Appearance
How can I serve images from my own custom domain?
📝 Note: For higher pricing plans (starting with Business 100K), you also get the ability to use your own custom domain name for the CDN-served images rather than an Optimole subdomain, something like images.yoursubdomain.com.
Here are the steps to set up a custom domain:
1. Go to the Custom Domain tab and add the custom domain you will want to use instead of your_key.optimole.com (eg. cdn.example.com). Please, make sure you use an existing domain/subdomain. 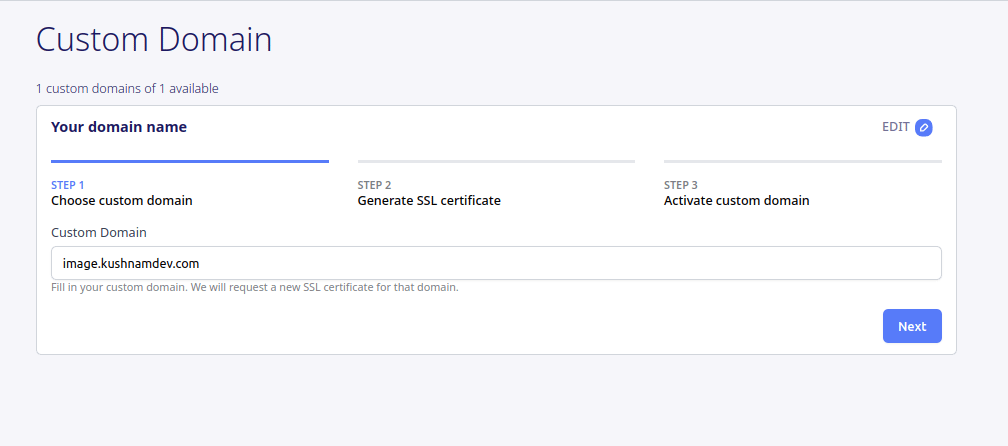
2. A certificate will be generated for the specified domain, and you will receive DNS Records to be added to your DNS Zone Editor for the domain configuration, ensuring certificate validation.
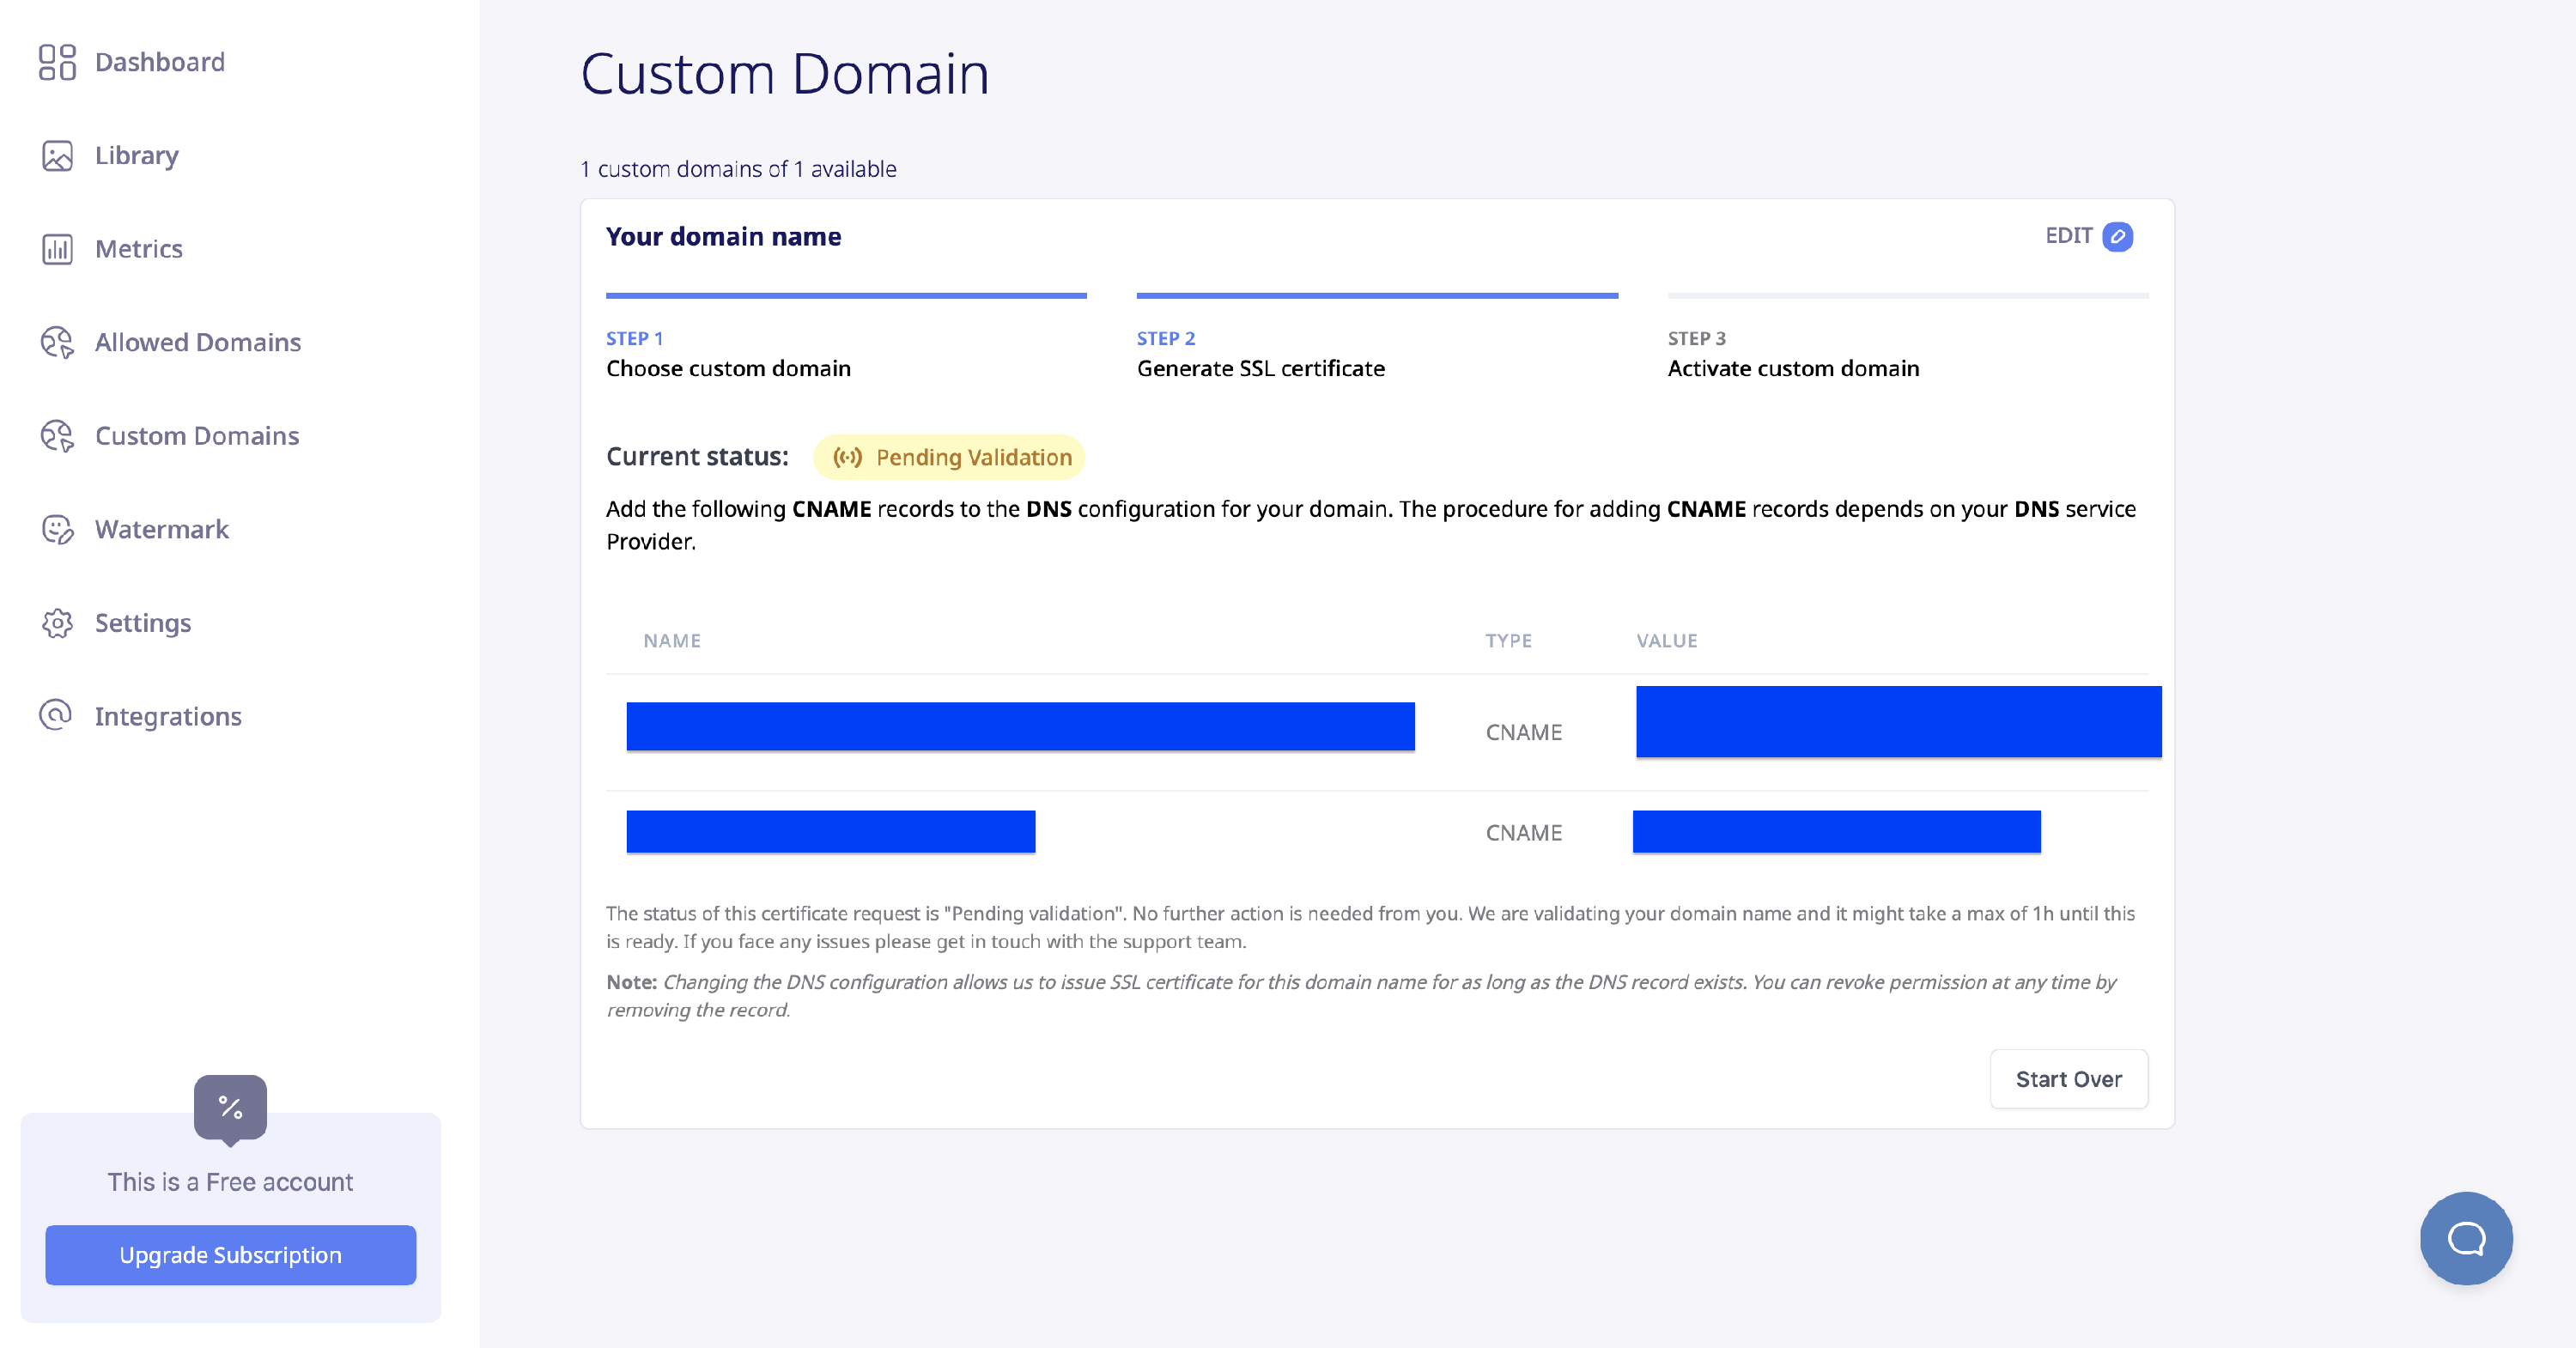
📝 Note: Take note that a certificate must be validated within 72 hours from the time it was generated, or else it will expire.
⚠️ Important: If your domain uses Cloudflare or another DNS provider that enforces CAA (Certification Authority Authorization) records, you must also add CAA records to authorize AWS to issue SSL certificates for your domain. Without these records, certificate validation will fail even if your CNAME records are correct. See the AWS Authorization section below for the exact records to add.
3. After the certificate is validated, modify your wp-config.php so that you specify the usage of the new custom domain.
define( 'OPTML_CUSTOM_DOMAIN', '<user custom domain>' );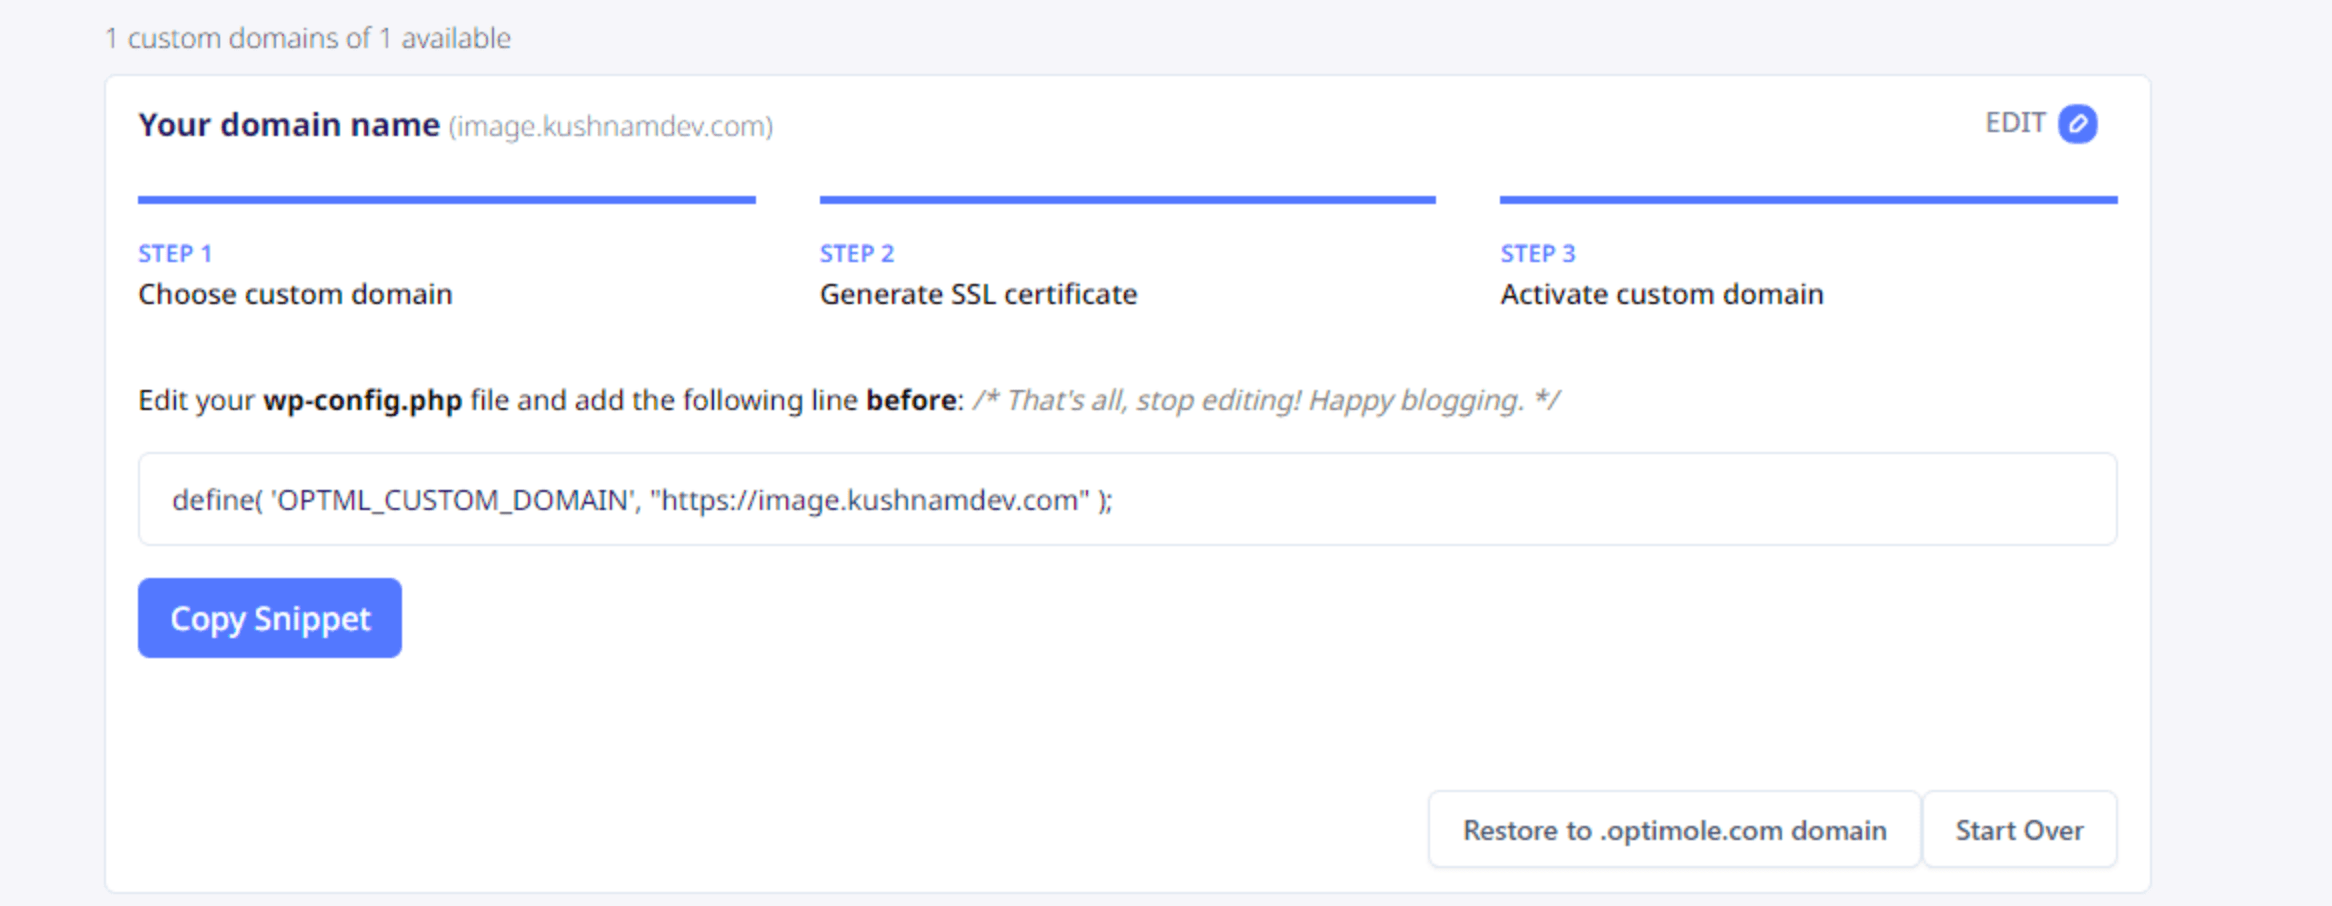
📝 Note: The <user custom domain> has to be replaced with your custom domain, as you can see in the above screenshot, or you can directly copy the code snippet. This code is valid if you have only one custom domain. For multiple custom domains, these can be selected when connecting the plugin.
⚠️ Important: Add OPTML_CUSTOM_DOMAIN only after the custom domain has been added and shows as verified in the Custom Domain dashboard, and make sure the value matches that domain exactly (including the https:// prefix). When the constant is set, Optimole builds every image URL from that domain. If it points to a domain that is not configured and verified in your Optimole account, the images cannot be served and they will stop loading on your site.
4. You can verify that the custom domain is serving the images you added by inspecting the image URL.
📝 Note: In the Images Domain (right panel of your WordPress Optimole dashboard page), you can observe that the name has been modified to match the custom domain you established.
If you encounter any issues at any of the steps mentioned before, you can let us know, and we will help you resolve any issues.
In this article
AWS Authorization
Some DNS providers — most notably Cloudflare — use CAA (Certification Authority Authorization) records that restrict which certificate authorities can issue SSL certificates for your domain. If your DNS provider enforces CAA records, you must add the entries below so that AWS can issue and validate the SSL certificate for your custom domain.
Add the following four CAA records in your DNS Zone Editor (replace example.com with your actual domain):
example.com. CAA 0 issue "amazon.com"
example.com. CAA 0 issue "amazontrust.com"
example.com. CAA 0 issue "awstrust.com"
example.com. CAA 0 issue "amazonaws.com"
💡 Tip: In Cloudflare, go to DNS > Records > Add Record, set the type to CAA, and create one record for each of the four authorities listed above.
For more details on CAA records, see the Cloudflare CAA FAQ.
Once these records are in place, AWS can issue an SSL certificate for your domain and validation should complete successfully.
Troubleshooting SSL Validation Failures
If your custom domain status shows Failed or keeps switching between Verified and Failed, follow the steps below to resolve the issue.
Missing CAA records
The most common cause of SSL validation failure — especially on Cloudflare — is missing CAA records. Even if your CNAME records are correct, the certificate will not be issued unless AWS is authorized through CAA records.
- Verify that all four CAA records listed in the AWS Authorization section are present in your DNS zone.
- Make sure the records are set on the correct domain (e.g.,
example.com, not a subdomain likecdn.example.com, unless your CAA policy is scoped to the subdomain). - After adding the records, allow time for DNS propagation before checking the status again.
DNS propagation delays
DNS changes can take anywhere from a few minutes to several hours to propagate, depending on your DNS provider and TTL settings. Certificate validation may not succeed immediately after adding or updating DNS records.
- Wait at least 30 minutes after making DNS changes before expecting validation to complete.
- You can use a tool like DNS Checker to confirm your CNAME and CAA records are visible globally.
- Remember that the certificate must be validated within 72 hours from the time it was generated, or it will expire.
Delete and re-add the custom domain
If validation has failed or the 72-hour window has expired, you can reset the process:
- Go to the Custom Domain tab in your Optimole dashboard.
- Delete the existing custom domain configuration.
- Wait a few minutes to ensure the change is processed.
- Re-add the custom domain — this generates a new certificate with a fresh 72-hour validation window.
- Add the required CNAME and CAA records to your DNS zone (if they are not already in place).
- Monitor the status in the dashboard until it shows Verified.
Images are not loading after enabling a custom domain
If your images stop displaying right after you add OPTML_CUSTOM_DOMAIN to your wp-config.php, the constant is most likely pointing to a domain that is not yet configured and verified in your Optimole account. When the constant is set, Optimole builds every image URL from that domain, so if the domain is not ready to serve images, none of them will load.
Work through the following checks:
- Inspect one of your images on the front end (right-click the image and choose Inspect) and confirm the image URL uses your custom domain.
- Open the Custom Domain tab in your Optimole dashboard and confirm the domain is present and its status shows as verified.
- Make sure the domain shown in the dashboard matches the value of
OPTML_CUSTOM_DOMAINexactly, including thehttps://prefix. - Confirm the DNS and certificate setup is complete. If the status shows Failed, follow the Troubleshooting SSL Validation Failures steps above.
- Clear your site, CDN, and browser caches after any change so the updated image URLs are served.
Images stopped loading after upgrading, downgrading, or canceling your plan
Custom domains are available only on higher pricing plans. When your plan changes — for example after a downgrade, a cancellation, a lapsed or failed renewal, or a downgrade followed by a new upgrade — your custom domain can become inactive in the Custom Domain dashboard. The OPTML_CUSTOM_DOMAIN constant is not removed from your wp-config.php automatically, so Optimole keeps building every image URL from a domain it no longer serves, and your images stop loading even though you did not change anything yourself.
To recover:
- Remove or comment out the
OPTML_CUSTOM_DOMAINline to bring your images back right away, as described in Restore the default Optimole domain while you troubleshoot. - Open the Custom Domain dashboard and check whether the domain is still listed and verified. If it is missing or no longer verified, re-add it by following Delete and re-add the custom domain, and add the new DNS records shown there rather than reusing your previous ones.
- Add the
OPTML_CUSTOM_DOMAINconstant back only after the domain shows as verified again, and make sure its value matches the dashboard exactly, including thehttps://prefix.
Restore the default Optimole domain while you troubleshoot
If you need your images back immediately, remove or comment out the OPTML_CUSTOM_DOMAIN line in your wp-config.php. Delete the whole line rather than setting it to an empty value — Optimole still treats the constant as defined when it is empty, so an empty value will not restore delivery.
php
// define( 'OPTML_CUSTOM_DOMAIN', 'https://cdn.example.com' );With the constant removed, Optimole serves images again through the custom domain configured in your dashboard, or through the default Optimole subdomain if no custom domain is set up. You can add the constant back once the custom domain shows as verified in the dashboard.