Appearance
How to Use the Custom Integration in Optimole?
Using Optimole is not limited to WordPress websites, it can be extended to most projects through custom integration. This article presents step-by-step how to take advantage of Optimole features on any domain.
📝 Note: This article assumes that you already have an active domain where you want to integrate Optimole, so we will skip the steps of creating it.
In this article
Integrating Optimole Service
1. First, in Optimole Dashboard, navigate to the Allowed Domains tab.
2. Use the Add Domain button to paste the URL of your domain.
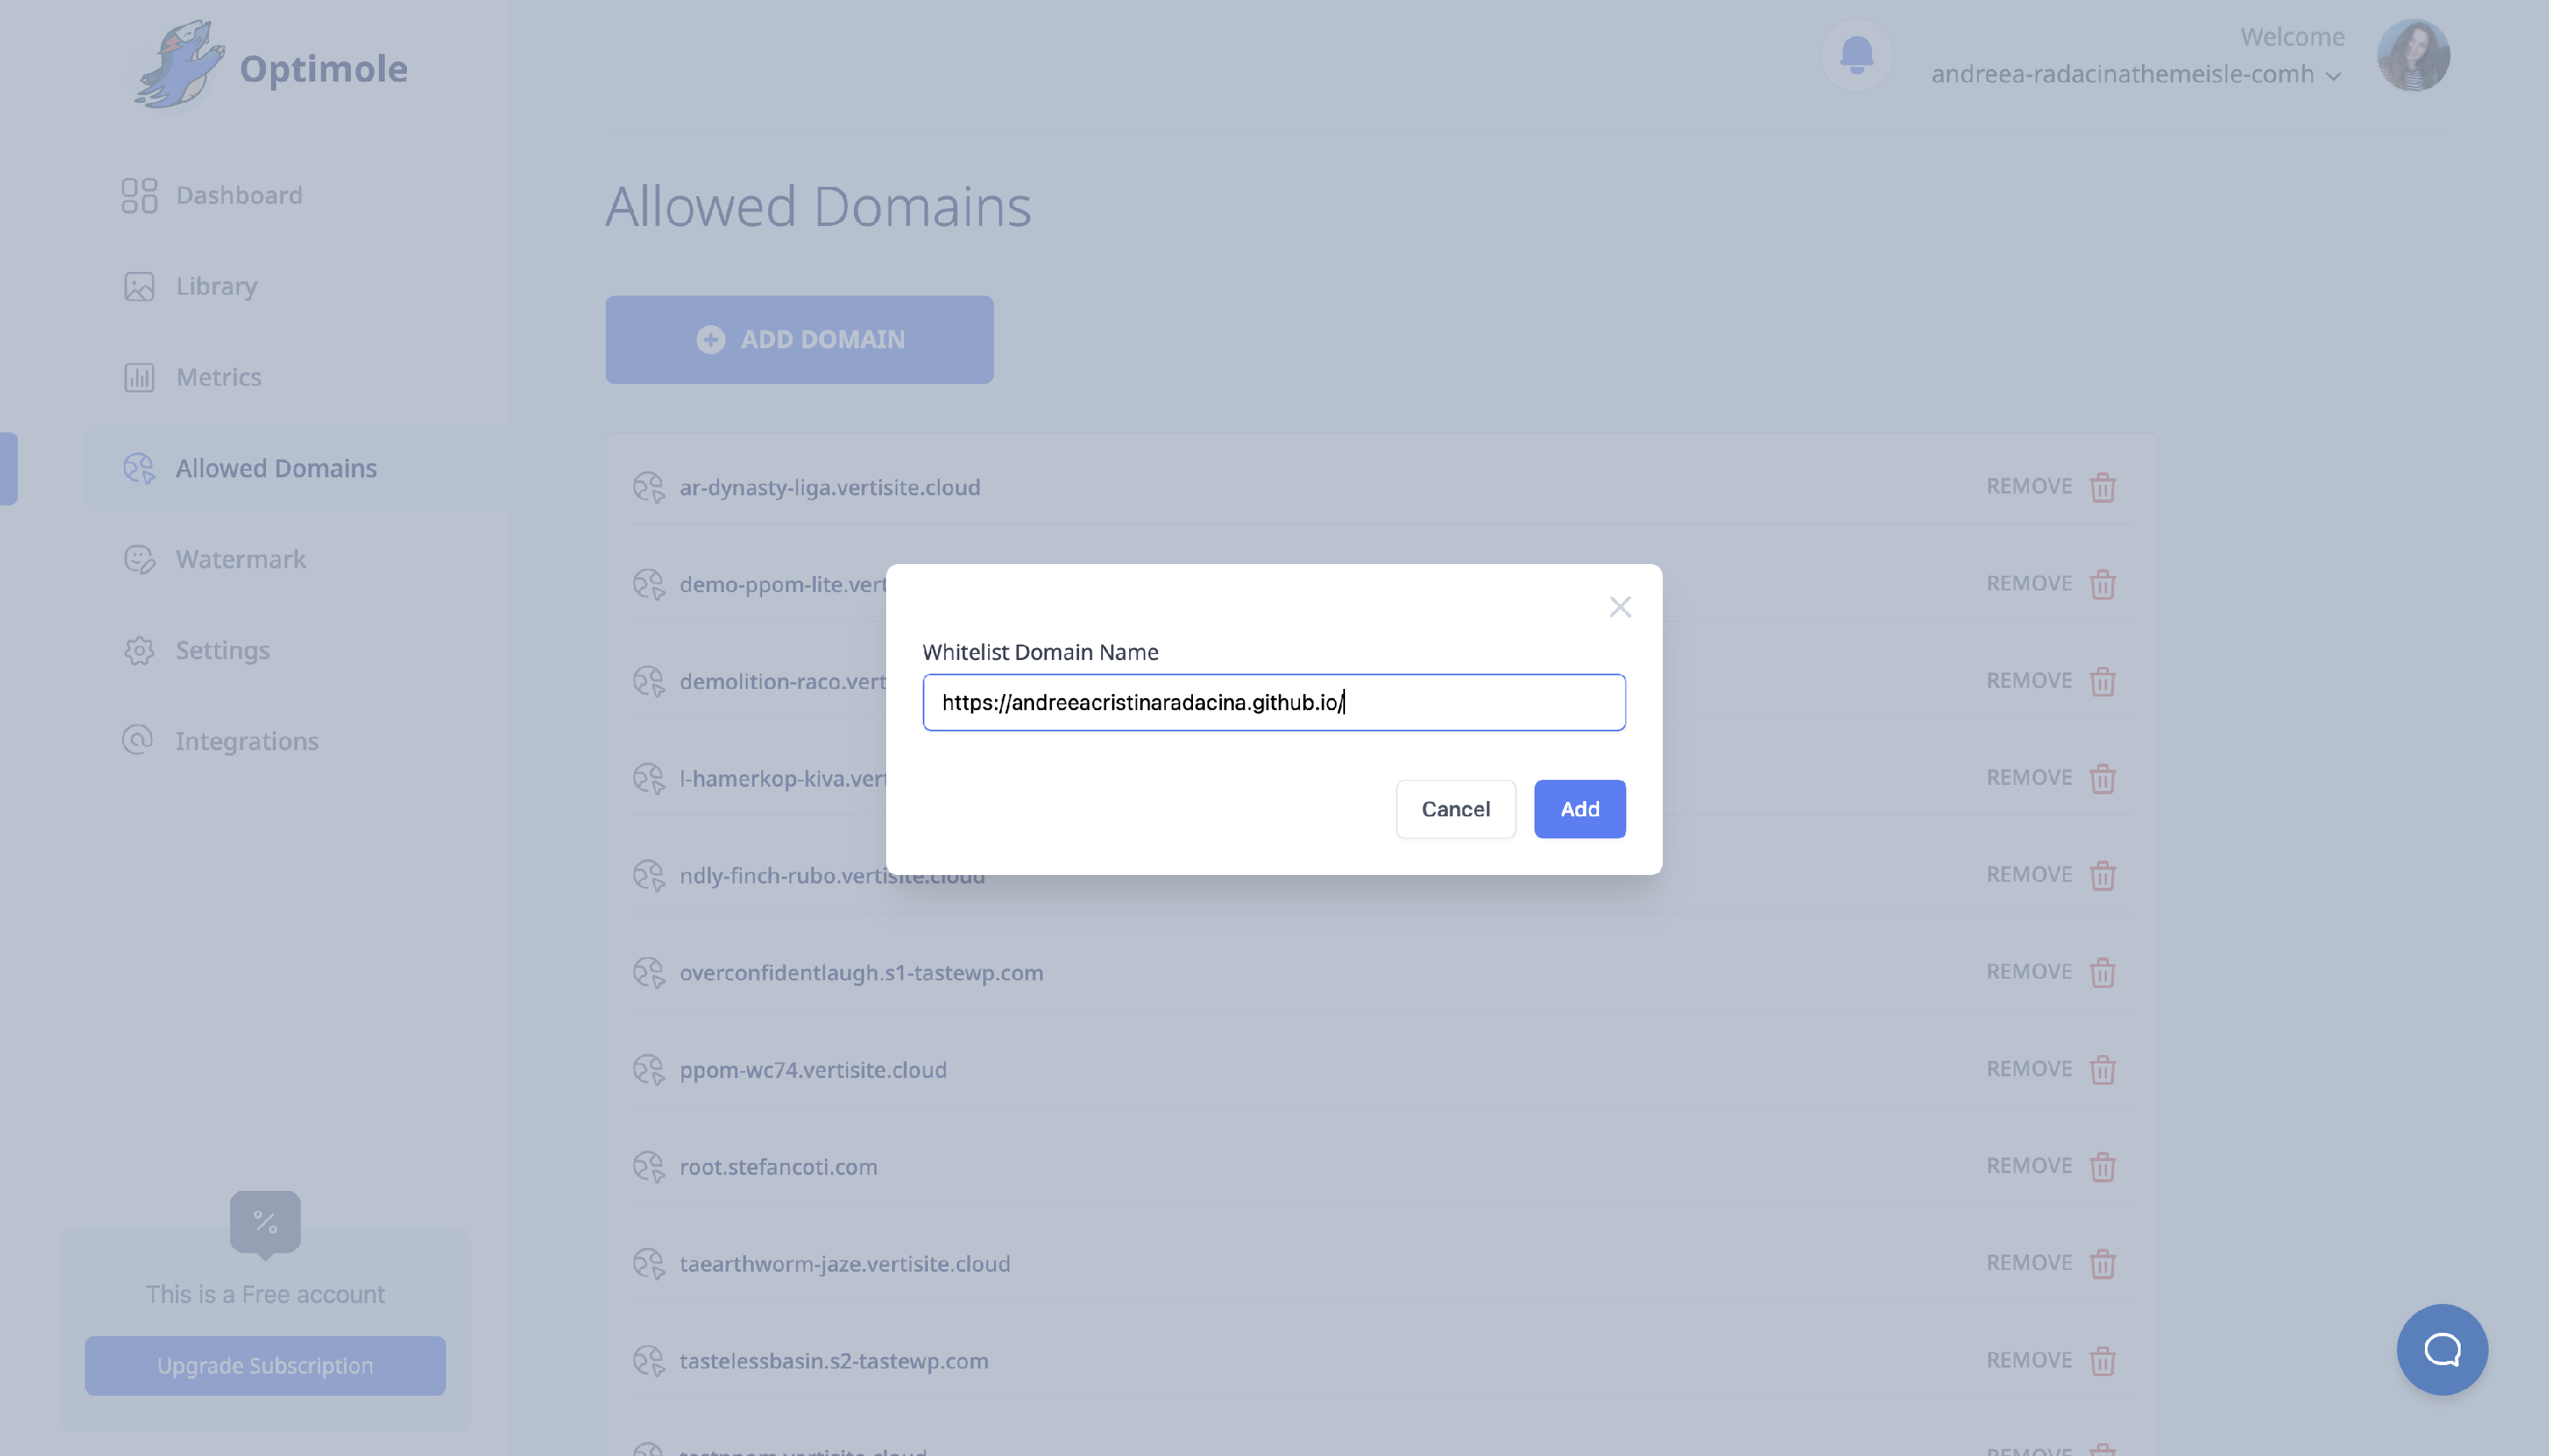
Once you have done this, the domain is ready to be served by Optimole.
3. Copy the code snippet below and paste it inside the <head> tag of your code.
<script type="text/javascript">
    (function(w, d){
        var b = d.getElementsByTagName('head')[0];
        var s = d.createElement("script");
        var v = ("IntersectionObserver" in w) ? "_no_poly" : "";
        s.async = true; // This includes the script as async.
        s.src = "https://d5jmkjjpb7yfg.cloudfront.net/v2/latest/optimole_lib" + v + ".min.js";
        w.optimoleData = {
            key: "your_key",
            quality: "85",

        };
        b.appendChild(s);
    }(window, document));
</script>
📝 Note: Please note that the 'key' parameter is not equal to the API key but to the images domain, which you can also see in 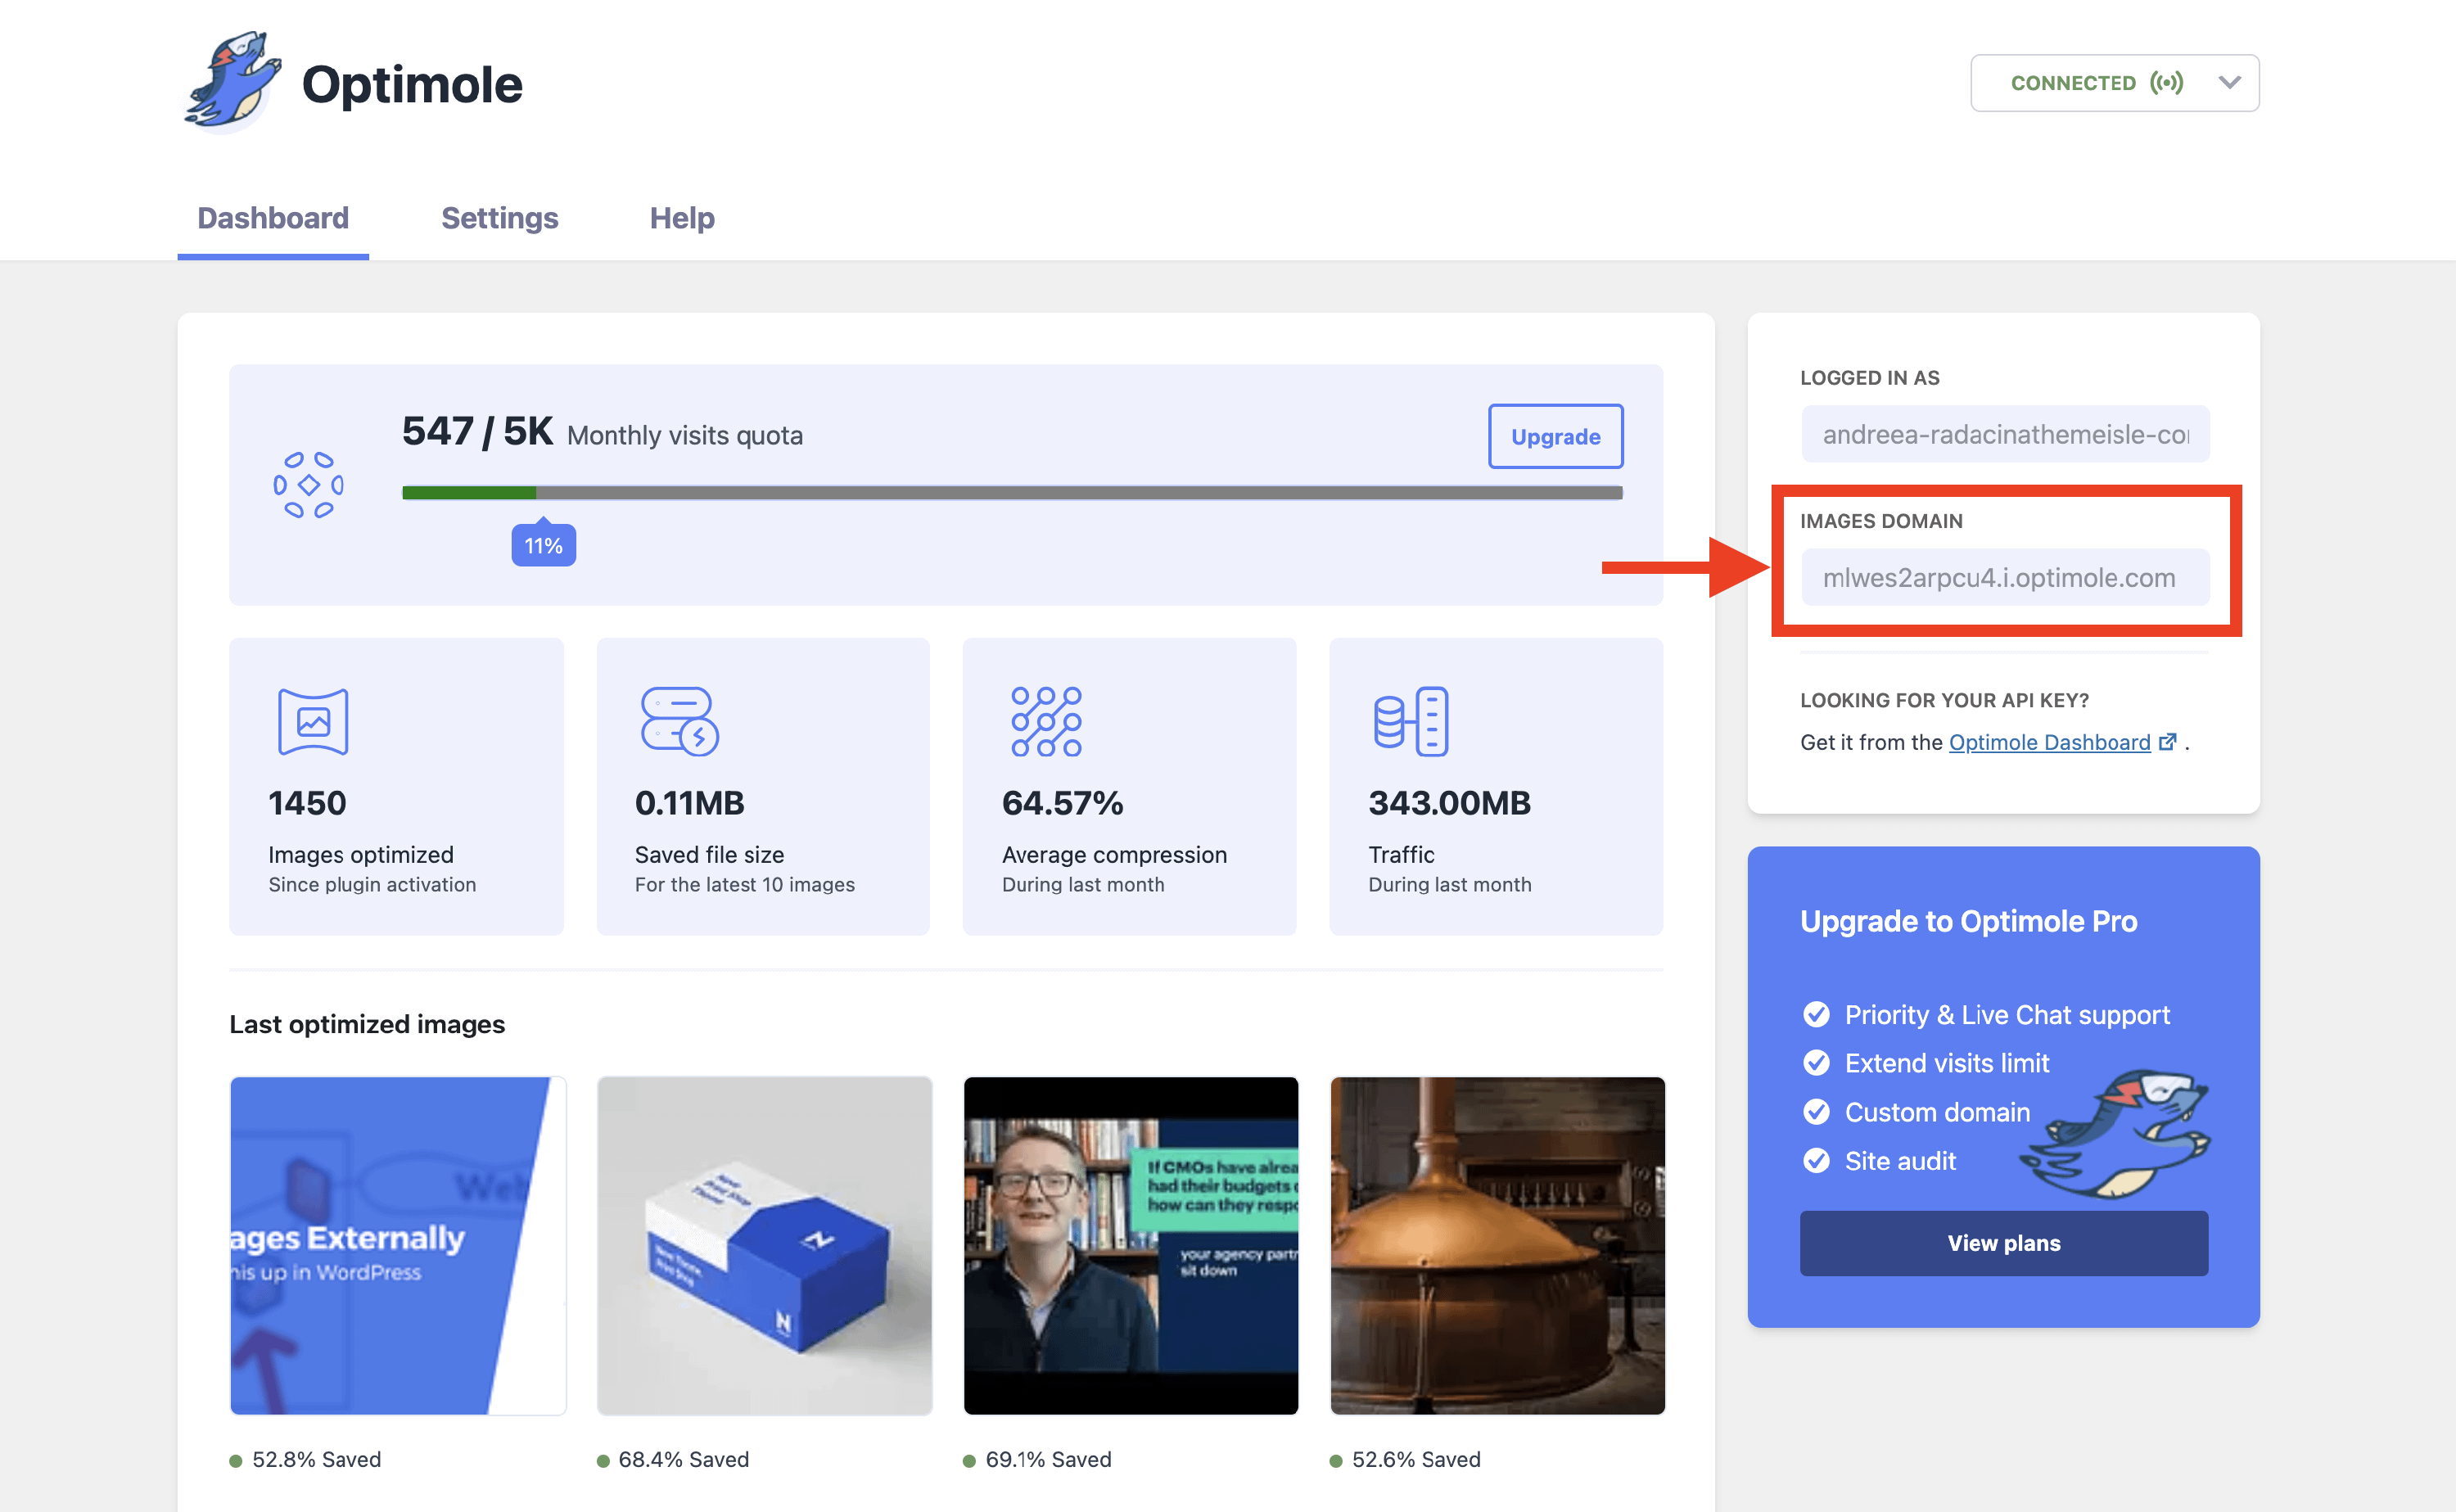 WordPress Dashboard.
Inserting Images
After establishing the connection with Optimole, the next phase is to insert images. Please note that the following steps can be applied even if you already have a website and just start optimizing your images using Optimole.
1. Copy the code snippet below.
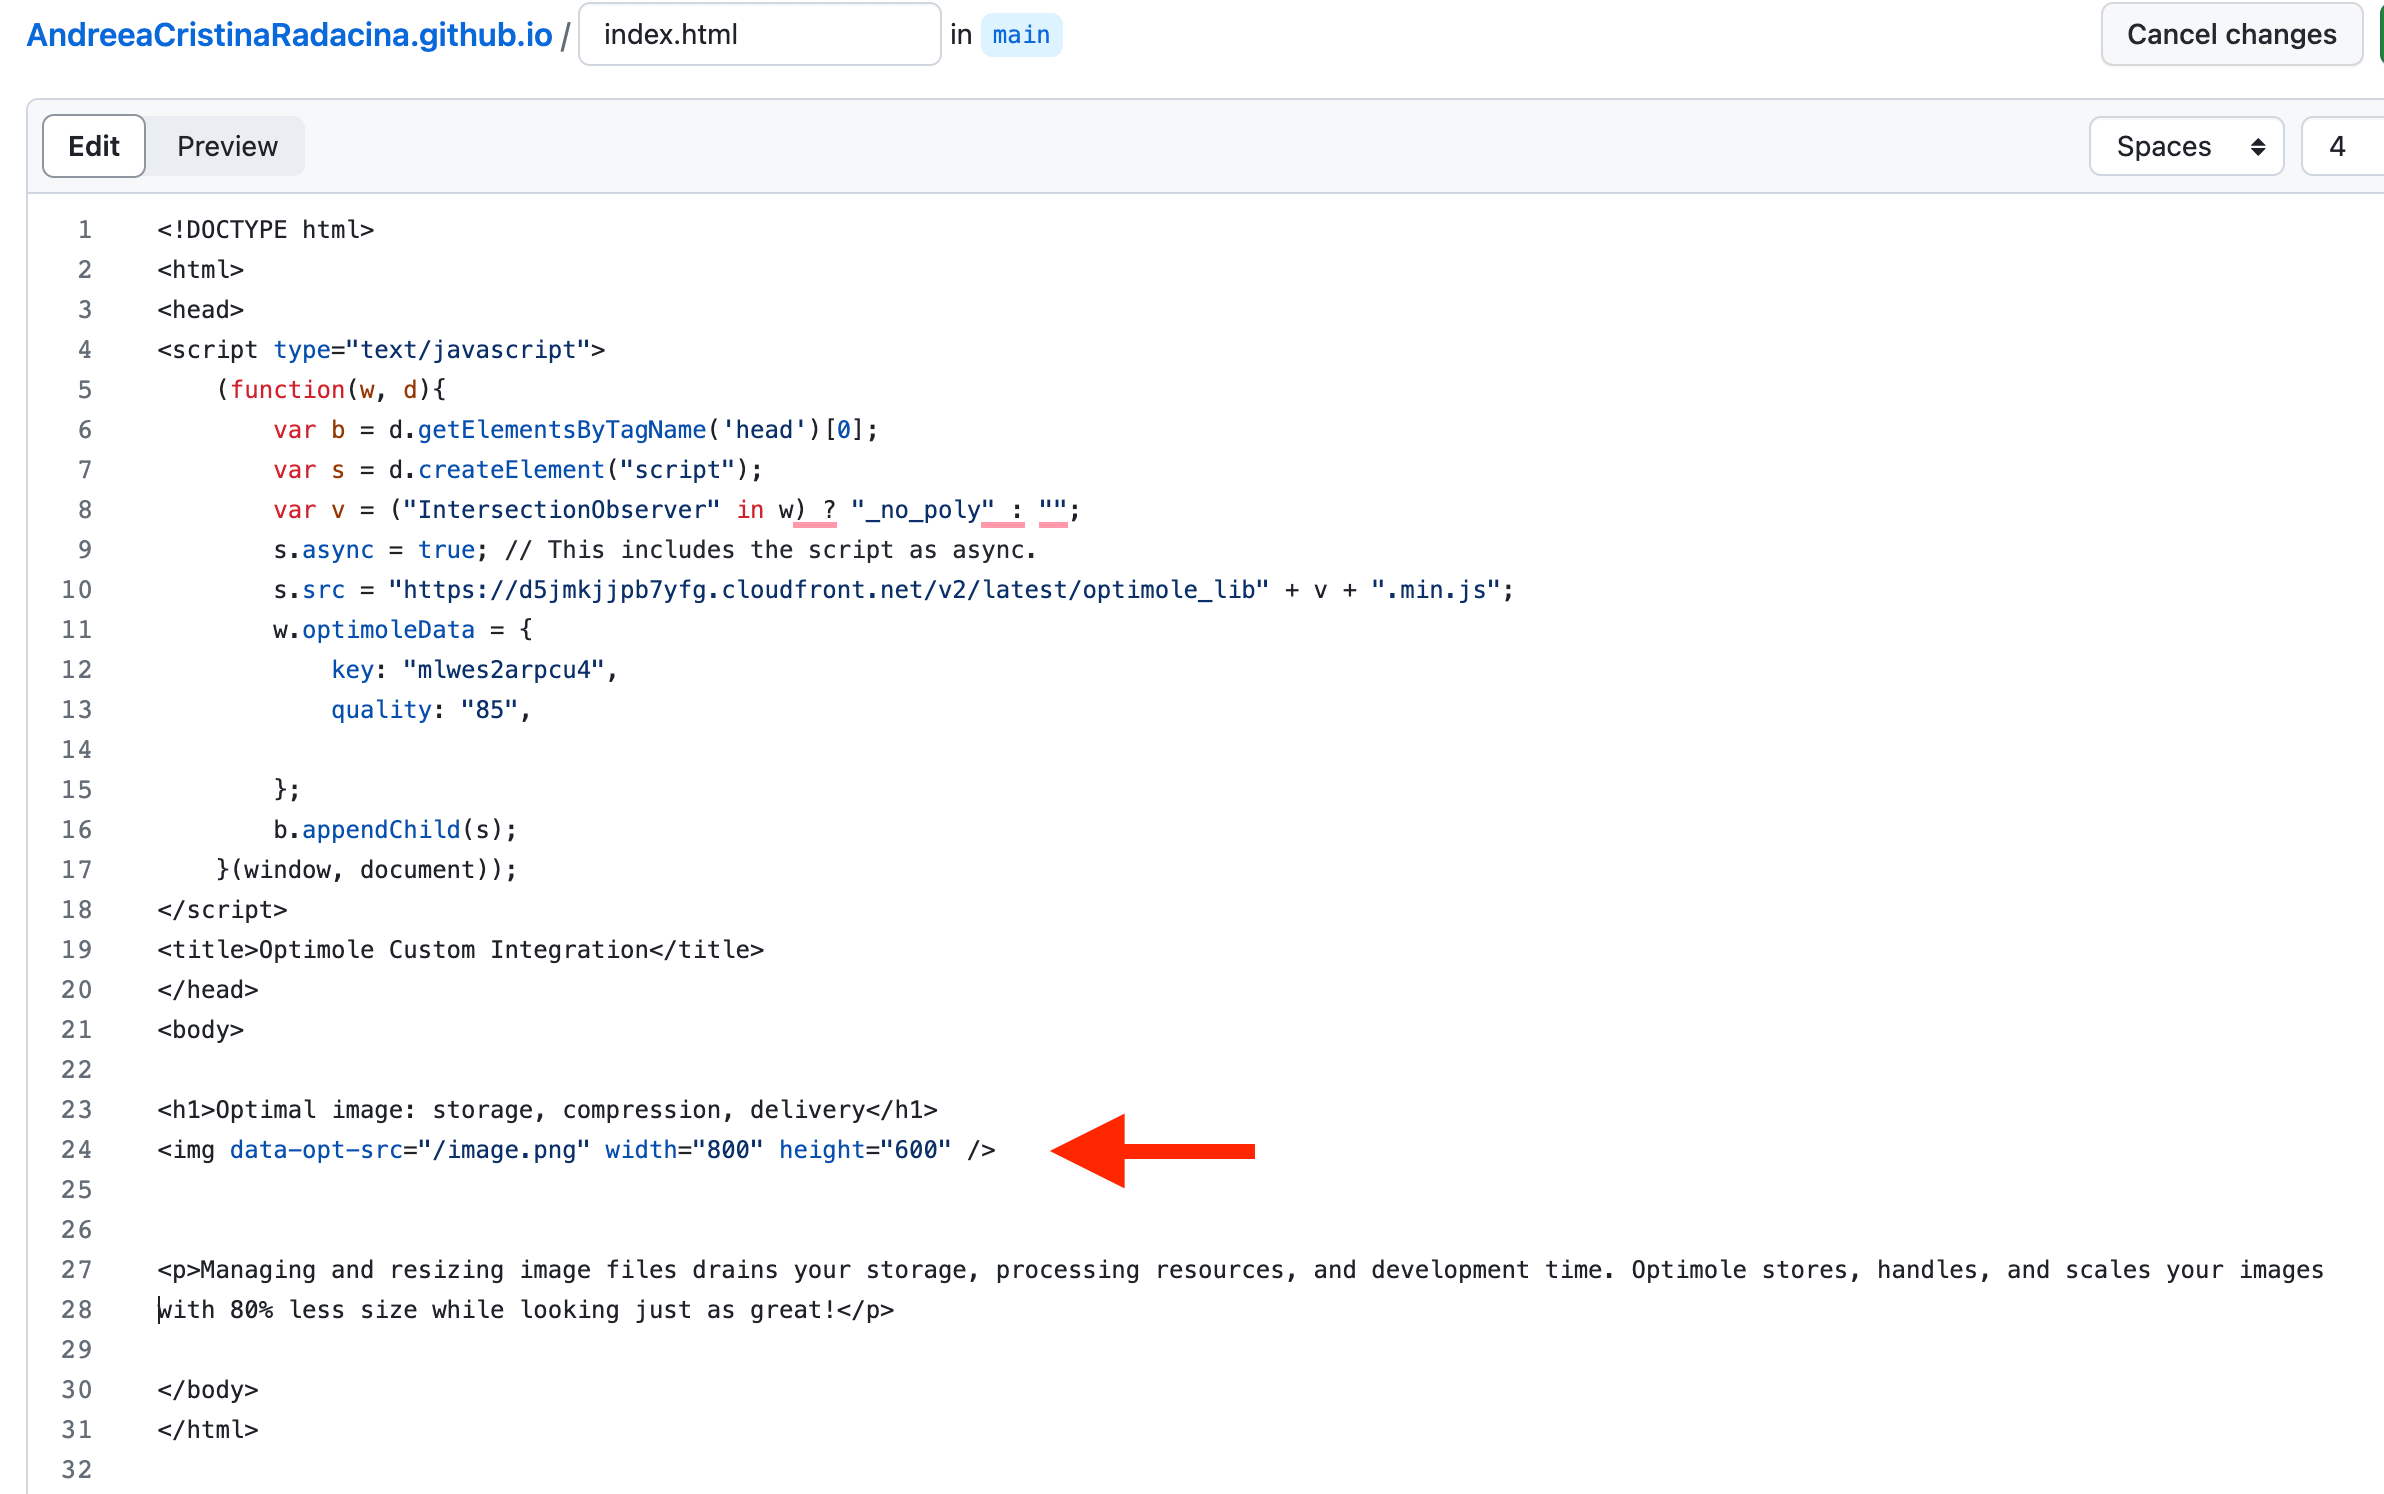
<!-- Use the `data-opt-src` image property instead of `src`, add the image `width` and `height` attribute. -->
<img data-opt-src="http://example_domain.com/img/opt_test_4.jpg" width="800" height="600" />
2. Replace the data-opt-src value with the value of the image that you want to add.
📝 Note: You can skip adding the domain and only mention " image_name.extension". Also, the width and height are not required parameters. Optimole will optimize your images even if you don't set dimensions.
3. Paste it inside the <body> tag and save the changes.
4. Use the same procedure to insert as many images as you need.
Result
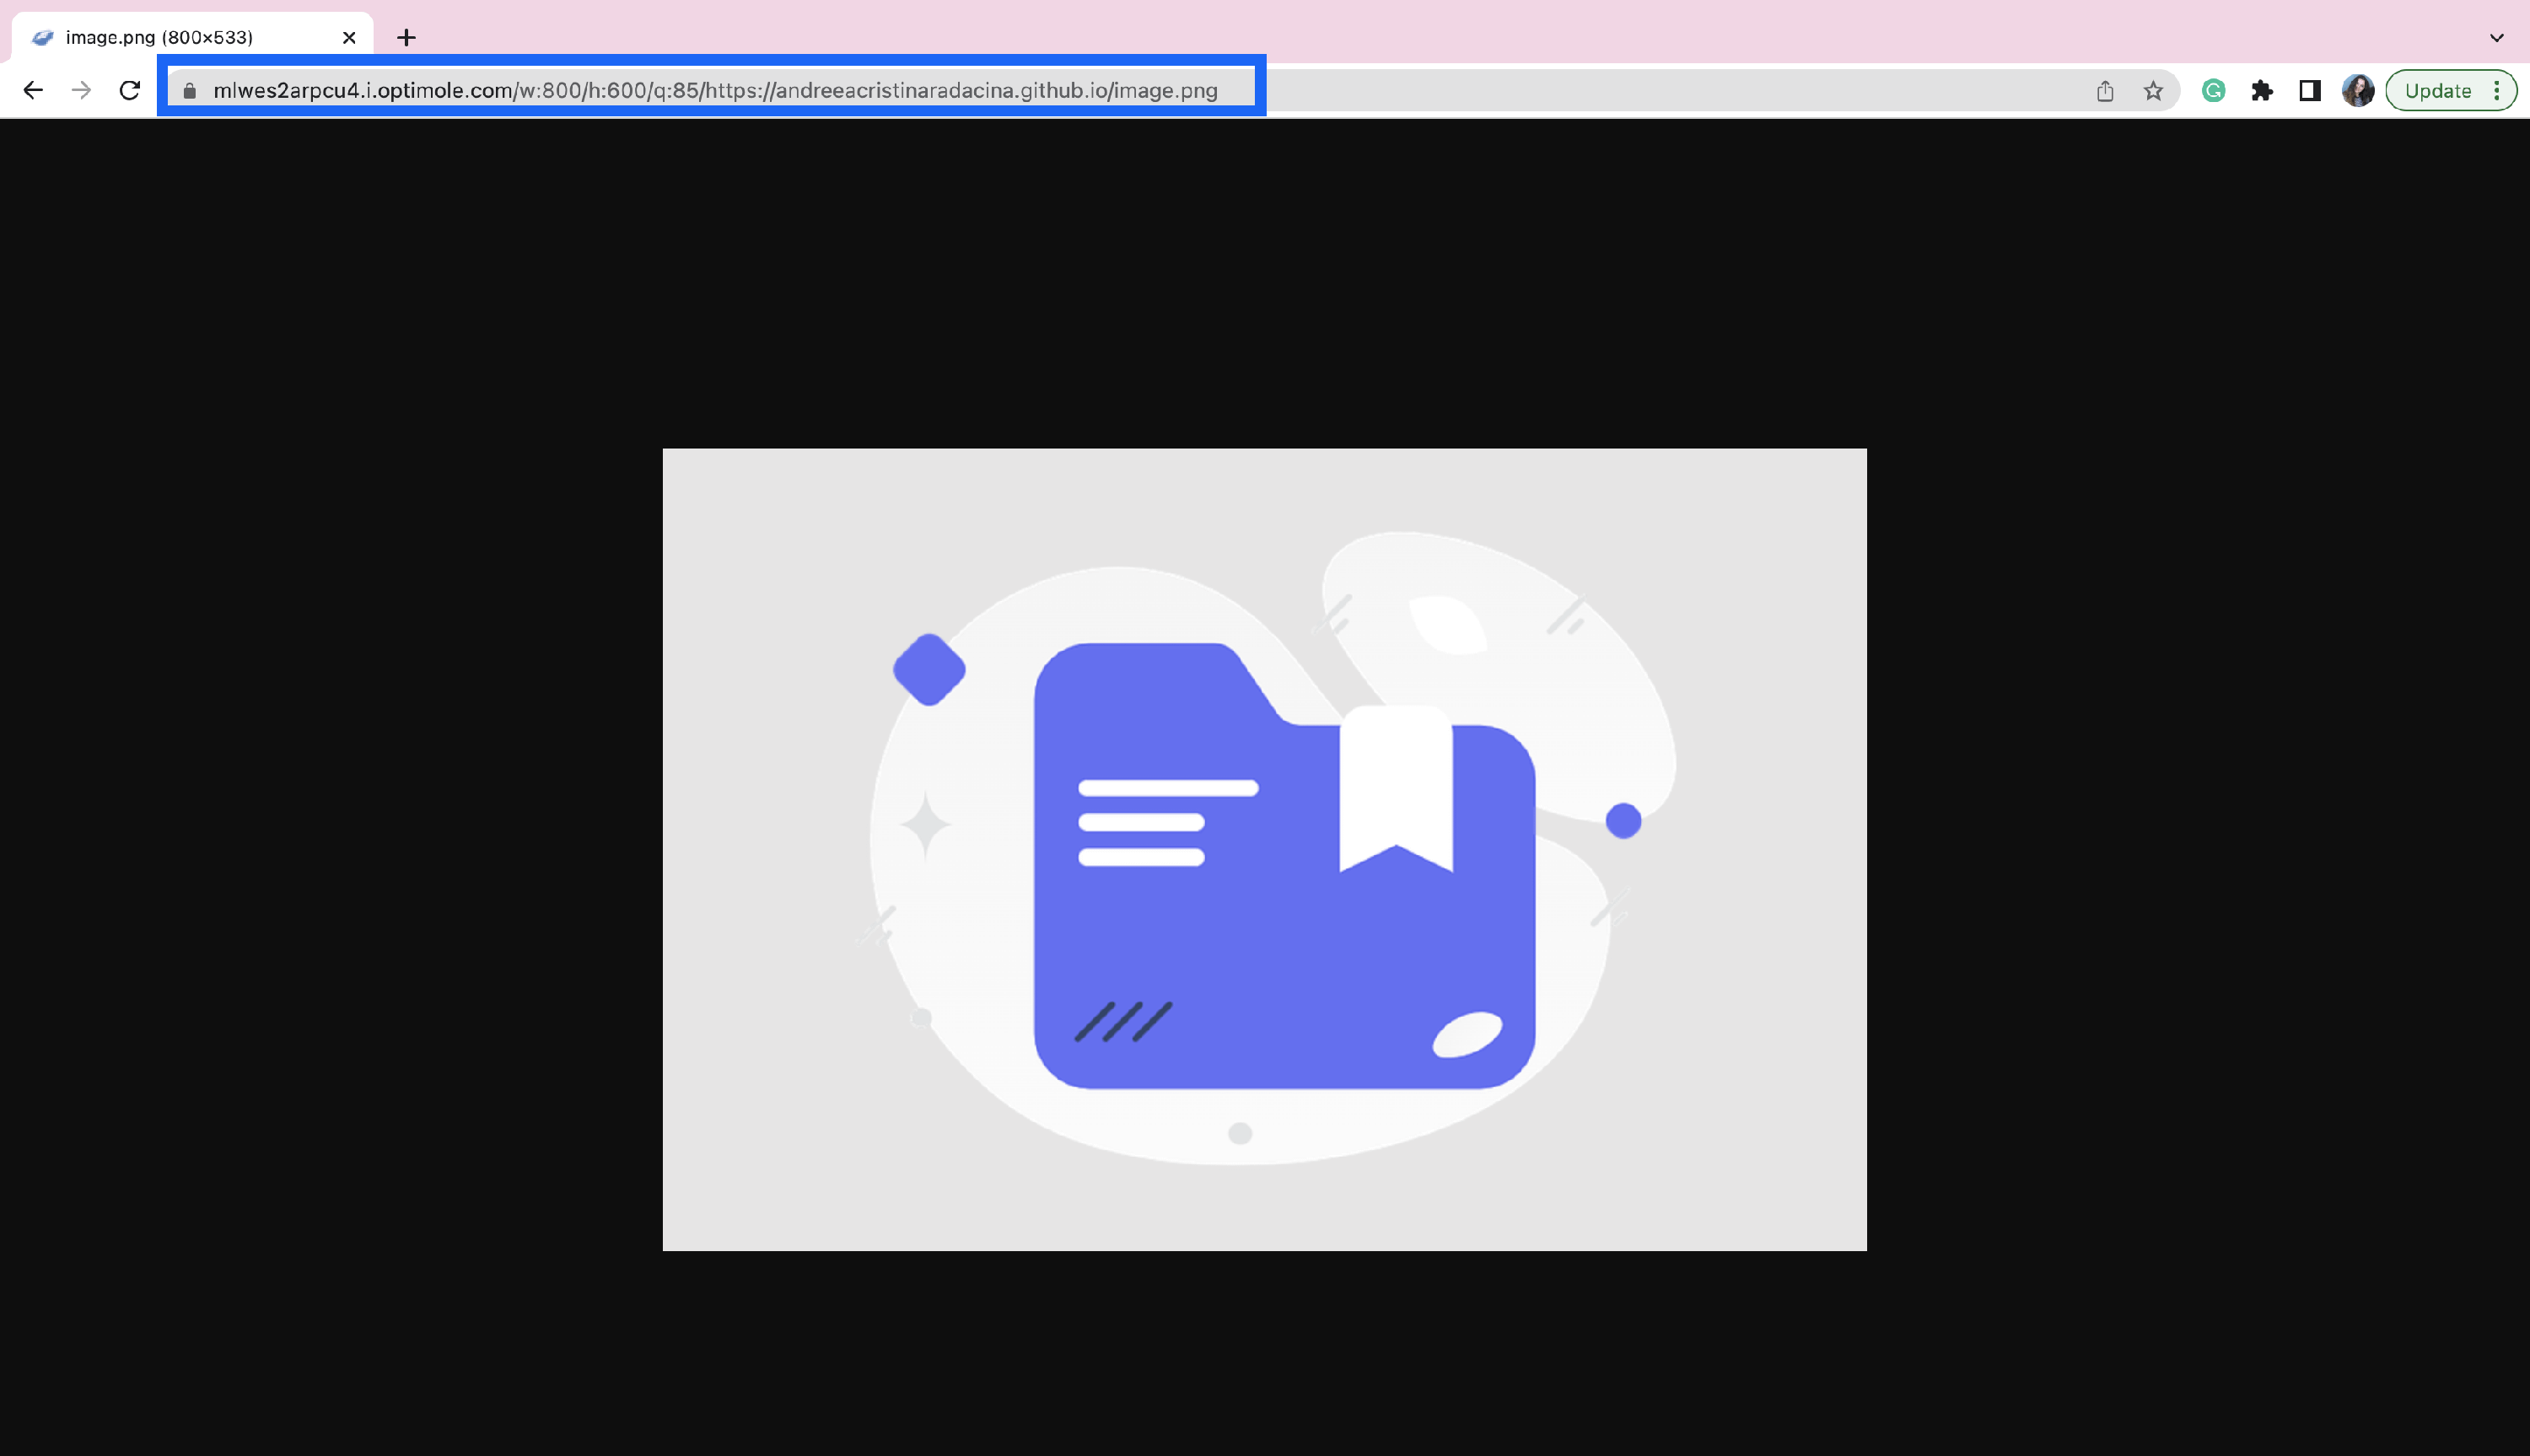
As a result, after making these changes, click on the image and open its address in a different tab. You will see that its URL contains the domain key and Optimole's specific parameters.
URL Anatomy
As mentioned above, the image URLs will have a specific structure. In this chapter, we will present the available parameters that you can use to take full advantage of Optimole features.
https://mlwes2arpcu4.i.optimole.com/w:800/h:600/q:85/https://andreeacristinaradacina.github.io/image.png- key = mlwes2arpcu4
- domain = https://mlwes2arpcu4.i.optimole.com
- resize parameters = w:800 (width); h:600 (height); q:85 (quality)
- website URL = https://andreeacristinaradacina.github.io
- image name = image.png
Advanced Features
If you want to unlock the full potential of the Optimole service, here is the extended list of features:
- customDomain:"<user_customDomain>" - available for users with the premium plan
- lazyloadOnly: "optimole-lazy-only" - read more
- nativeLazyload: false
- scalingDisabled: false
- watchClasses: []
- network_optimizations: false - control if Optimole should reduce quality based on the network conditions
- ignoreDpr: true - set it to false to serve retina images if required - read more
- backgroundLazySelectors: "my-background-loaded-img" - Optimole will lazy-load these elements by disabling the background display until scrolling into view
- backgroundReplaceClasses: [ "my-background-loaded-img" ]
If you're using backgroundReplaceClasses or backgroundLazySelectors, you also need to add this <style> before the <script> above to lazyload background images:
<style>
 html .my-background-loaded-img:not(.optml-bg-lazyloaded),
 html  .my-background-loaded-img2:not(.optml-bg-lazyloaded) { background-image: none !important; }
</style>
If you wish to add all these features, the extended code snippet will look like this:
<script type="text/javascript">
        document.documentElement.className += " optimole_has_js";
        (function(w, d){
            var b = d.getElementsByTagName('head')[0];
            var s = d.createElement("script");
            var v = ("IntersectionObserver" in w) ? "_no_poly" : "";
            s.async = true; // This includes the script as async.
            s.src = "https://d5jmkjjpb7yfg.cloudfront.net/v2/latest/optimole_lib" + v + ".min.js";
            w.optimoleData = {
                key: "<user_key>",
                quality: "85",
		customDomain:"<user_customDomain>",
                lazyloadOnly: "optimole-lazy-only",
                nativeLazyload : false,
                scalingDisabled: false,
                watchClasses: [],
                backgroundLazySelectors: "",
		backgroundReplaceClasses: [ "my-background-loaded-img" ],
                network_optimizations: false,
                ignoreDpr: true,
            };
            b.appendChild(s);
        }(window, document));

        document.addEventListener( "DOMContentLoaded", function() {
            document.body.className = document.body.className.replace("optimole-no-script","");
            if ( "loading" in HTMLImageElement.prototype && Object.prototype.hasOwnProperty.call( optimoleData, "nativeLazyload" ) && optimoleData.nativeLazyload === true ) {
                const images = document.querySelectorAll('img[loading="lazy"]');
                images.forEach( function (img) {
                    if ( !img.dataset.optSrc) {
                        return;
                    }
                    img.src = img.dataset.optSrc;
                    delete img.dataset.optSrc;
                });
            }
        } );
</script>