Appearance
How to Get Started With Optimole
Optimole is a cloud-based solution for optimizing your website's images. In this guide, you will find out how to activate it on your WordPress website within a few steps. To use it on non-WordPress websites, just create your free account and follow the custom integration steps.
In this article
Hero Image Preloader
An important feature of Optimole is its ability to detect the hero image on the web pages, ensuring its quick loading without significant effects on performance. To do this, it appends the attribute fetchpriority="high" to prioritize their loading. It scans for the initial image that fits the criteria and doesn't apply this to any other images. Apart from this, it is applied also to the Site Logo.
Install the Optimole plugin on your WordPress site
1. Log in to your WordPress admin panel and go to Plugins → Add New.
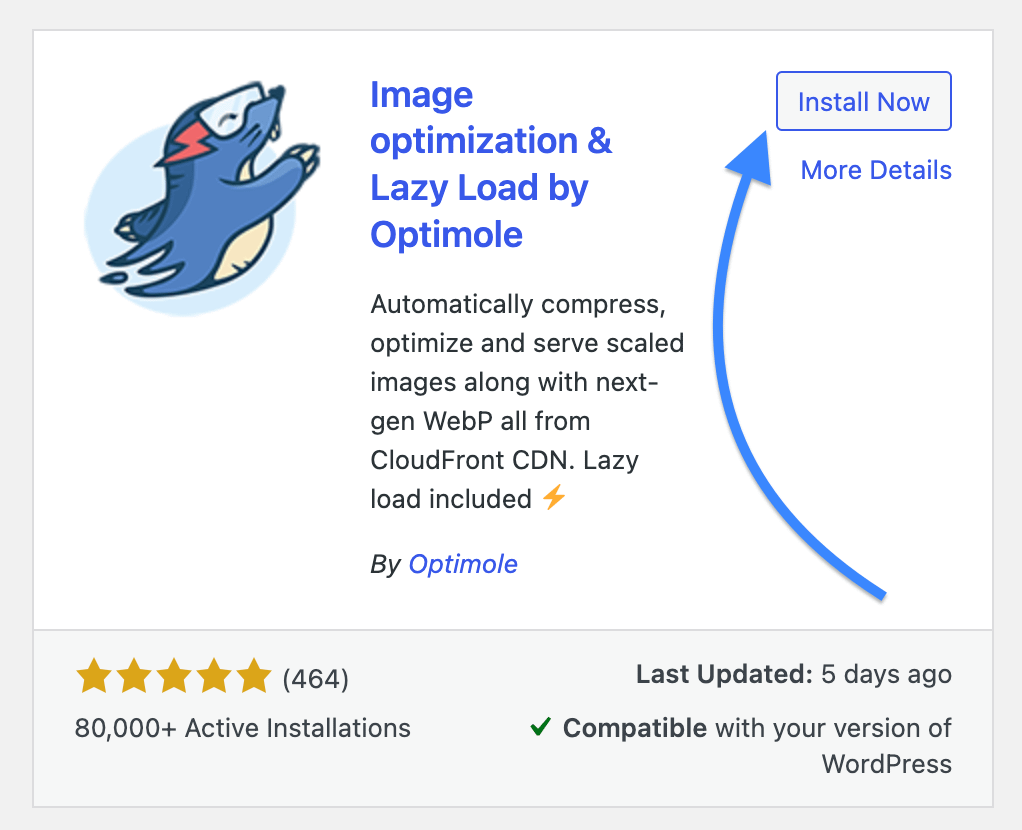
2. Search for the Optimole plugin using the box on the right:

3. Click on Install Now next to the plugin's name:
4. When the installation finishes, the Activate button will appear in place of the Install Now button. Click on it. A new panel Optimole will appear.
Activate Optimole
As soon as you install and activate the Optimole plugin, you will be asked to register for an account and input your personal API key that will let you connect to the Optimole service.

Click on the Create & connect your account button (you will be asked to provide an email address that will be used to set up your new account).
🚄 As you know, Optimole will process your images and deliver optimized versions of them to 1,000 of your website visitors a month for free.
When your account is all setup, you'll receive your API key via email. That email will look something like the following:
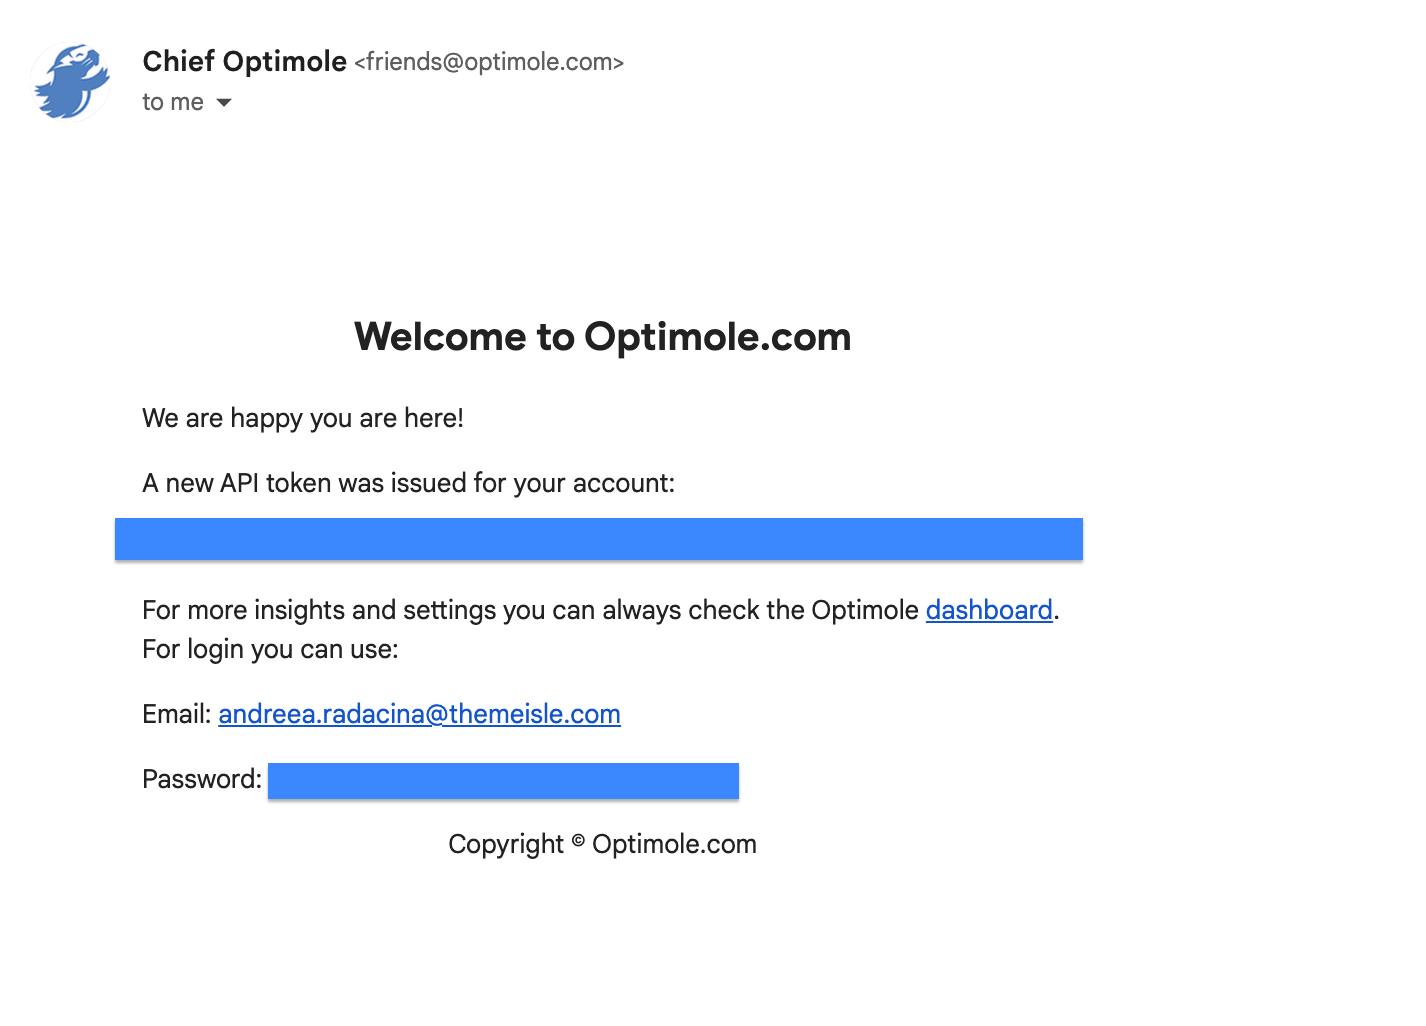
In the email, apart from the API token, you will also receive the login and password to your user profile on dashboard.optimole.com
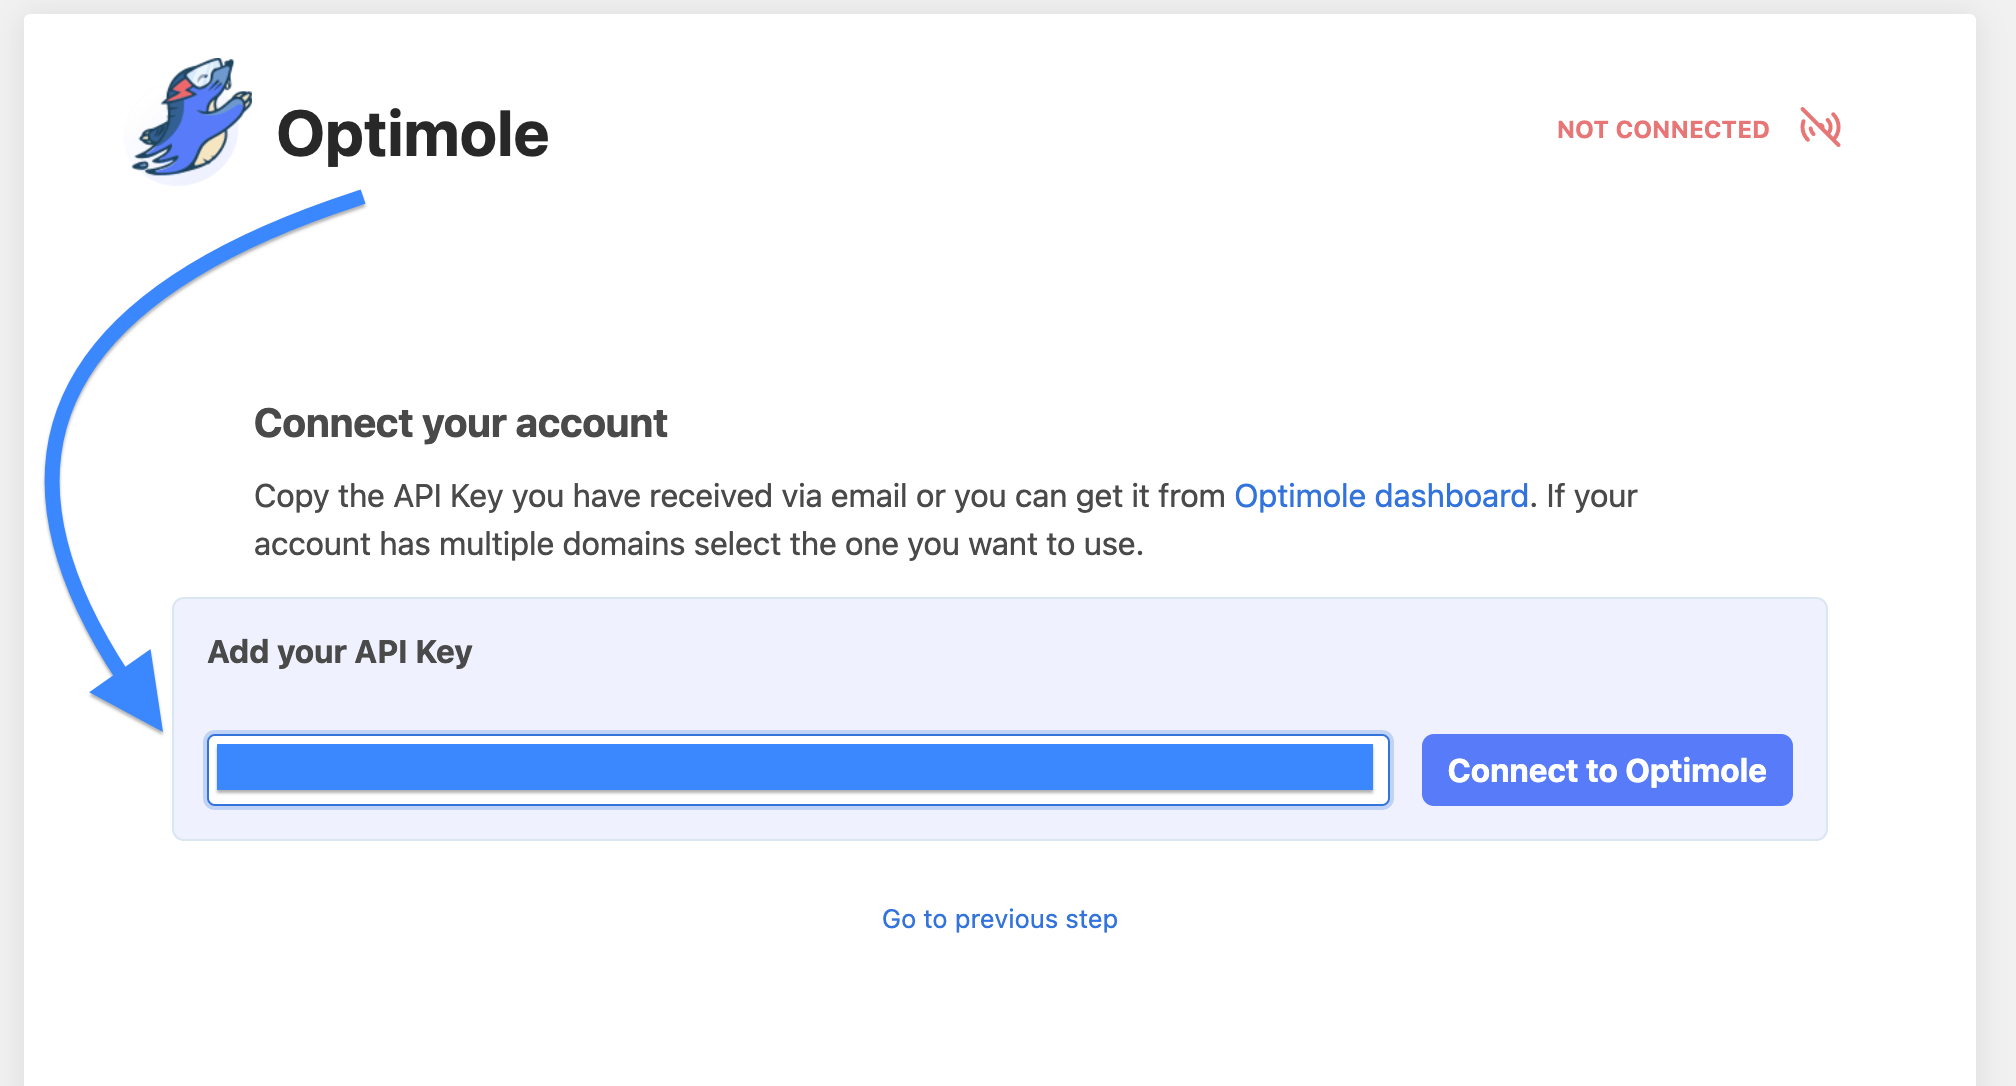
If you already have an Active Optimole account, you can skip the Create and Connect your account Step and can directly use the button labeled "I already have an API key."
On the next screen, you can use your API key from the Optimole dashboard and use it to Connect to Optimole Service.
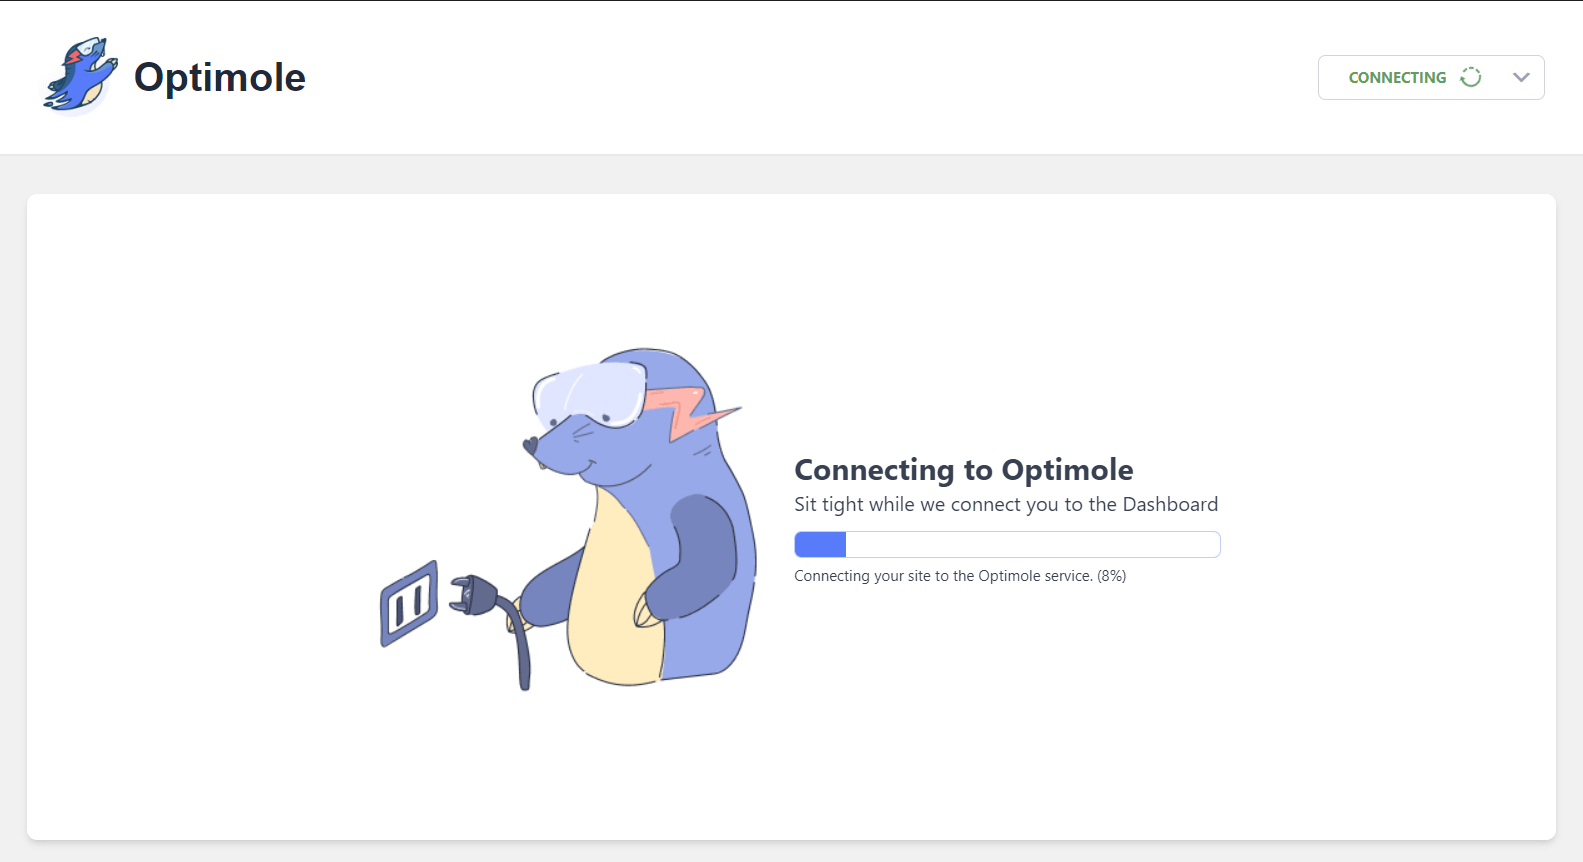
After a couple of seconds, you will be able to start working with Optimole. You'll see this notification:

Start using Optimole
The great thing about Optimole is that it works on autopilot; if you don't want to, you don't have to go through any other settings to get Optimole to do its job - it's already working!
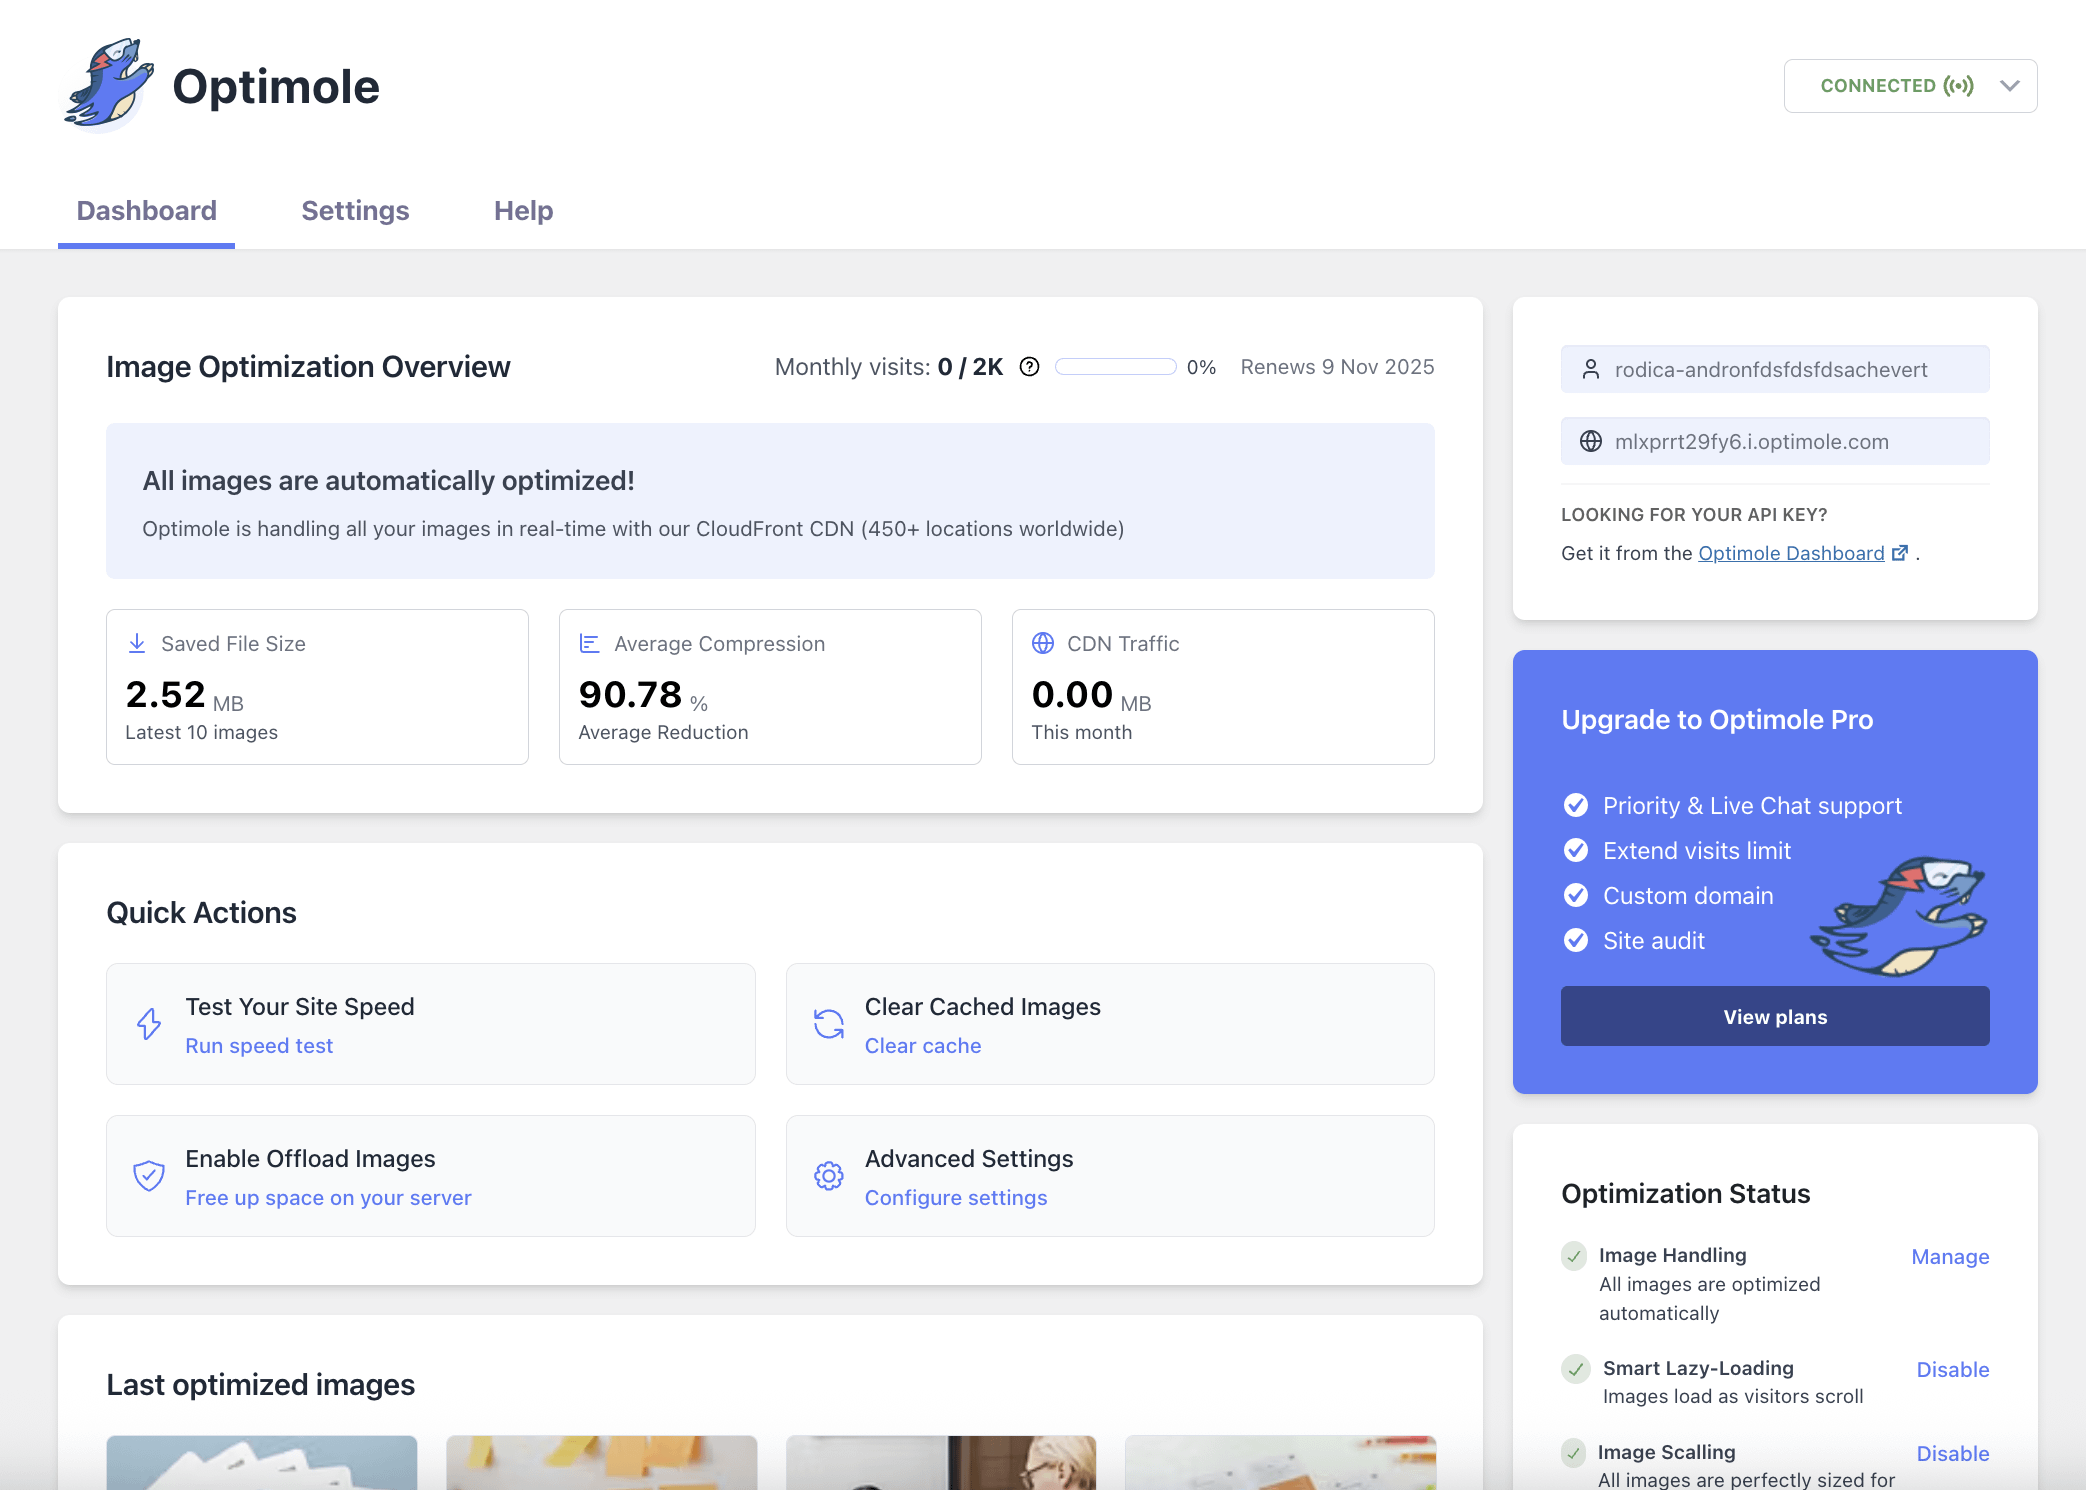
You can go to the main dashboard of Optimole to see the status of the service (in the Optimole panel). There, Optimole shows you your account info along with your usage of the Optimole service and the level of optimization achieved.
⚠️ The central part of this Optimole tutorial ends here. Everything below this point is optional. Optimole is already 100% operational and working.
Even though Optimole works on autopilot, there are still several options that give you a bit more control over what's going on. To see these options switch to the Settings tab.
Optimole settings - General
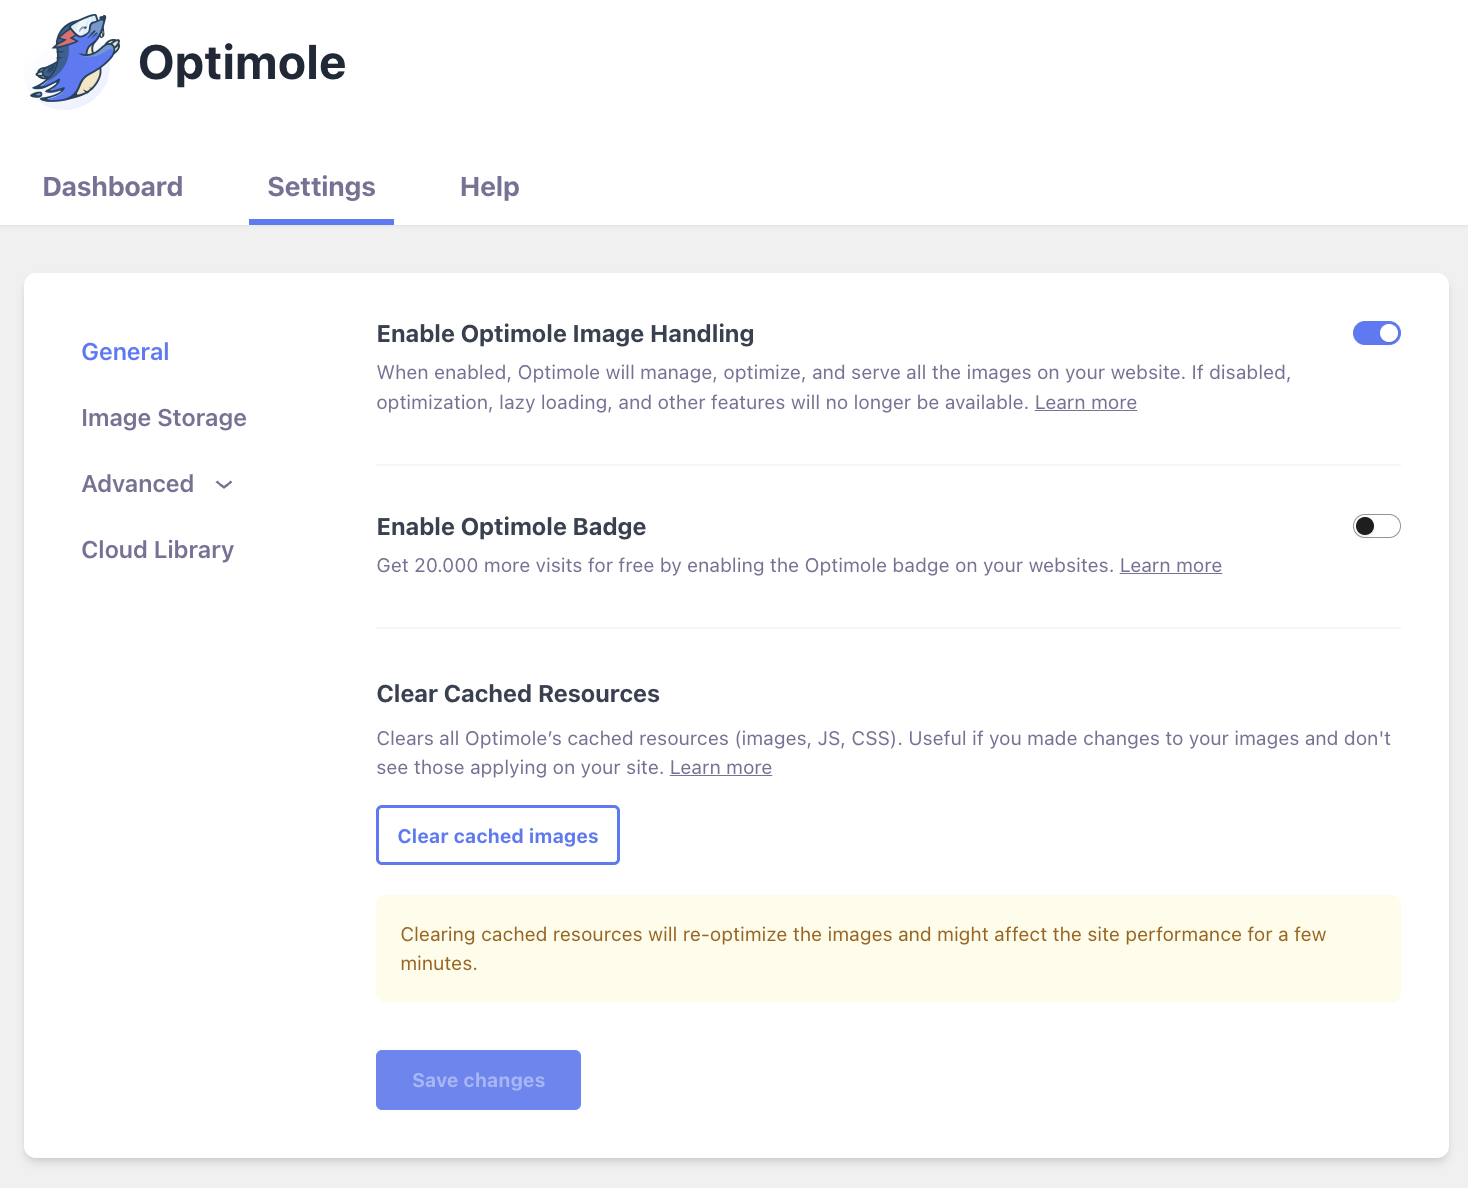
This is where you can see the main settings:
- Enable Optimole Image Handling - this one represents the core of what Optimole does; keep this enabled to get Optimole's advanced image optimization running - learn more
- Enable Optimole Badge - by enabling this option, an "Optimized by Optimole" badge will be displayed on your website. As a reward, you will get 20.000 more visits - learn more
- Clear Cached Resources - re-optimize the images by clearing the cache. As the description mentions, there might be a chance that Optimole shows the old version of some updated resources - learn more
⚠️ Note: When making any changes, don't forget to click on the Save Changes button when you're done.
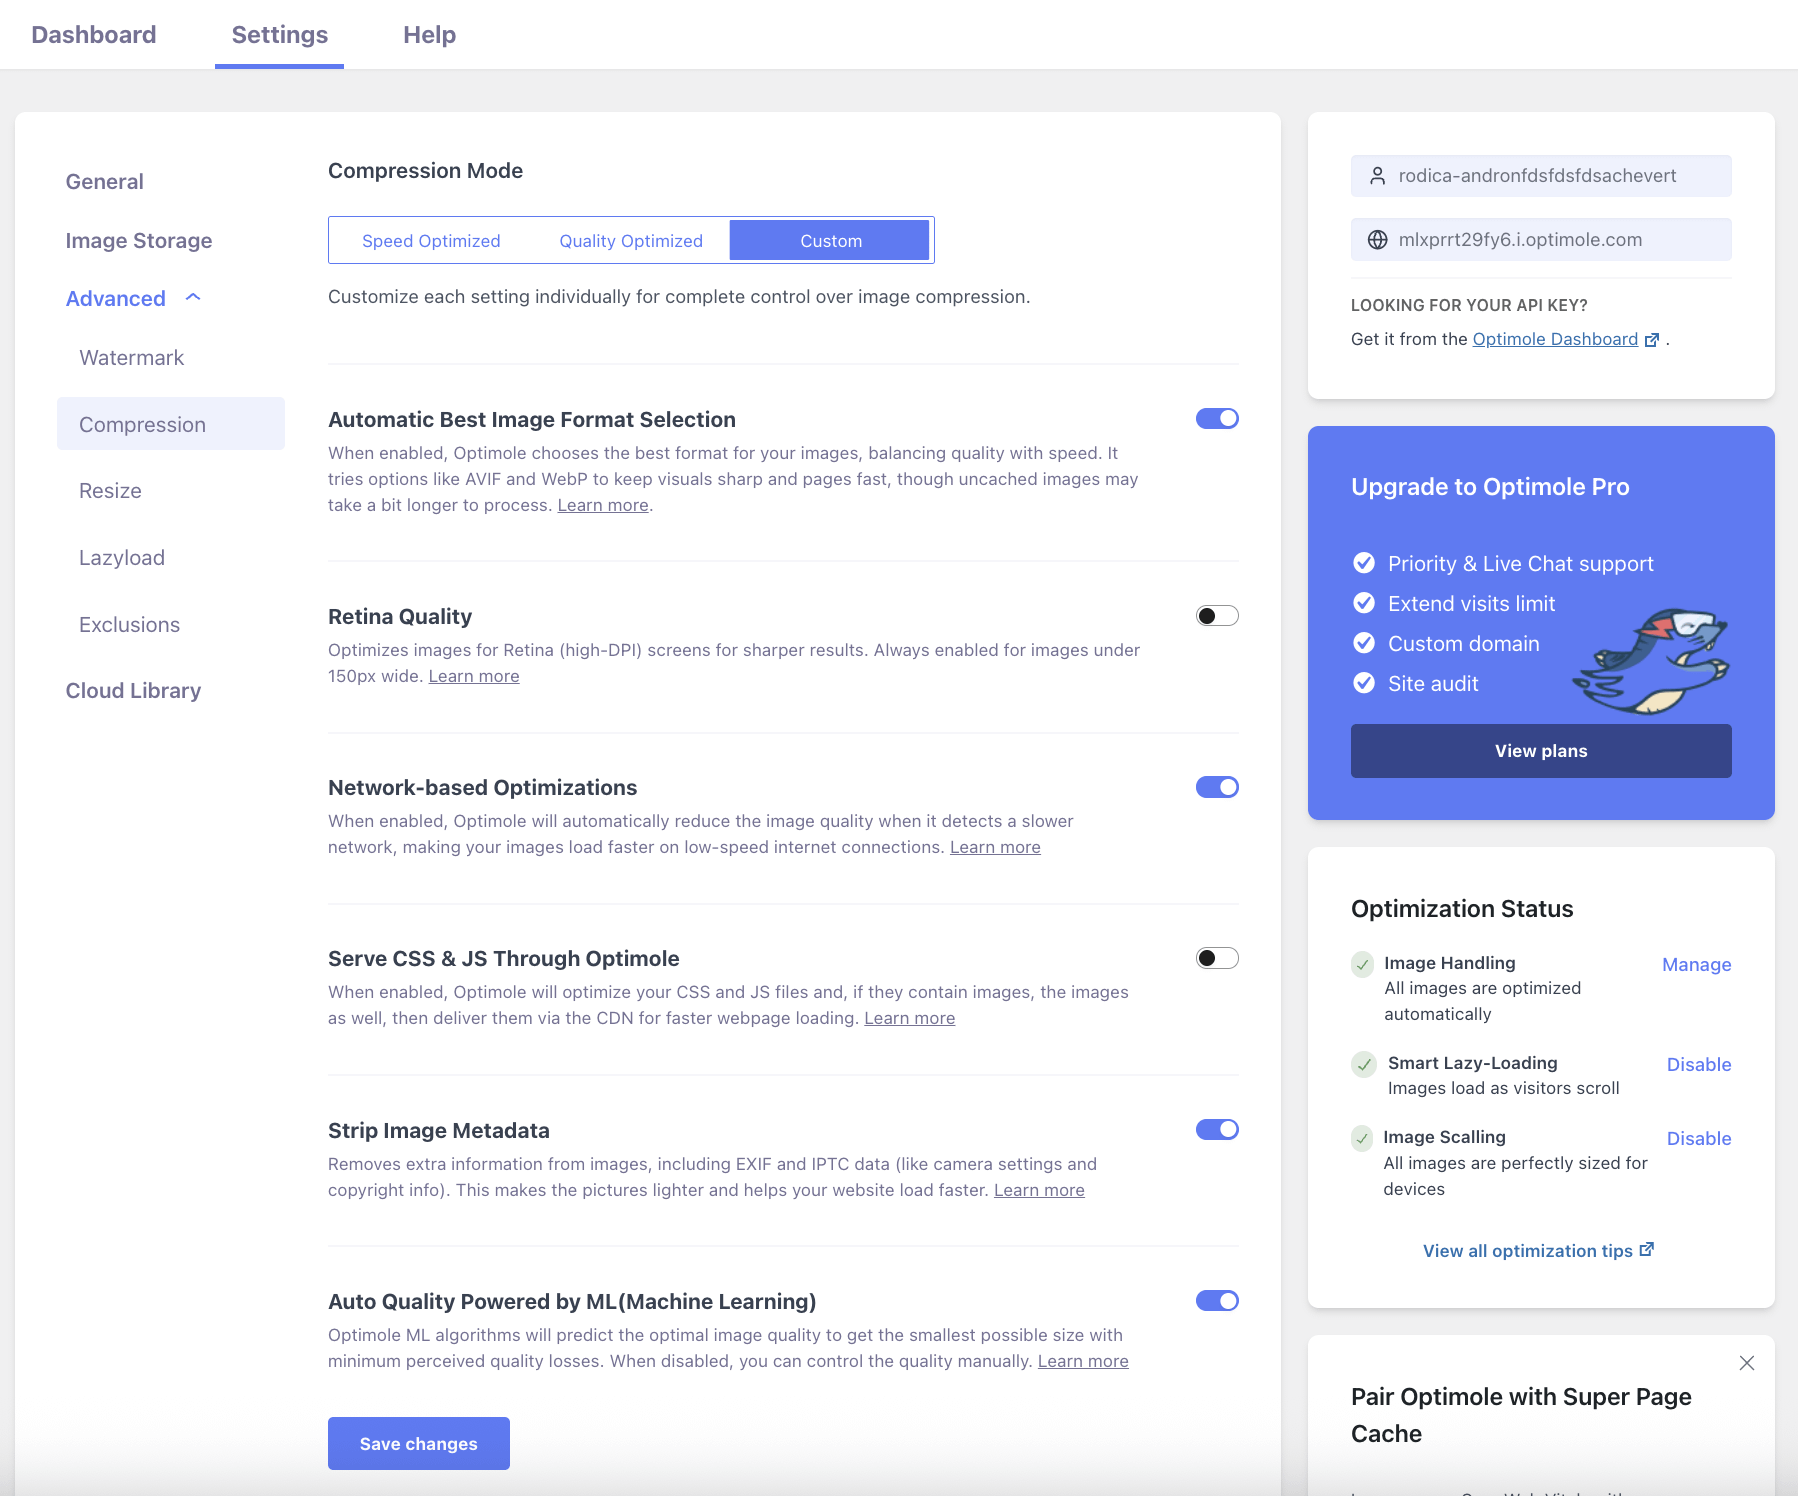
Advanced settings
This Advanced tab is where you can take even more control of how Optimole optimizes your images. Let's go through each sub-tab individually:
Compression
By default, Optimole compresses the images on your website, and it uses Machine Learning algorithms to detect how to get the smallest possible size with minimum perceived quality losses. In case you feel this automatic process doesn't suit your needs, it is possible to disable it and manually set the level of compression/image quality you're okay with.
At the bottom, a dial lets you toggle through the compression levels. As soon as you move that dial in any direction, Optimole will show you a preview based on an image taken from your site's media library.
Once you decide on a compression level, don't forget to press the Save Changes button.

Manual compression enabled
📝 Note: Learn more about the Auto Quality powered by ML (Machine Learning) from this doc.
Above the dial, there are more options:
- Automatic Best Image Format Selection - Optimole offers the best format support for its users, which means that the images are returned at minimum size without quality loss - learn more
- Network-based Optimizations - images load faster on low-speed internet connections - learn more
- Serve CSS&JS Through Optimole - when you have images embedded in CSS/JS files, Optimole optimizes those images and delivers the CSS/JS content via the CDN - learn more
- Strip Image Metadata - the ability to toggle on or off the removal of metadata (such as EXIF, IPTC, etc.) from the generated image, granting the users greater autonomy over their content - learn more
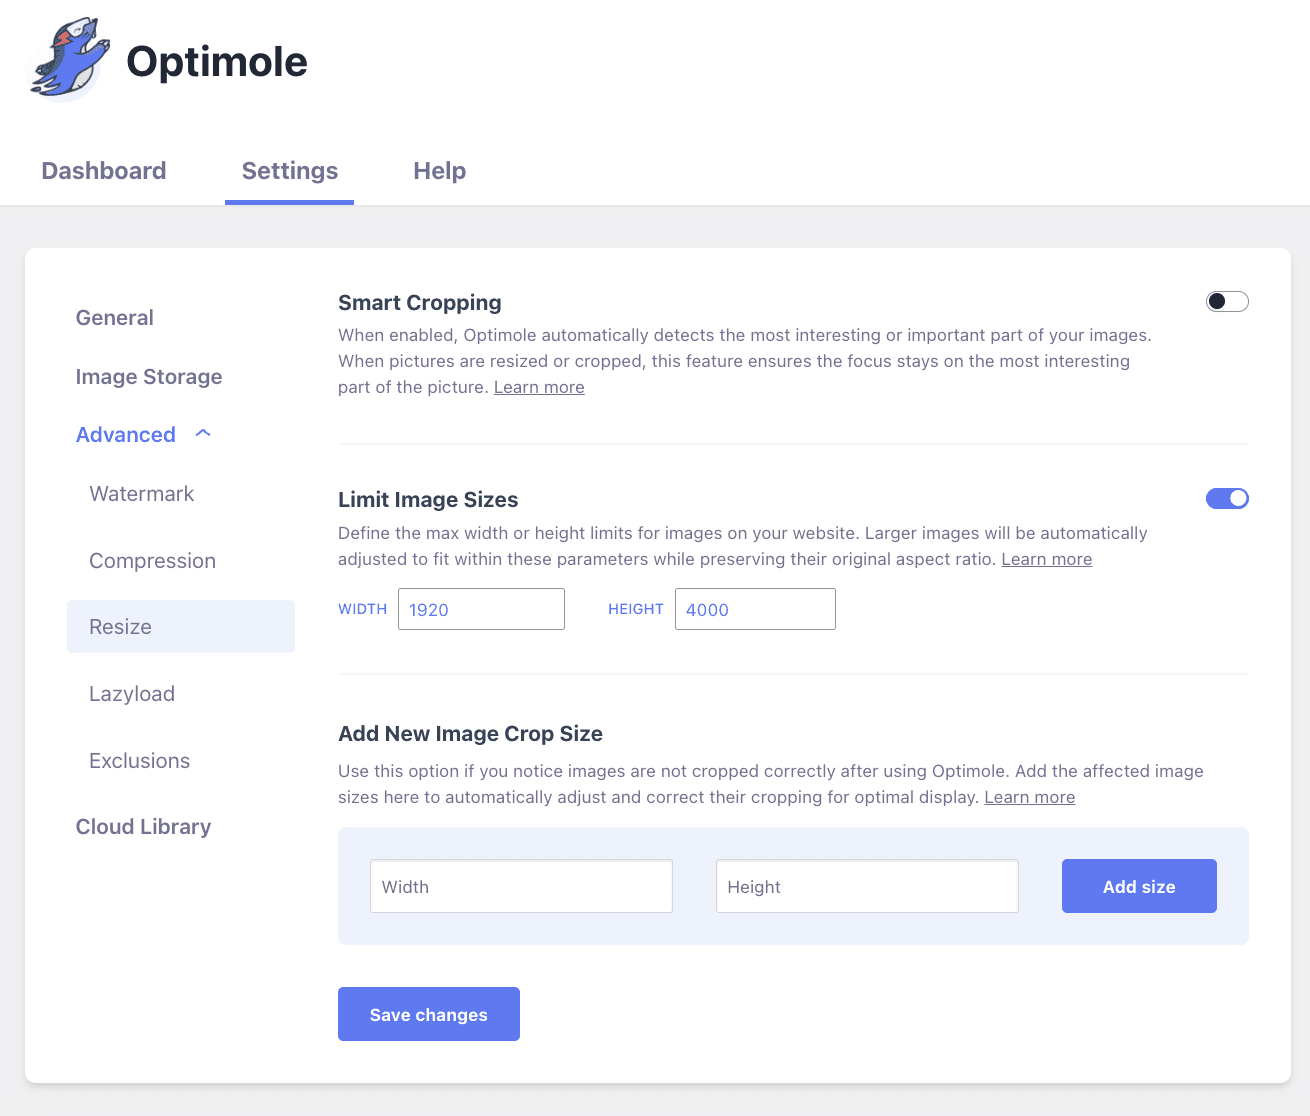
Resize
Optimole gives you a couple of cool settings relating to cropping your images and thus making them fit the destination screen of the visitor even better:
Smart Cropping - this is a fun AI-powered feature that can be useful for some websites - depending on the kind of images you're publishing - learn more
Retina Images - Retina screens, aka. HiDPI screens pack pixels much more densely than standard screens; as a consequence, images at twice their original size are needed to make everything look crisp; enable this feature to make sure your images look great on Retina - learn more
Limit Image Sizes - as the name suggests, you will be able to set custom maximum width or height for the images served by Optimole. When this setting is enabled, the option for retina images will be disabled to ensure consistency between the images - learn more
Add New Image Crop Size - insert width and height for cropped images. Once you add size, the cropped images will be listed there - learn more
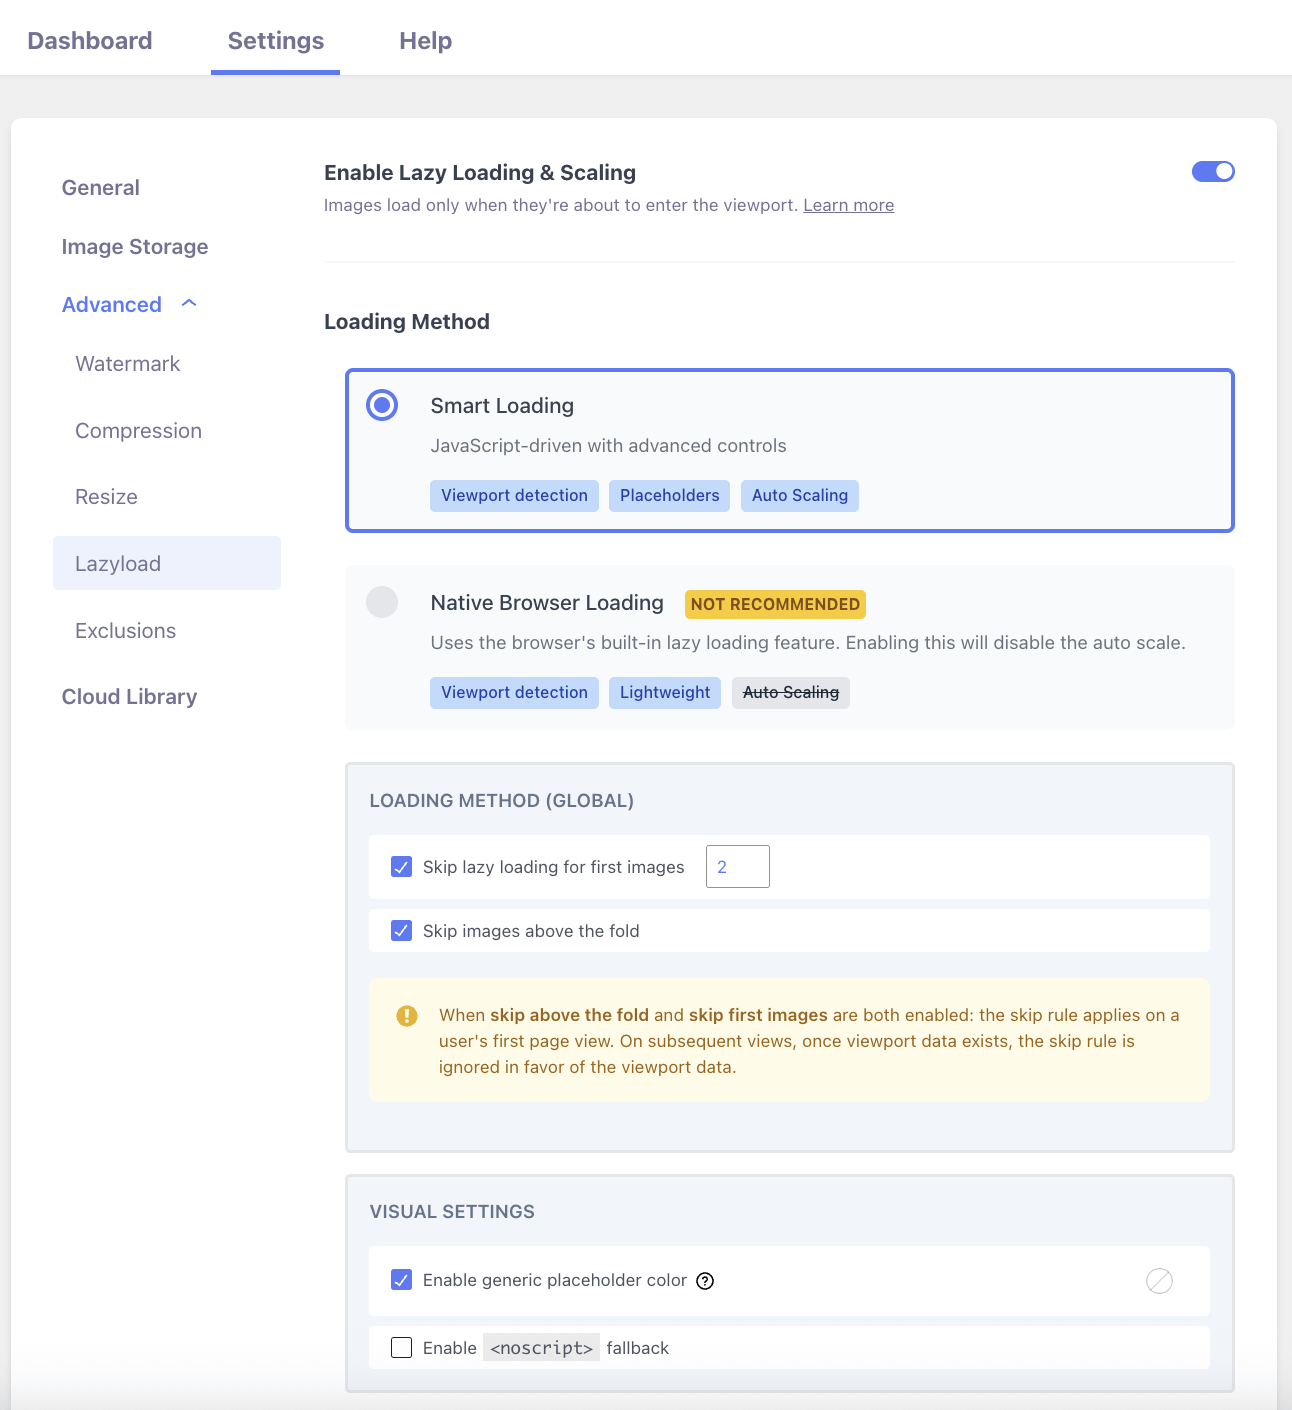
Lazyload
This section allows you to fine-tune how Optimole executes lazy loading.
- Lazy Load with Generic Placeholder - when an image waits to be lazy-loaded, the visitor will see a blurred-out version of it - learn more
- Lazy Loading Behavior - avoid lazy loading for some of the first images. Use "Skip Lazy Loading for Initial Viewport" (recommended), or enter a number to exclude the first X images. Enable lazy loading for all images - learn more
- Native Browser Loading - adds an additional flag that allows the browser to pick a lazyload method. When this is enabled, Optimole stops the rescaling process - learn more
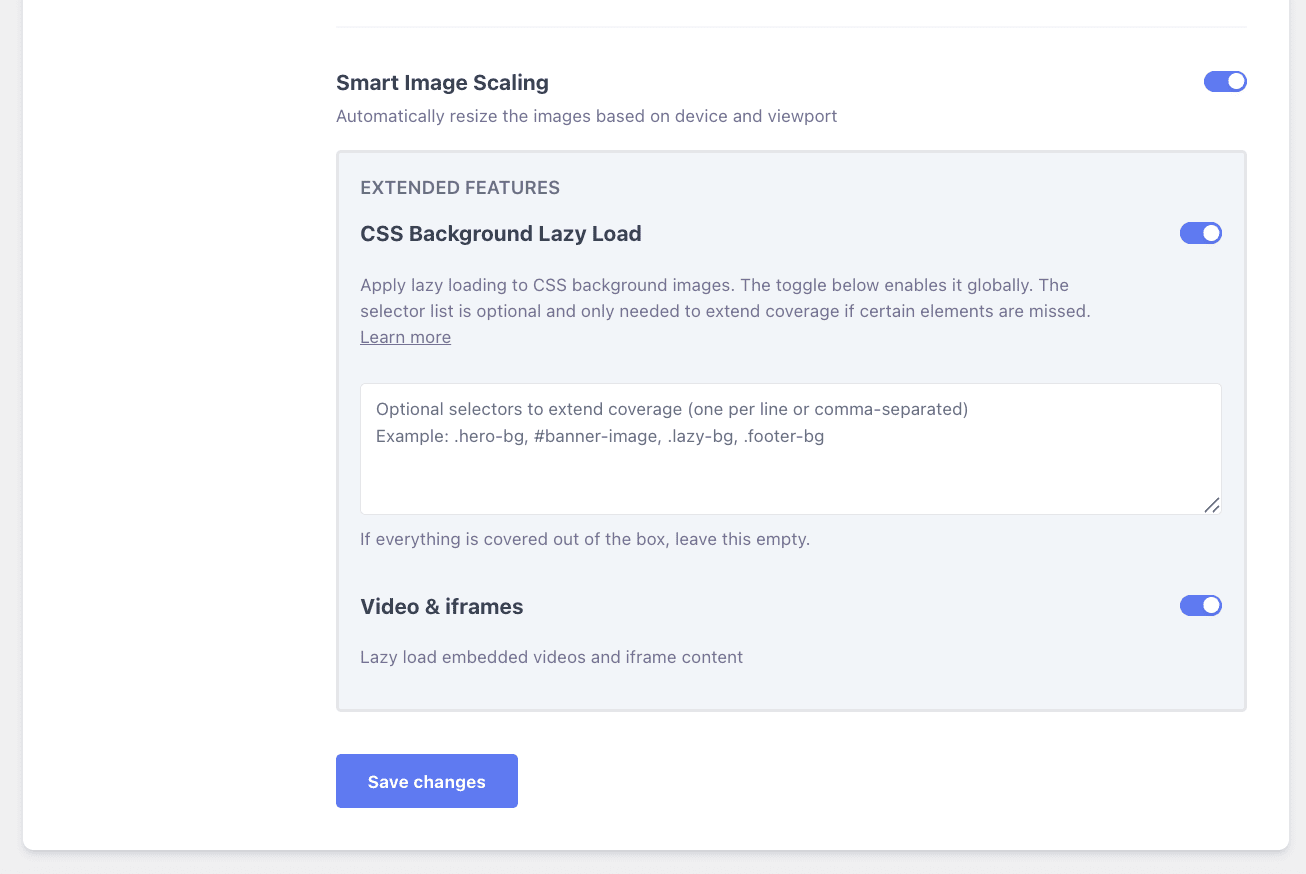
- Smart Image Scaling - scale the images on lazyload - learn more
- CSS Background Lazy Load - enable lazy loading for your background images - learn more
- Lazy Loading for Embedded Videos and Iframes - by default, lazy loading will not work for your embedded videos and iframes - learn more
- Noscript Tag - by default, this option will be off for new users and on for already connected users. This will help browsers that cannot handle Optimole-based features load fallback images - learn more
- Extend CSS Background Lazy Loading- if some background images are still not lazyloaded, then you can add their CSS selectors here - learn more
Video - Lazy-load Explained: How to Optimize Your Webpages for Maximum Speed
Exclusions
If you want to, you can turn off Optimole's optimization or the lazy loading for individual pages of your site, individual images, or even specific image types or classes.
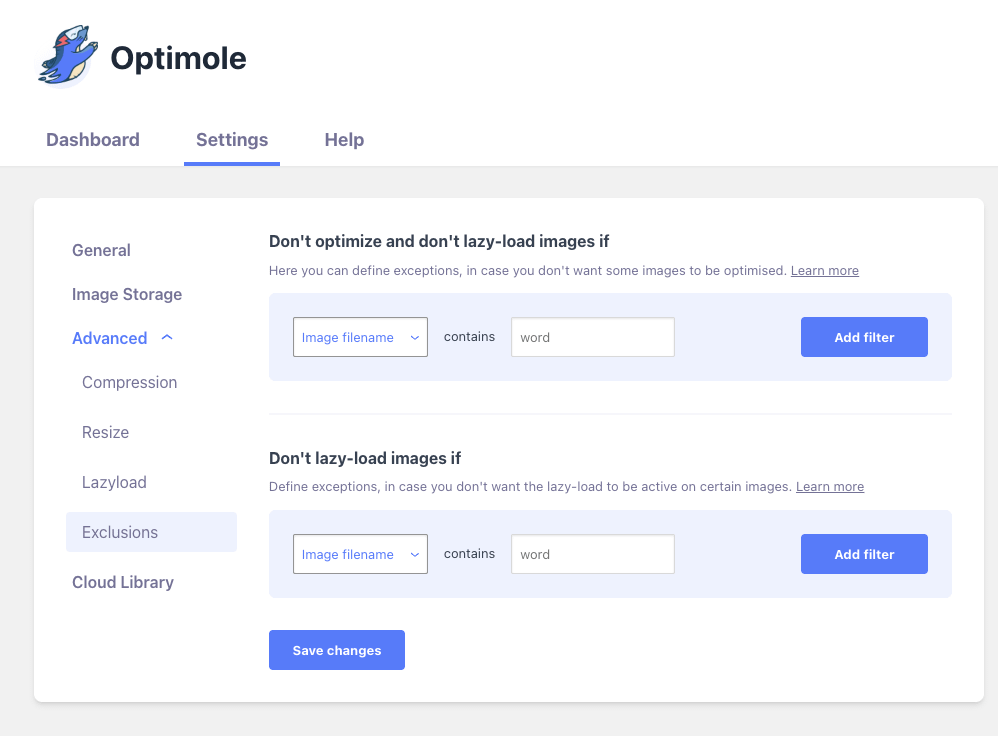
📝 Note: Read more about excluding images from optimizing or lazyloading here.
Cloud Library
The Cloud Library tab, as the name suggests, presents the options to use Optimole cloud library images on your website, for more information on this please refer to our Unified image access guide here.
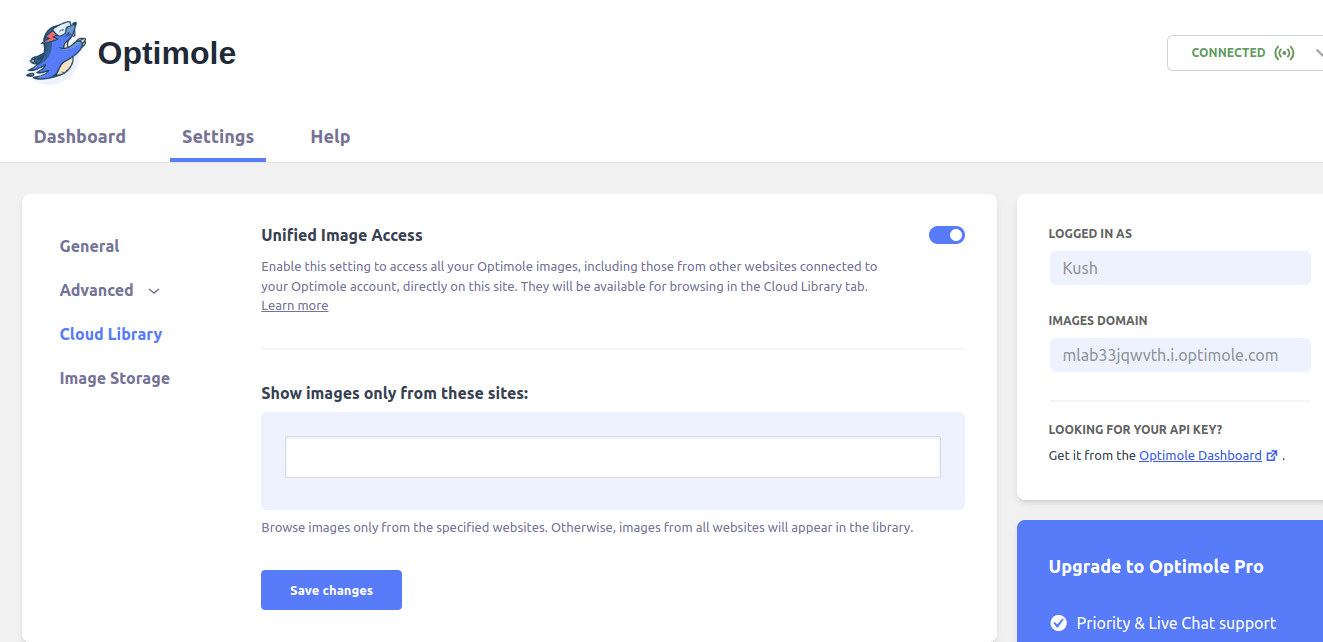
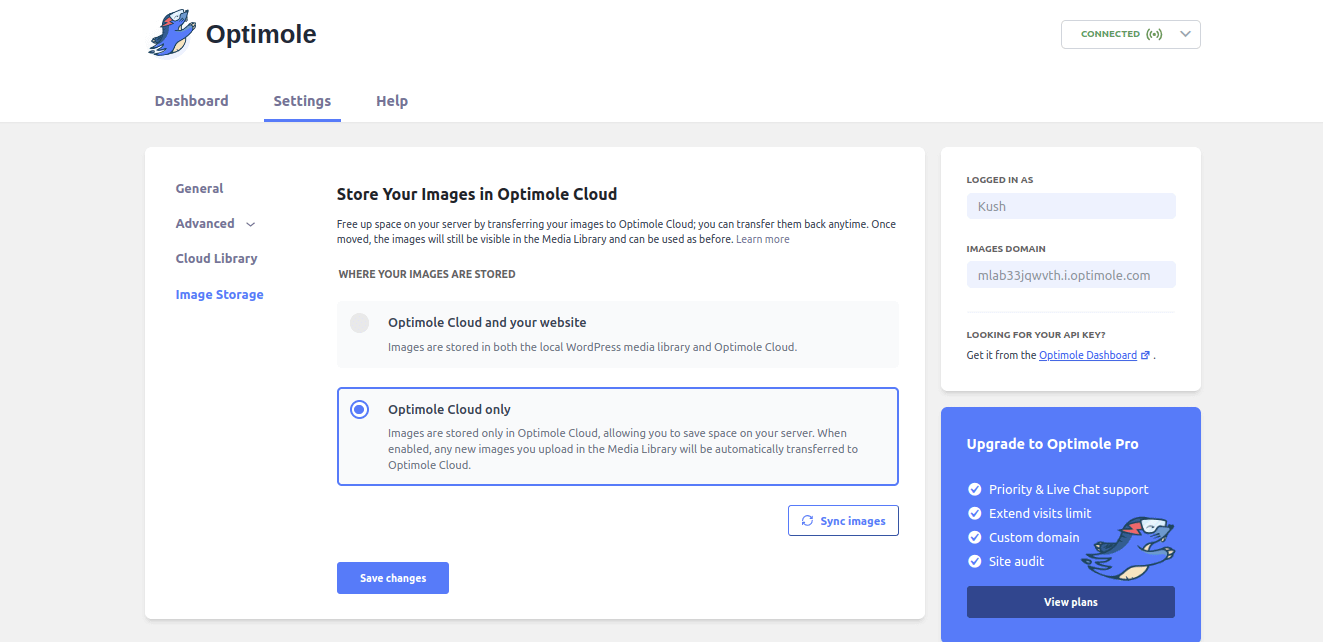
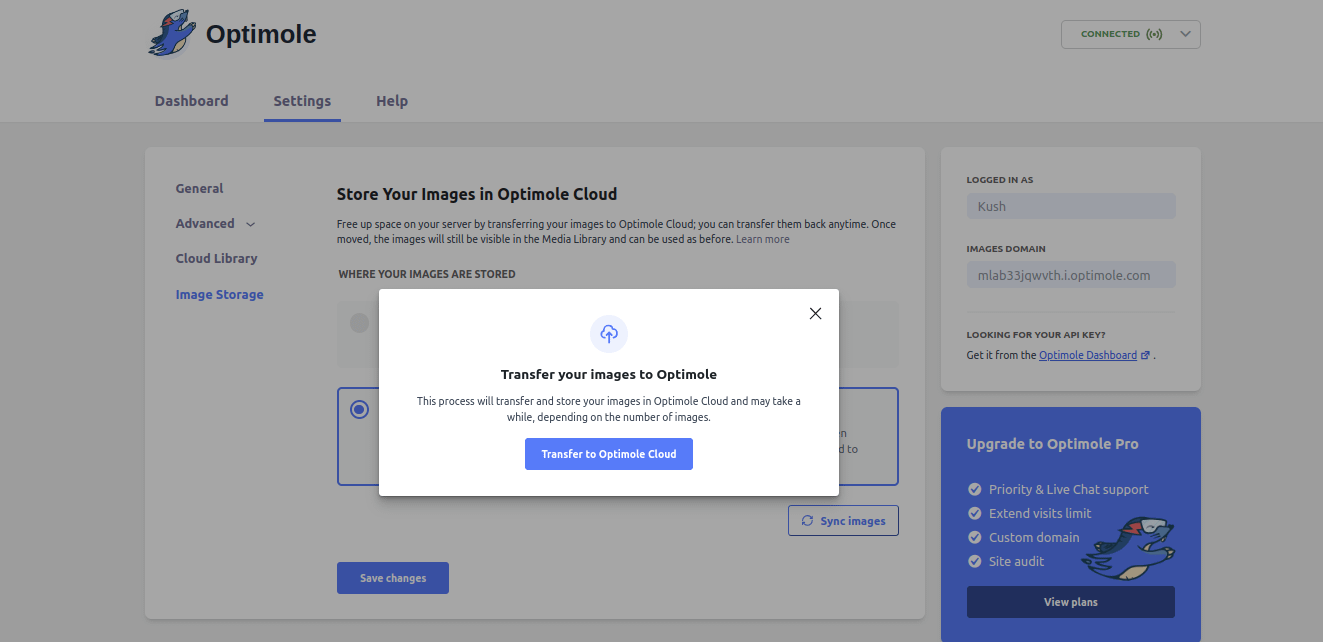
Image Storage
The Store your images in Optimole Cloud is a functionality provided by Optimole that allows website owners to optimize their server storage and improve website performance by transferring images to Optimole's cloud infrastructure, learn more about this feature here.
Custom Integration
To use the service on a non-WordPress website, just follow two steps: Activate your Optimole account and follow the Custom Integration guide. This will allow you to use Optimole to personally build websites outside WordPress.
Optimole tutorial done!
That is it! Optimole will now optimize your images on autopilot without you needing to do anything.
On the free plan, Optimole can handle up to 2,000 website visitors monthly and deliver images to them from 400+ CloudFront CDN locations. 🏃🏃
If you want to expand on that, sign up for Optimole premium plans and upgrade to 48,000 monthly visitors and 400+ CDN locations. 🏃🏃🏃🏃🏃🏃🏃🏃🏃