Appearance
Adding Watermarks to your images
The watermarks feature is available in your Optimole's library, and it consists of a custom identifier that can be applied to the images on your website(the ones processed by Optimole).
📝 Note: For more details on how Optimole works, we recommend checking the main documentation.
This guide covers creating watermarks and configuring how they will be applied to the images.
In this article
® Creating Watermarks
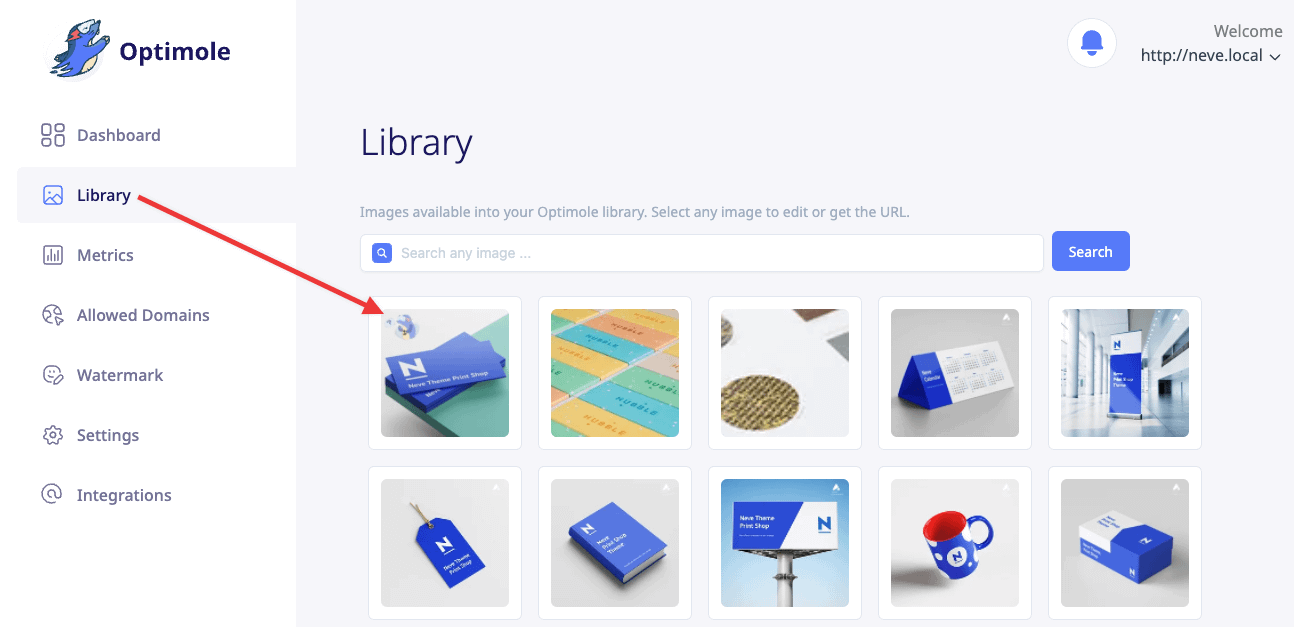
From your Optimole's library, please navigate to the Watermarks page and the Assets tab.
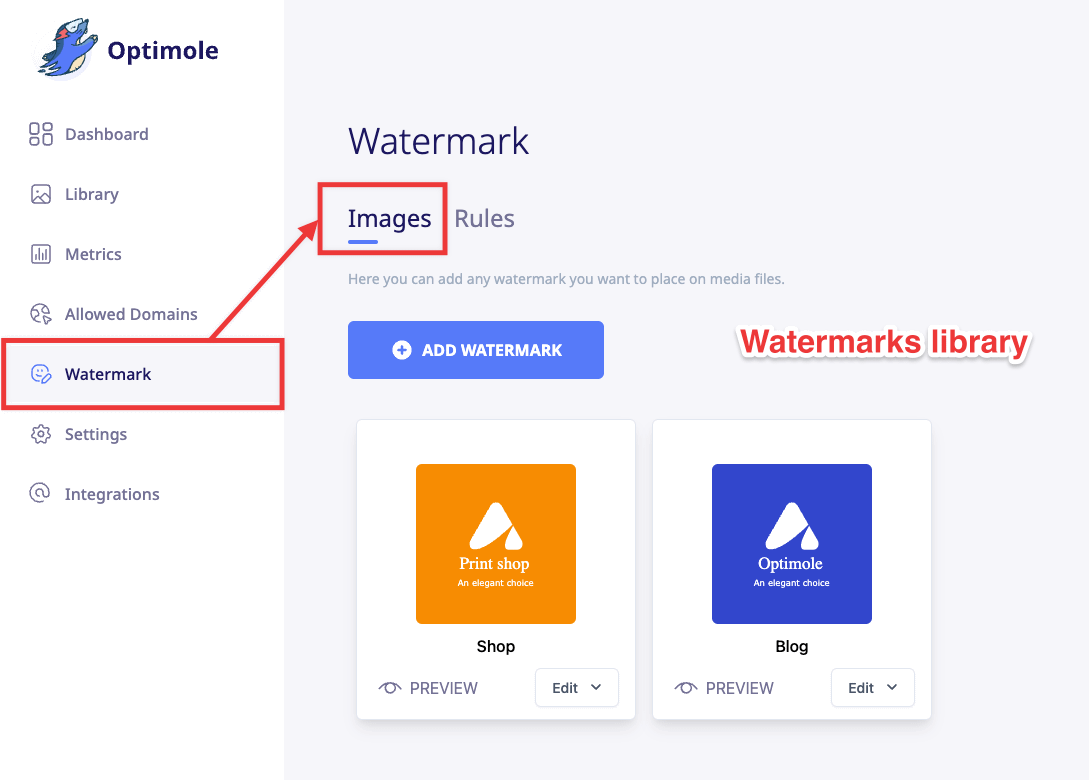
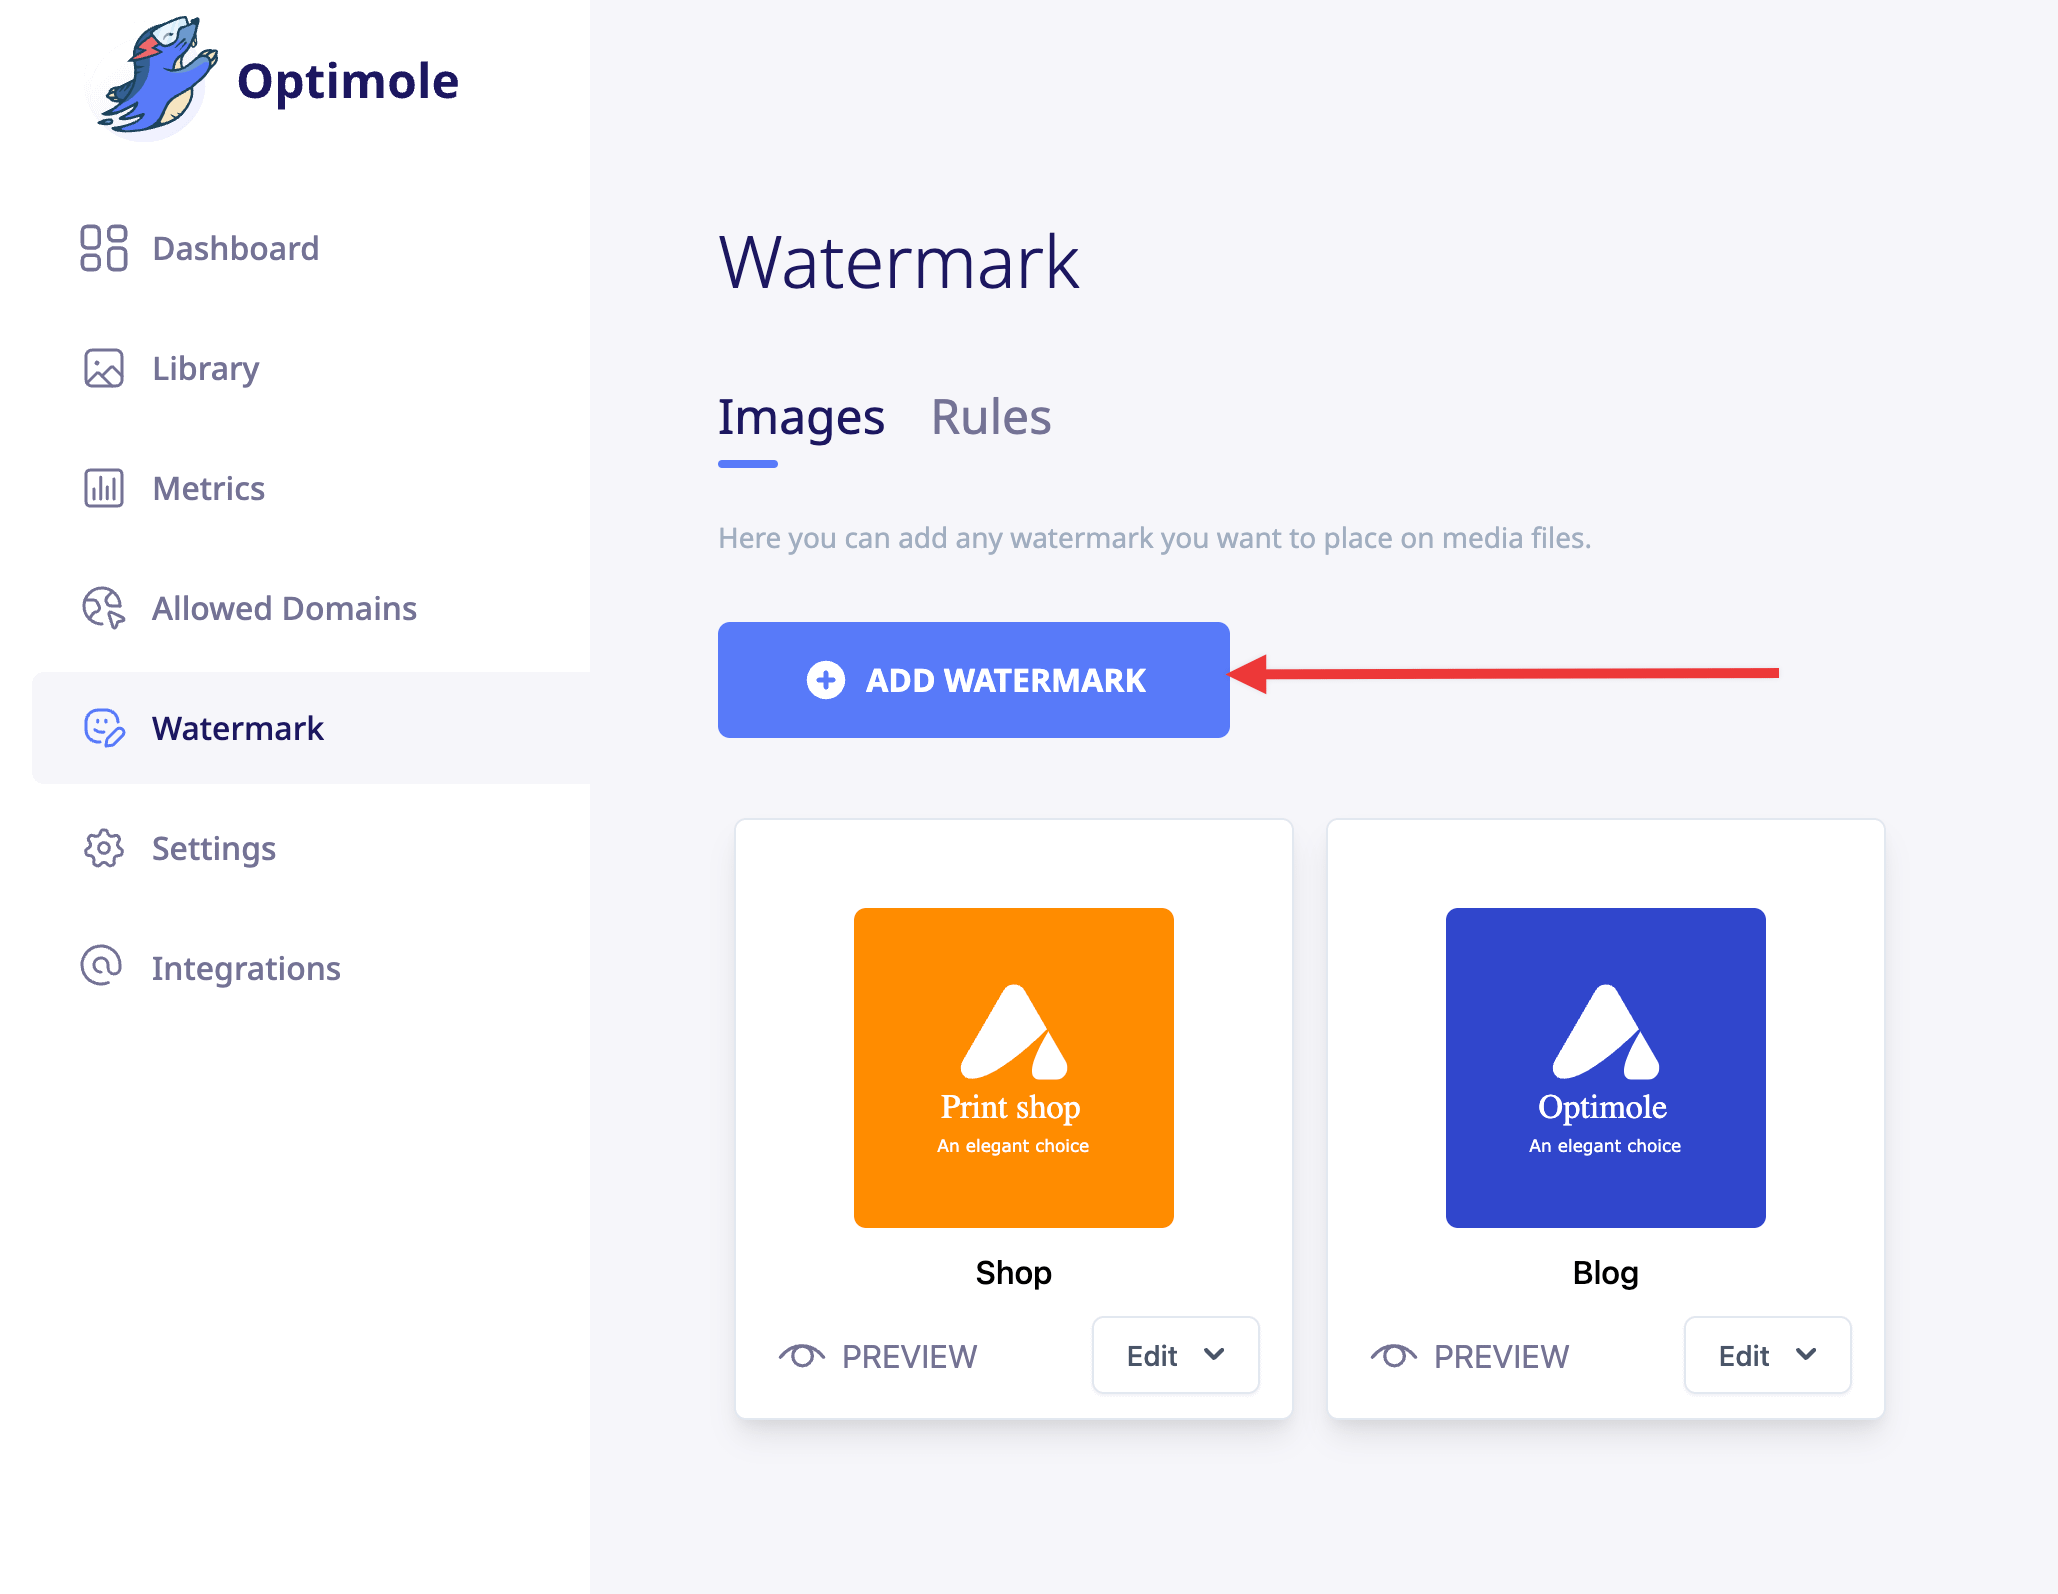
Creating a new watermark is very simple:
1. Click on the Add watermark button.
2. Pick a name for the new watermark.
3. Upload the desired image.
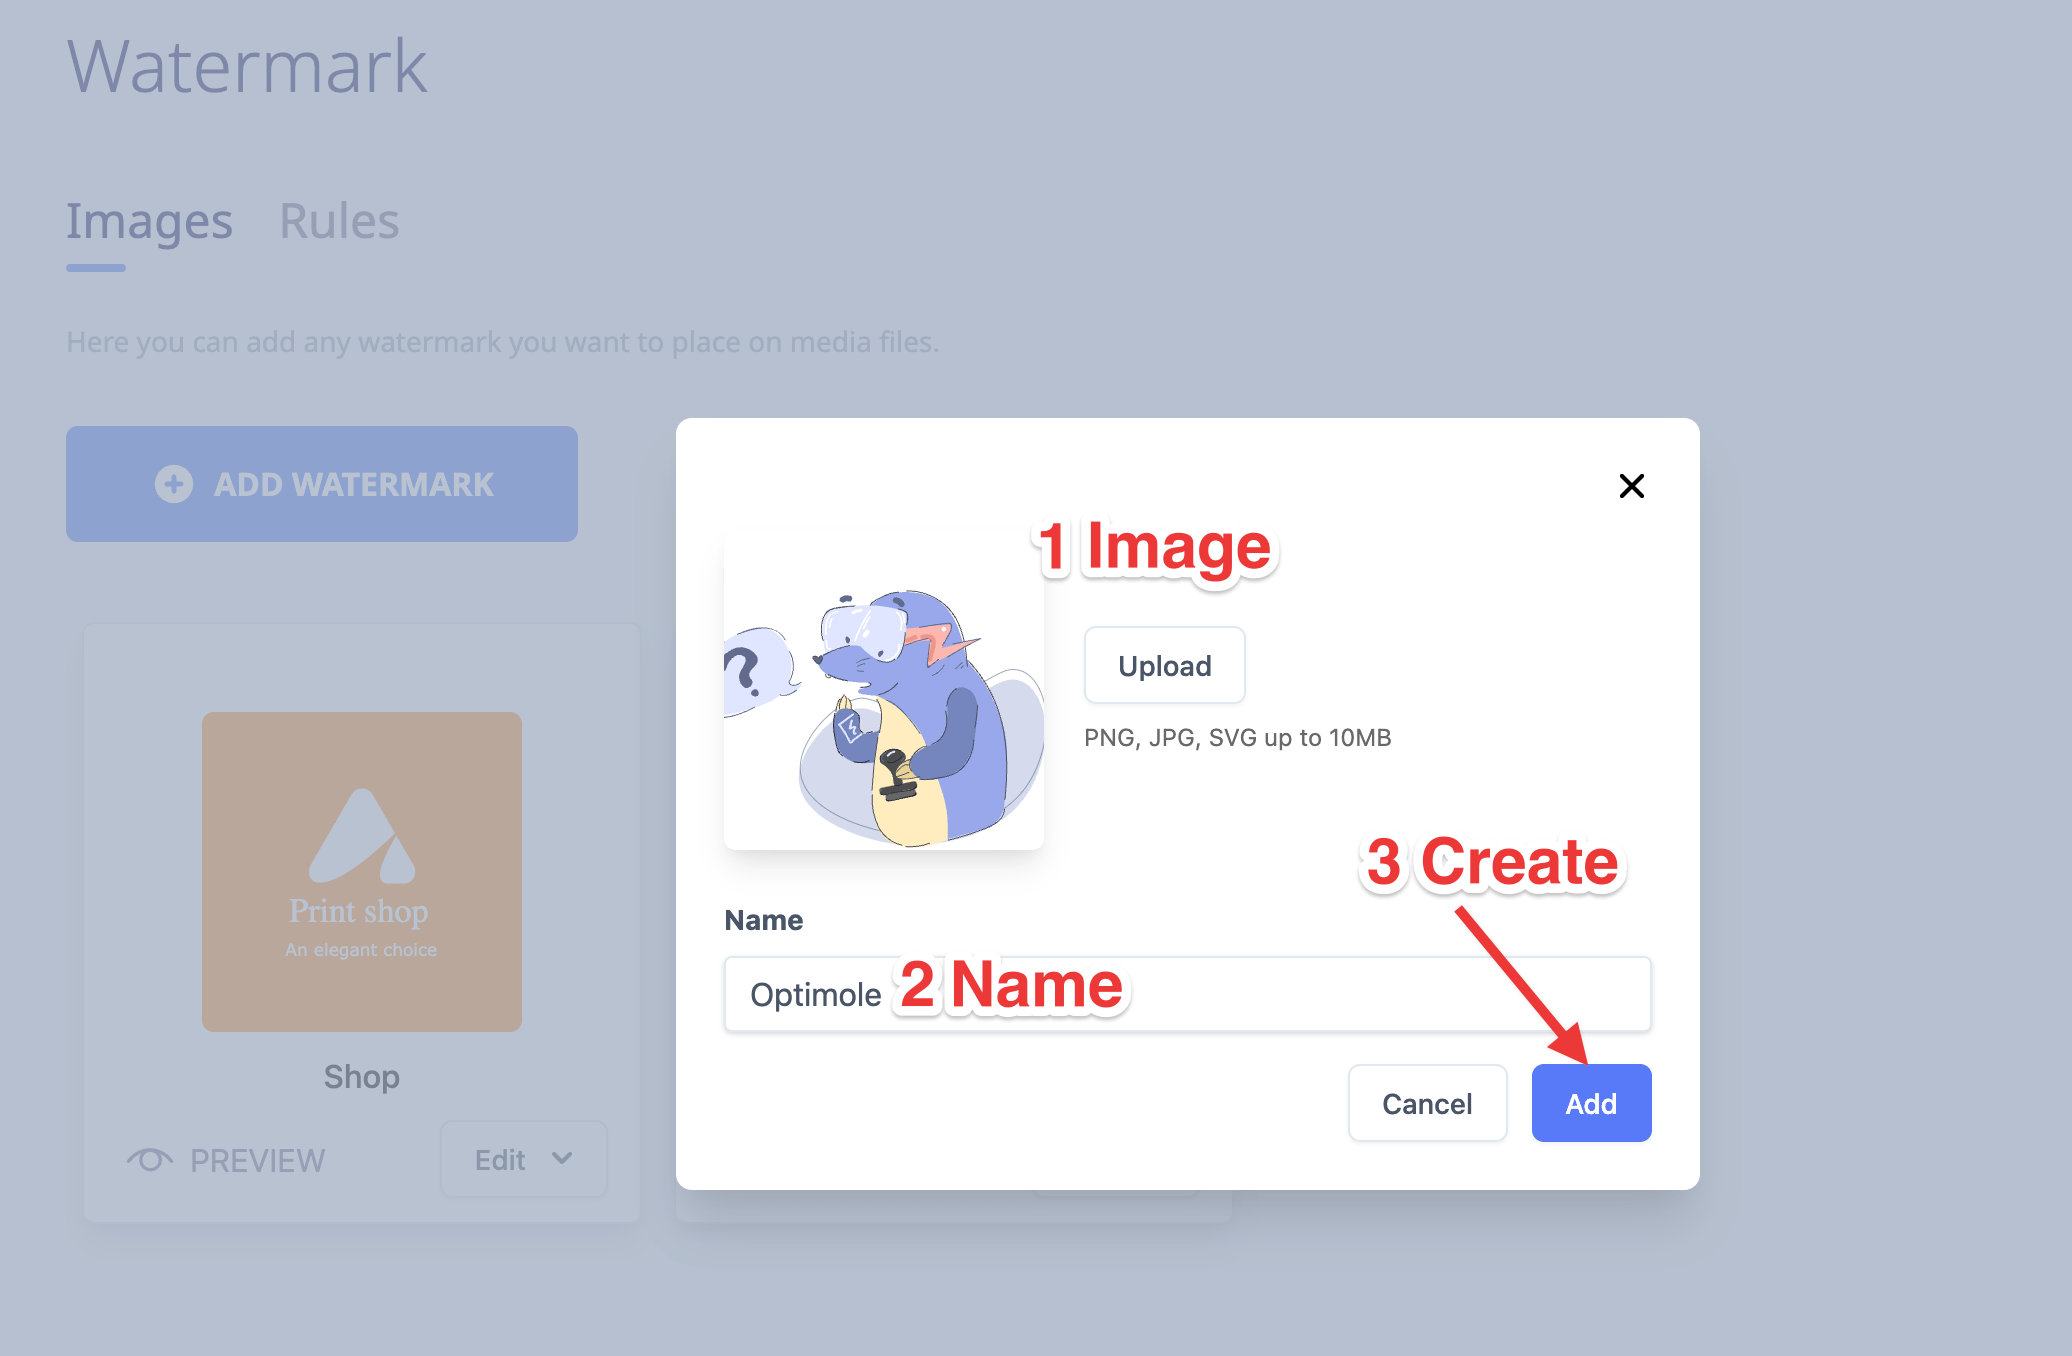
4. Create it by clicking the Upload button.

The watermarks, once created, need rules to be applied to some images.
Setting Rules
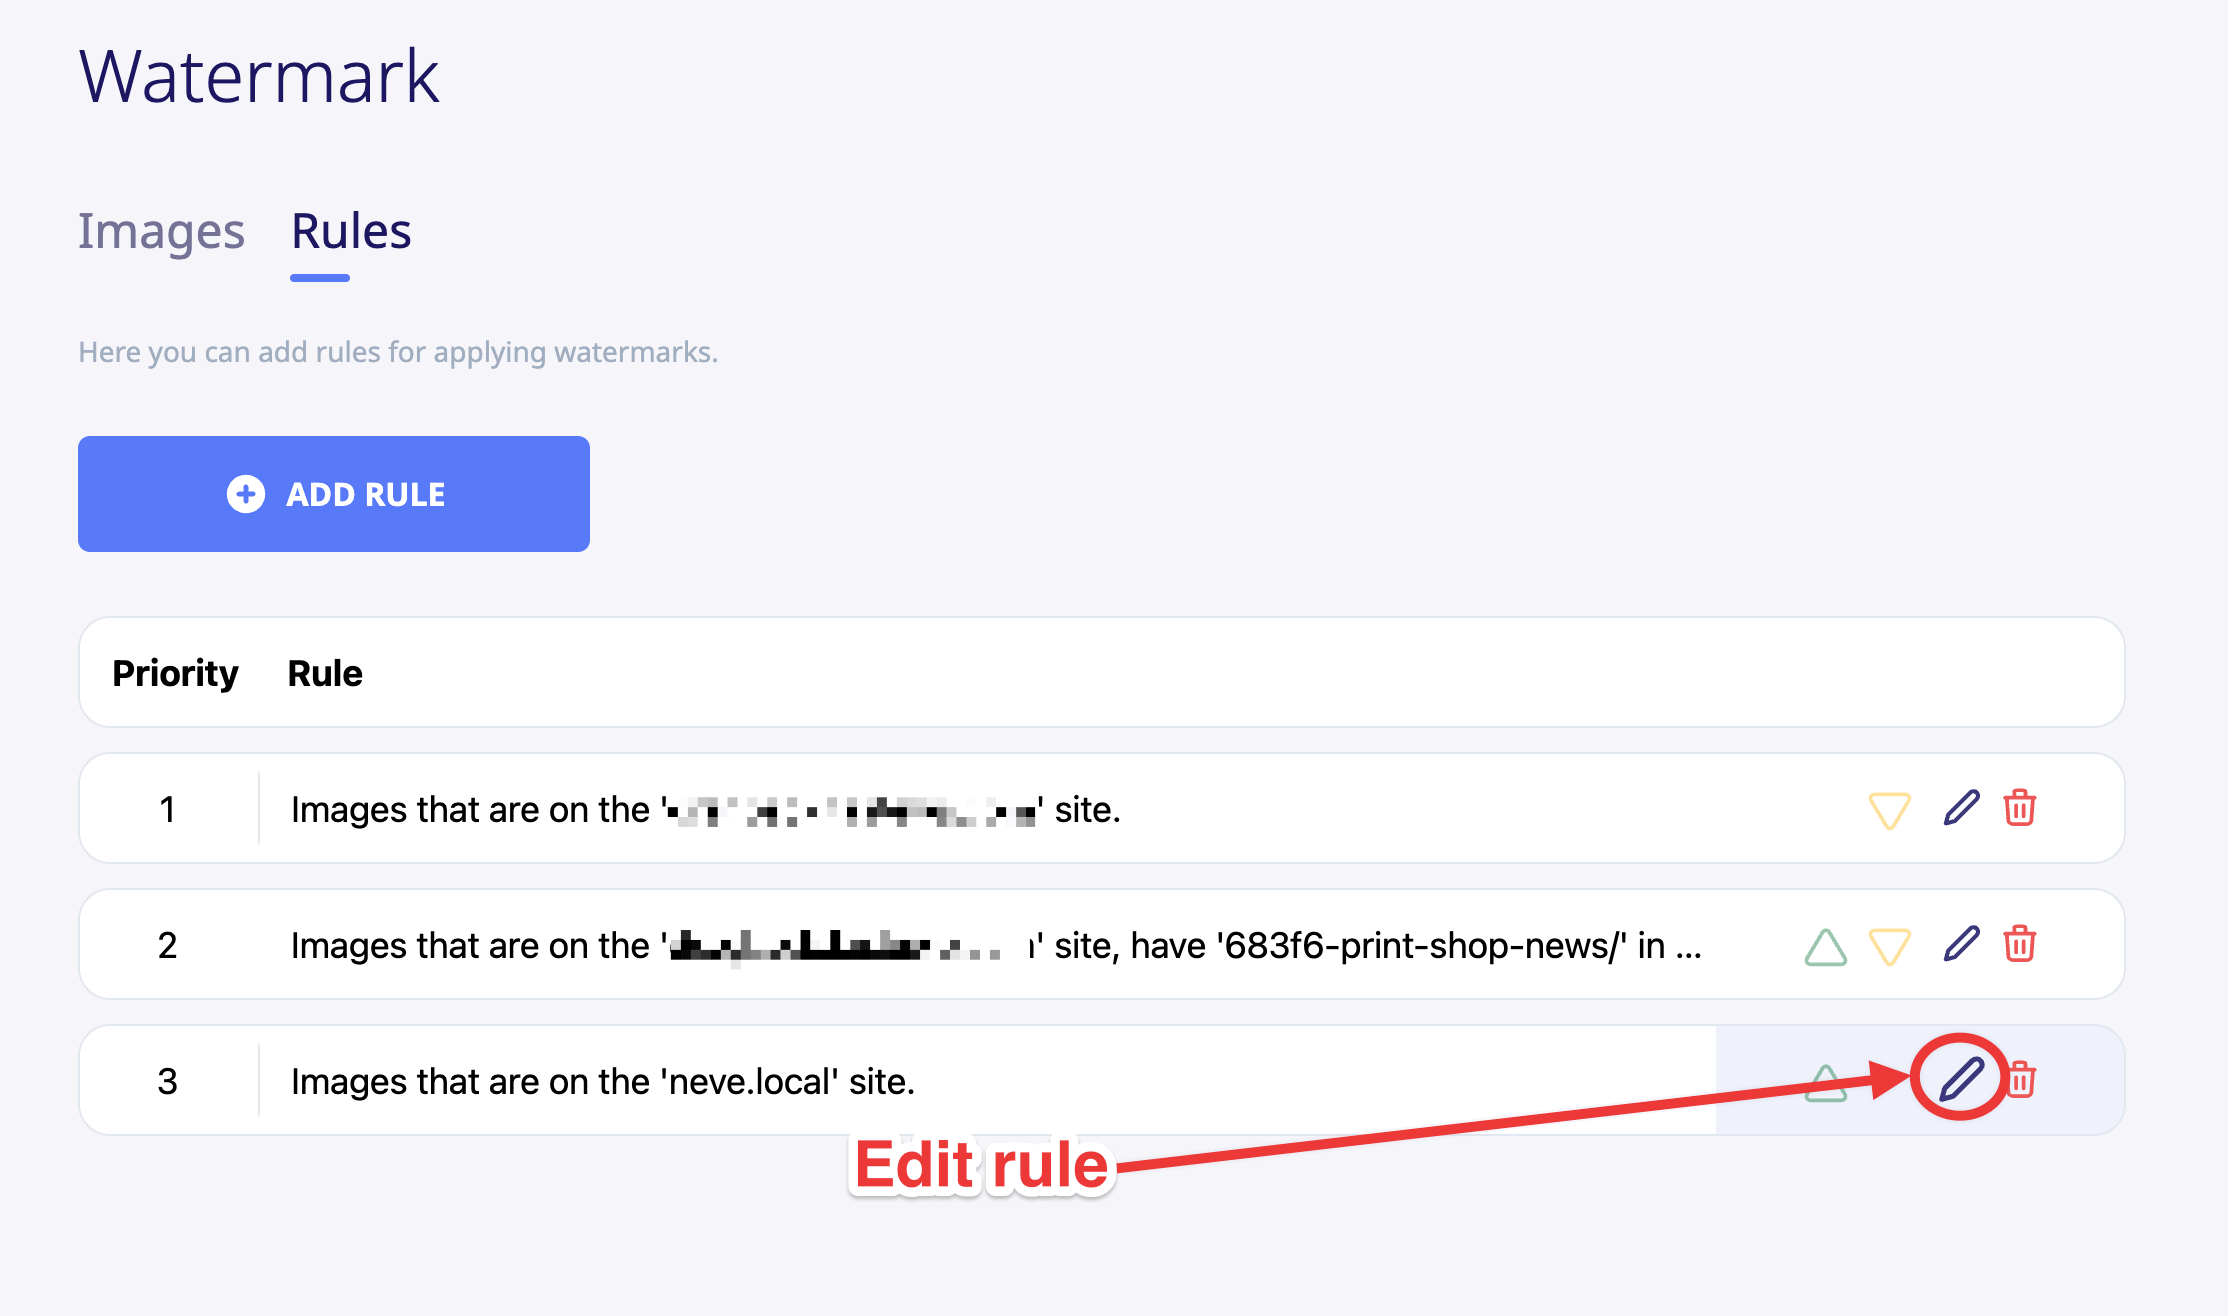
Once the desired watermarks are created, conditions must be set for applying them. This can be achieved in the Rules tab.
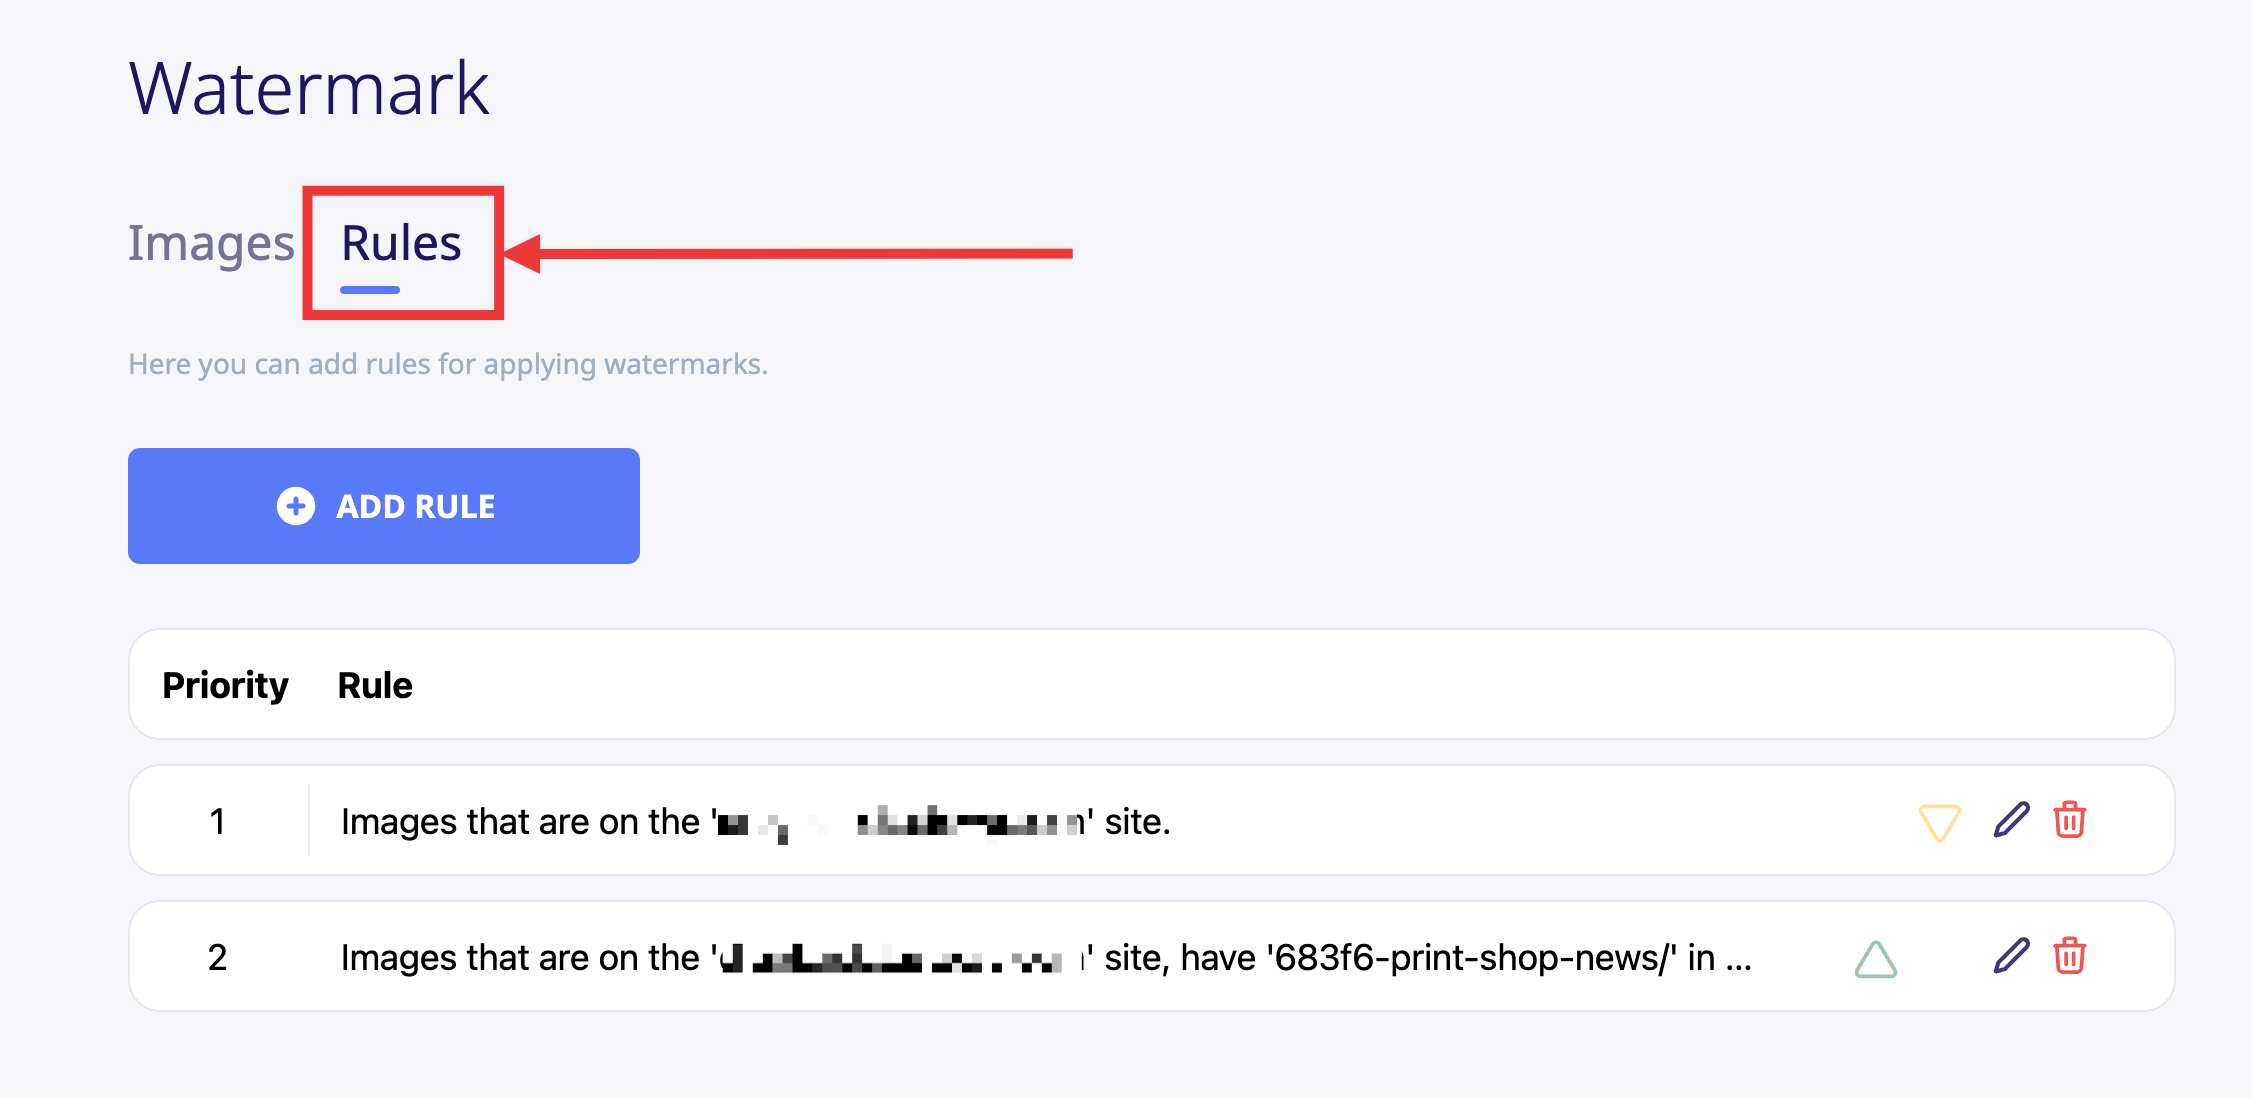
For creating a condition, click on the Add Rule button, then choose a condition type. The available options are:
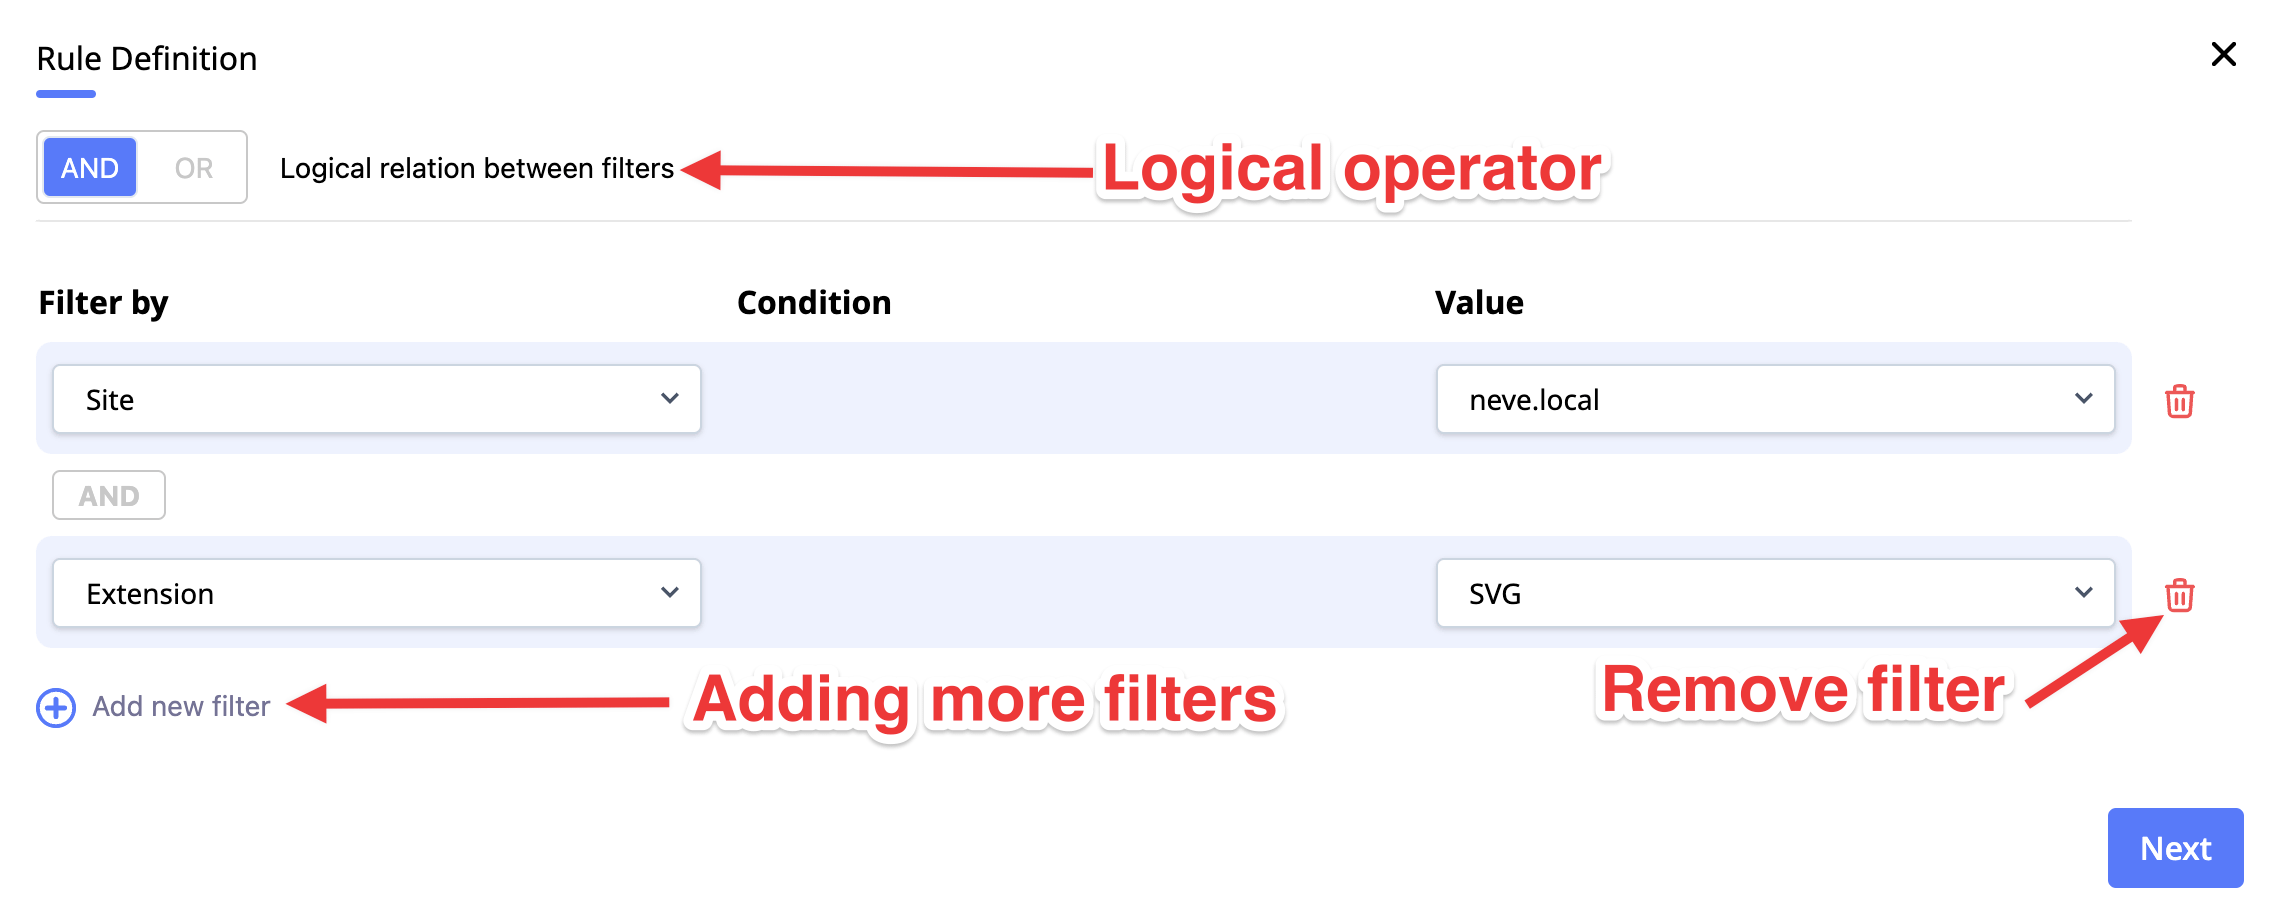
- Site - choose from the dropdown of your registered allowed domains, and select your publicly accessible live domain. Optimole can't fetch or process images served only from WP Studio, localhost, private intranet environments, or any other source that is not publicly reachable. For more details, check Resolving Optimole Access to your Website.
- Width - it's based on the width of the images where will be applied.
- Height - it's based on the height of the images where will be applied.
- Extension - the watermark will be applied to all images with the extension selected in the current rule.
- Contains - it can be a string; the watermark will be applied to all images containing this string in their name.
📝 Note: If your images were created on a local site and then migrated to a public live site, you don't need to upload those images manually to Optimole Cloud just to apply a rule-based watermark. Once those images are publicly accessible on the live site, Optimole can process and watermark them when Enable Optimole Image Handling is active and your watermark rule targets that live domain.
📝 Note: After choosing the filtering type, multiple conditions can be added. It's possible to choose the logical operator to be added between the conditions; it can be OR or AND.
To finish the setup and apply the watermark, click on the Next button.
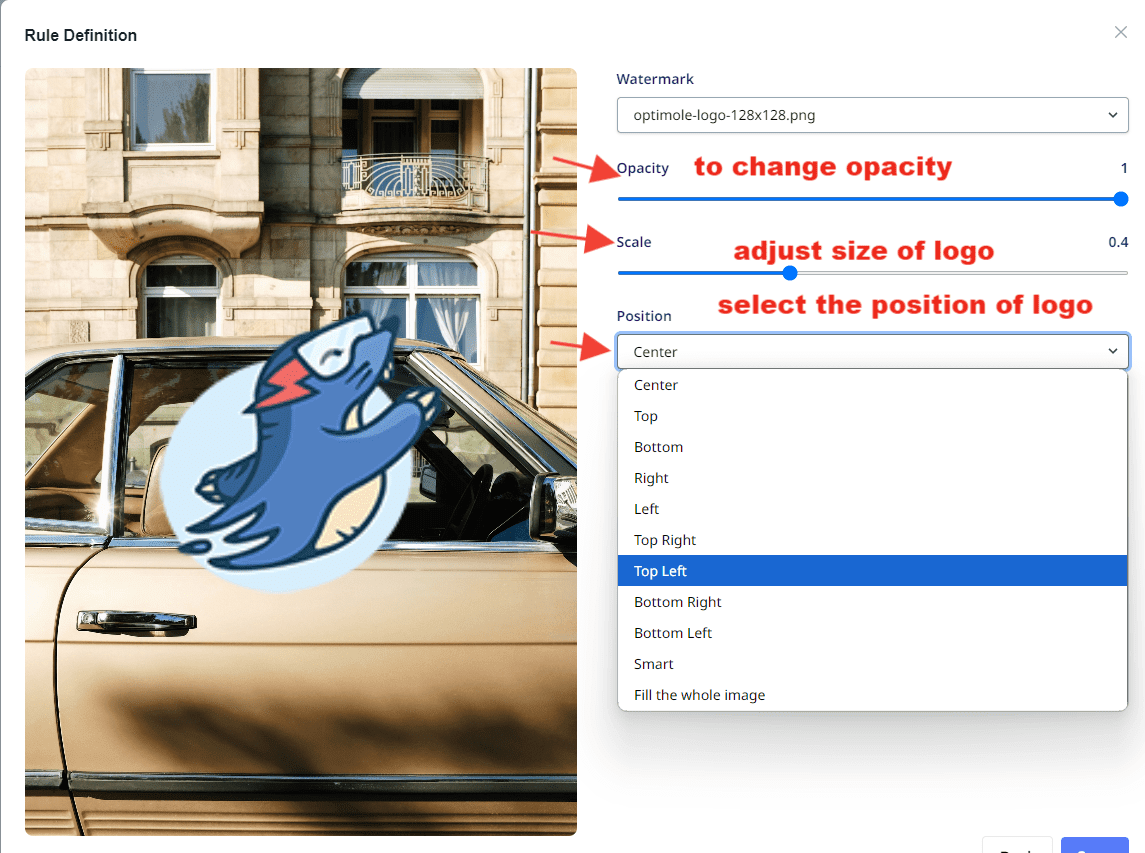
In the last step, you can adjust the various settings such as Opacity, Scaling, and position of the logo.
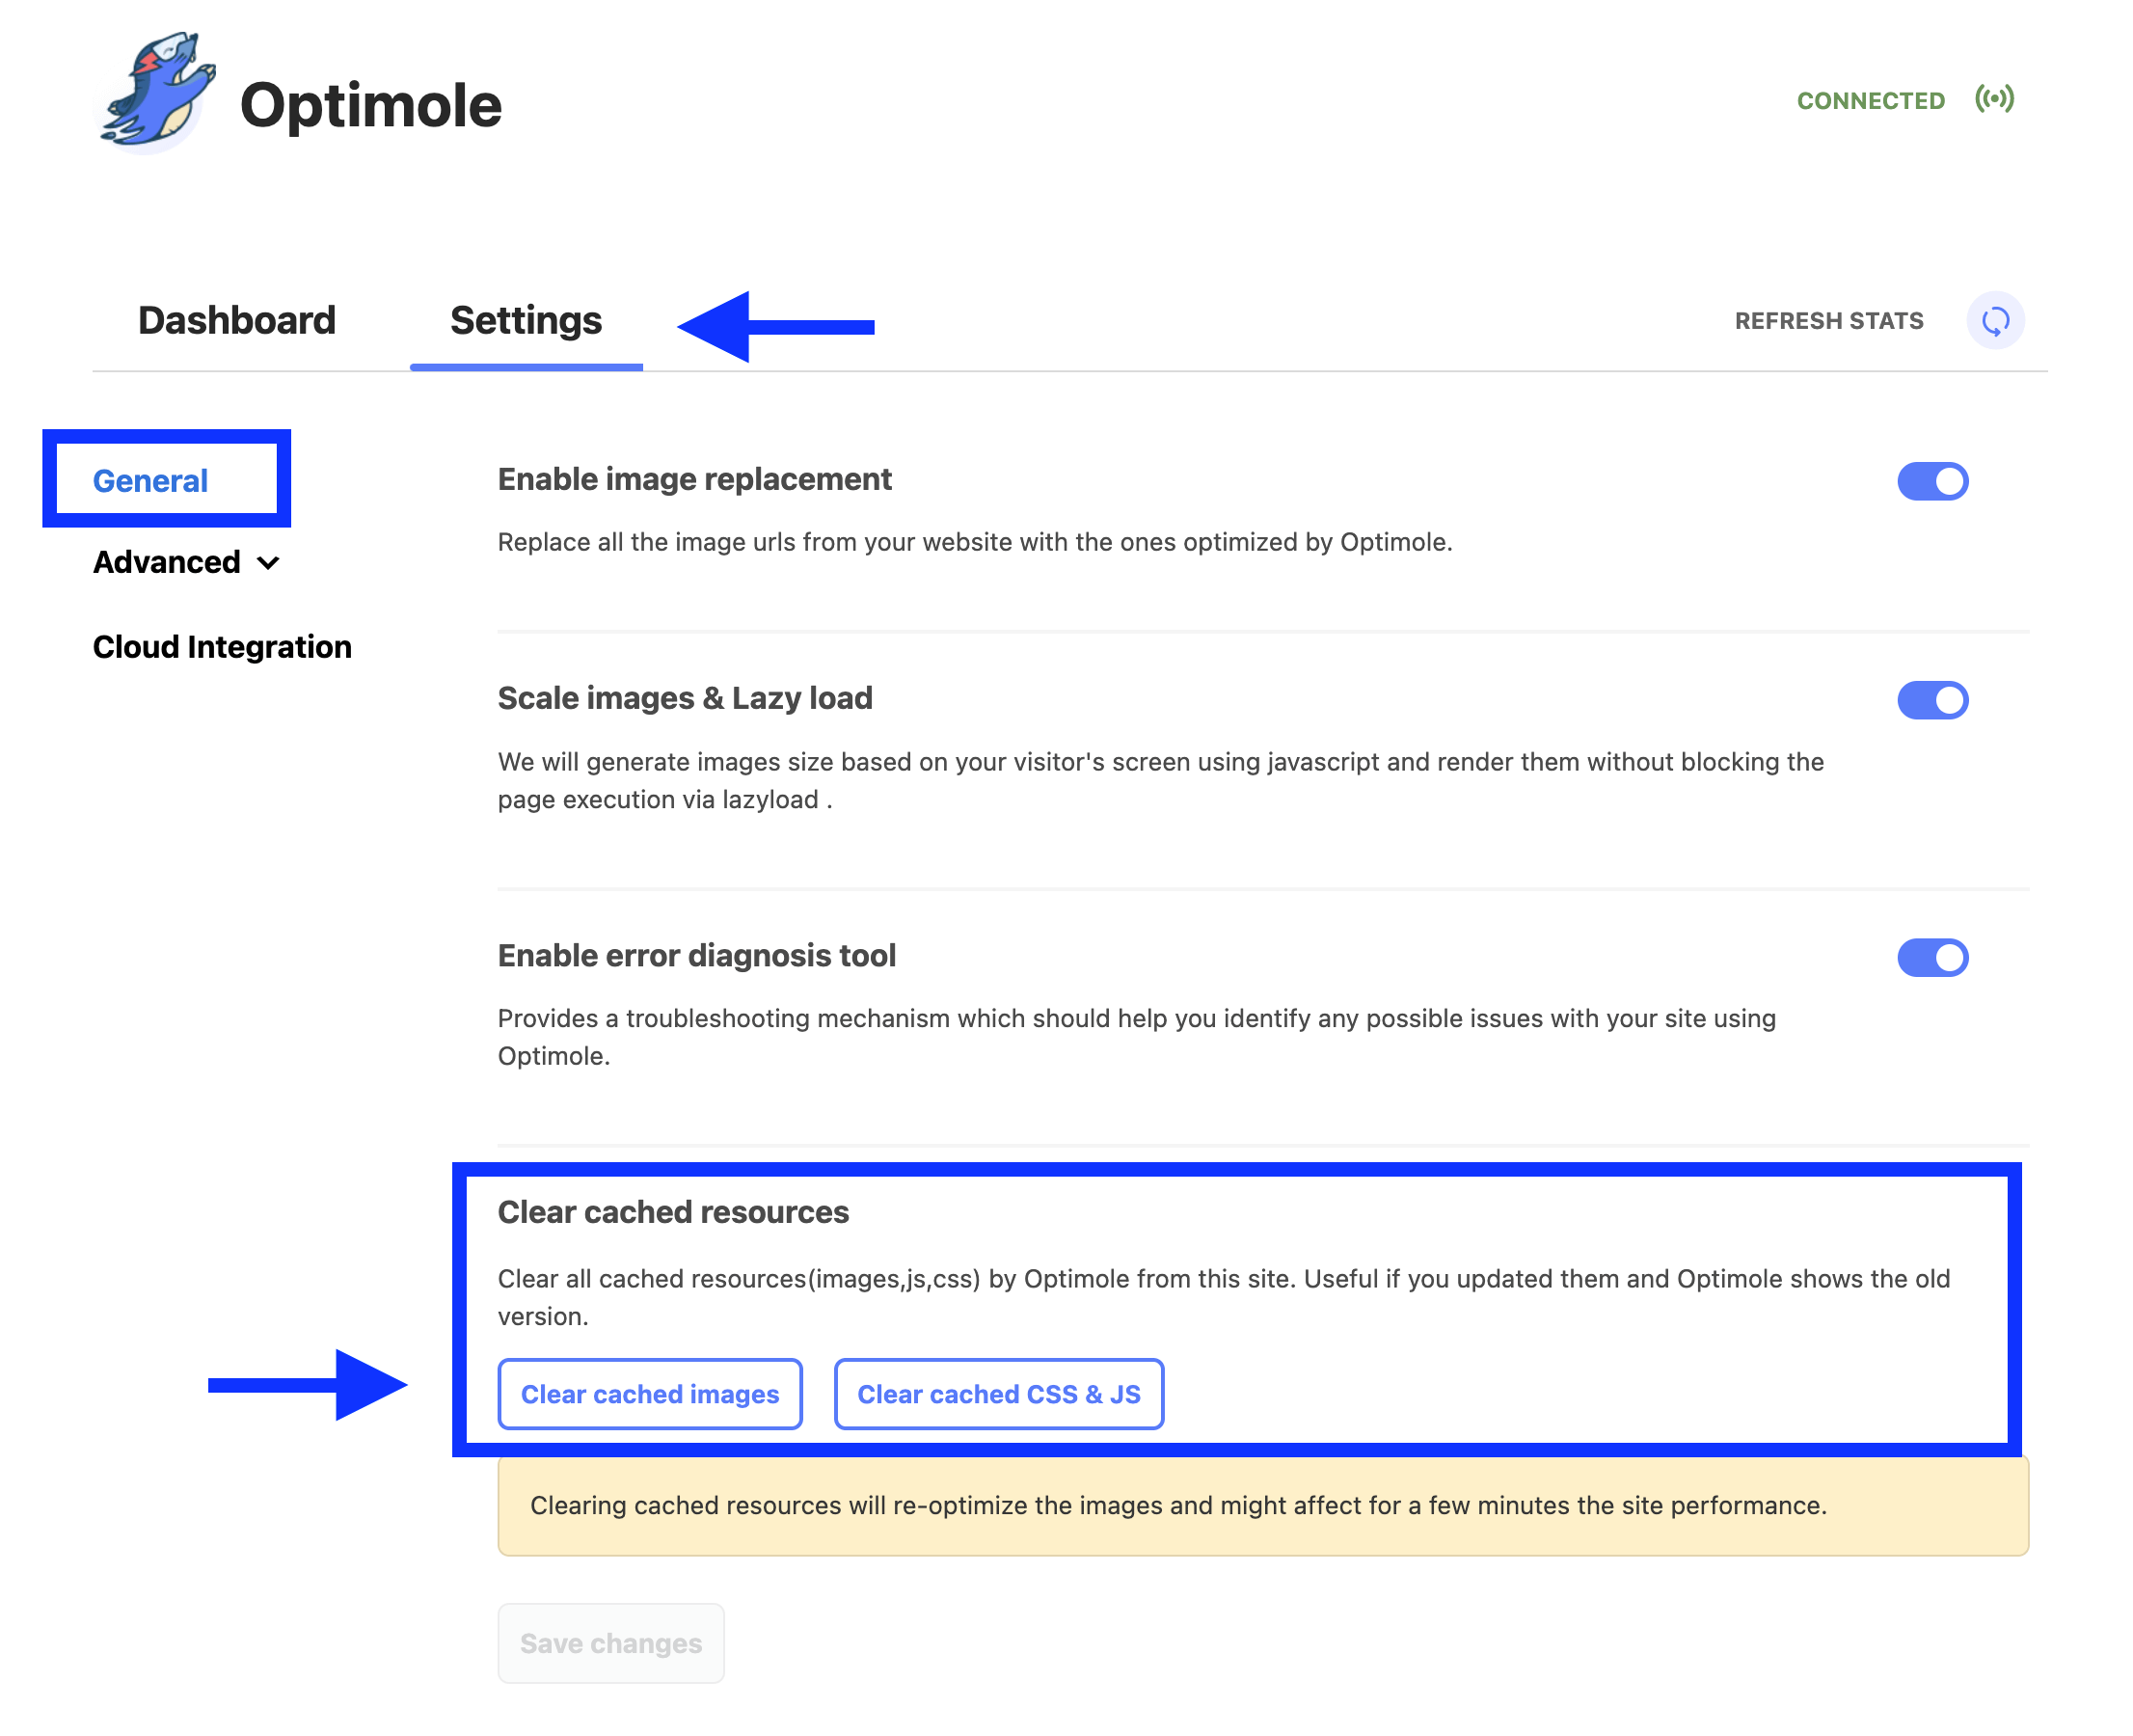
📝 Note: After creating or editing a watermark rule, clear the existing processed versions so Optimole can regenerate them with the watermark. In your WordPress admin, go to Optimole > Settings > General and click Clear cached images.
Managing Watermarks
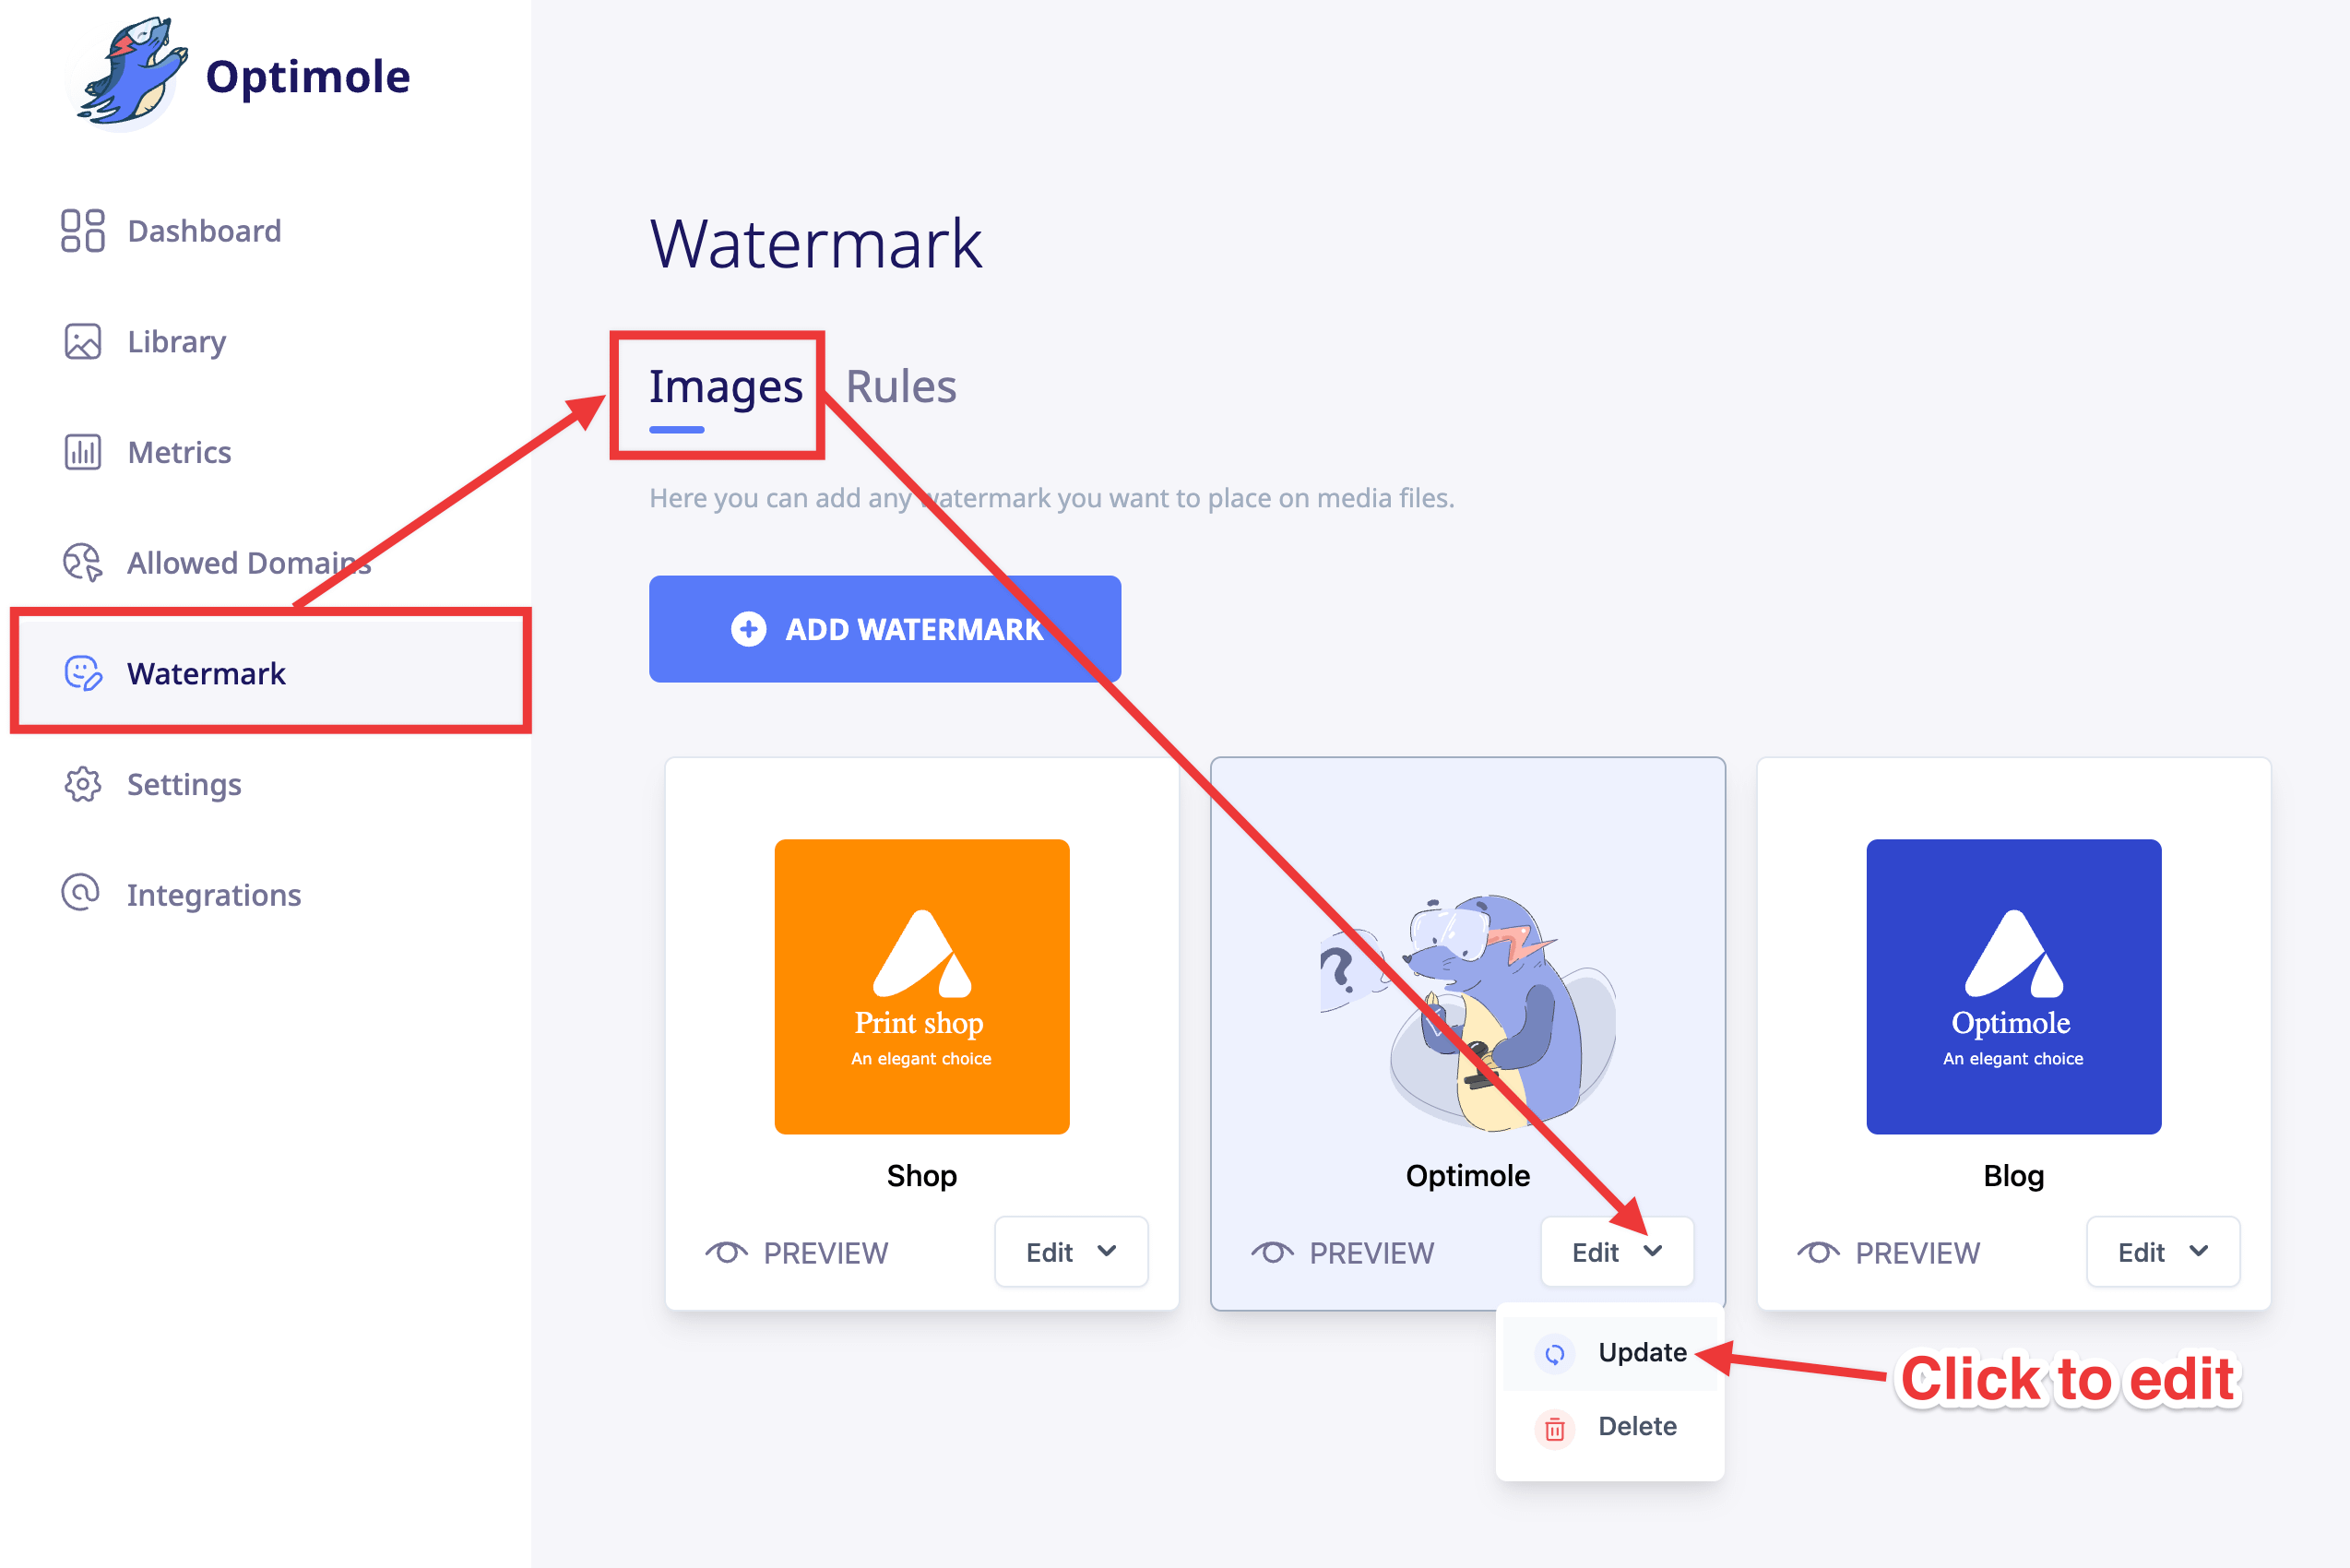
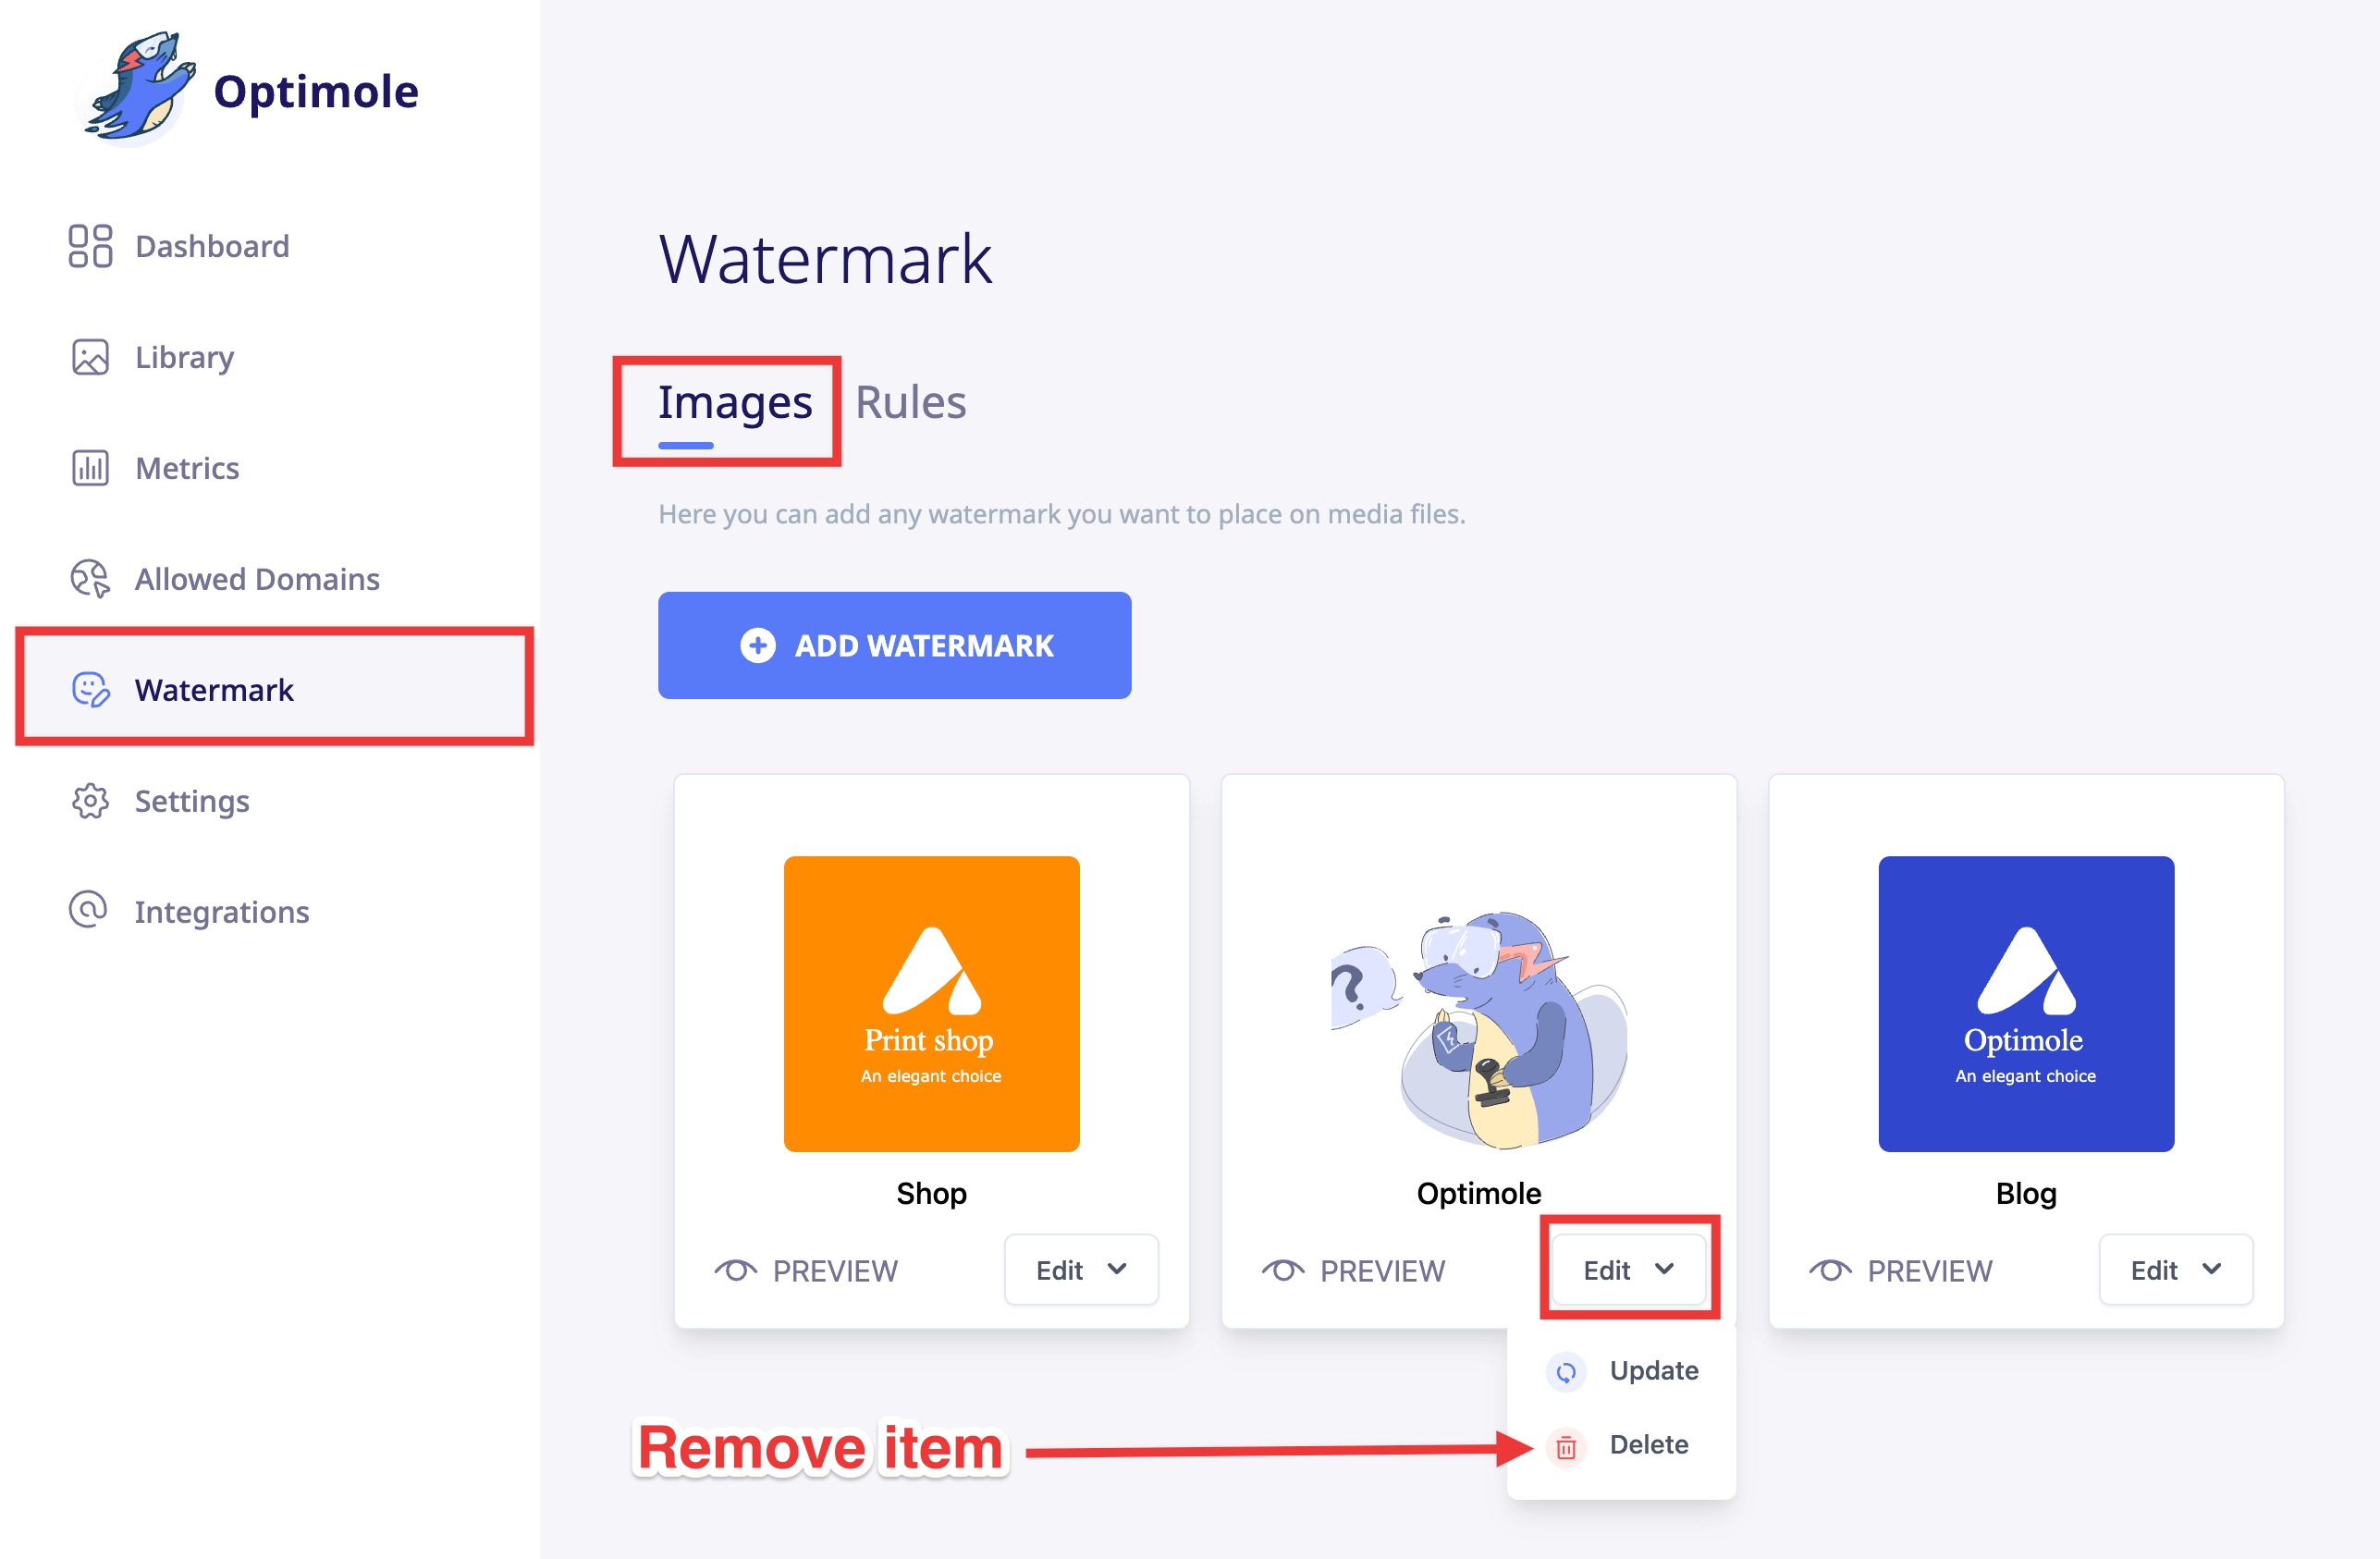
It's possible to add new watermarks, edit, and remove them.
Editing a watermark
Editing a rule
📝 Note: After editing a watermark, don't forget to clear the cache - click to see image.
Removing a watermark
Adding a watermark directly on the image
The above chapters cover creating watermarks and setting rules for applying them on multiple images. It's also possible to add a watermark directly on the image, and this one will take a higher priority than the watermarks applied via rules.
1. This can be achieved in Optimole's library, where all the images processed by Optimole and associated with your API key appear.
2. To set a watermark, just click on the image within the library, and click on the Watermark tab.